Kava RPC Nodes can be installed easily within an Akash deployment following the step by step instructions found in this guide.
- Akash Console Access and Initial Setup
- Kava RPC Node Deployment
- Kava RPC Node Deployment Complete
- Kava RPC Node Health Check
Akash Console Access and Initial Setup
Akash Console Access
The Akash Console can be accessed here.
Akash Console Initial Setup
Connect Wallet
- The Akash Console currently supports Keplr wallets
- If Keplr is not installed as a browser extension and/or a funded Akash account is not available, follow the instructions in our Keplr Guide
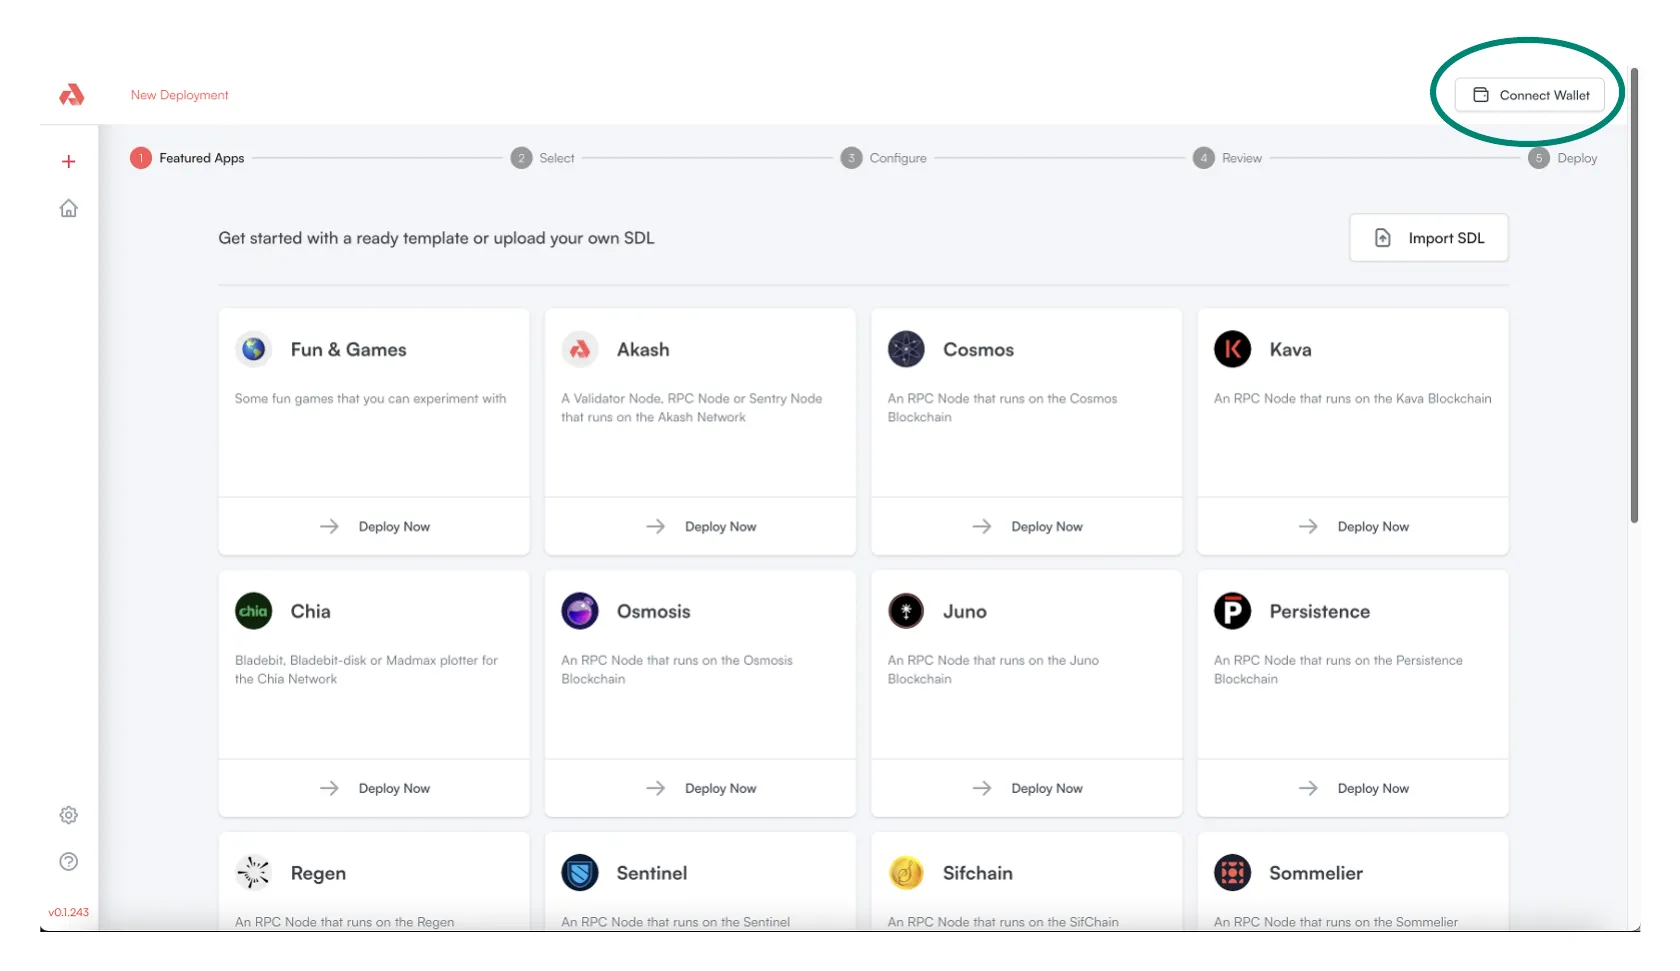
- Select the desired Akash account in Keplr and then select the
Connect Walletoption within the Akash Console as shown below
Kava RPC Node Deployment
Create a Kava RPC Node as an Akash Deployment
- Within the Akash Console template gallery, locate the Kava card and select the
Deploy Nowoption

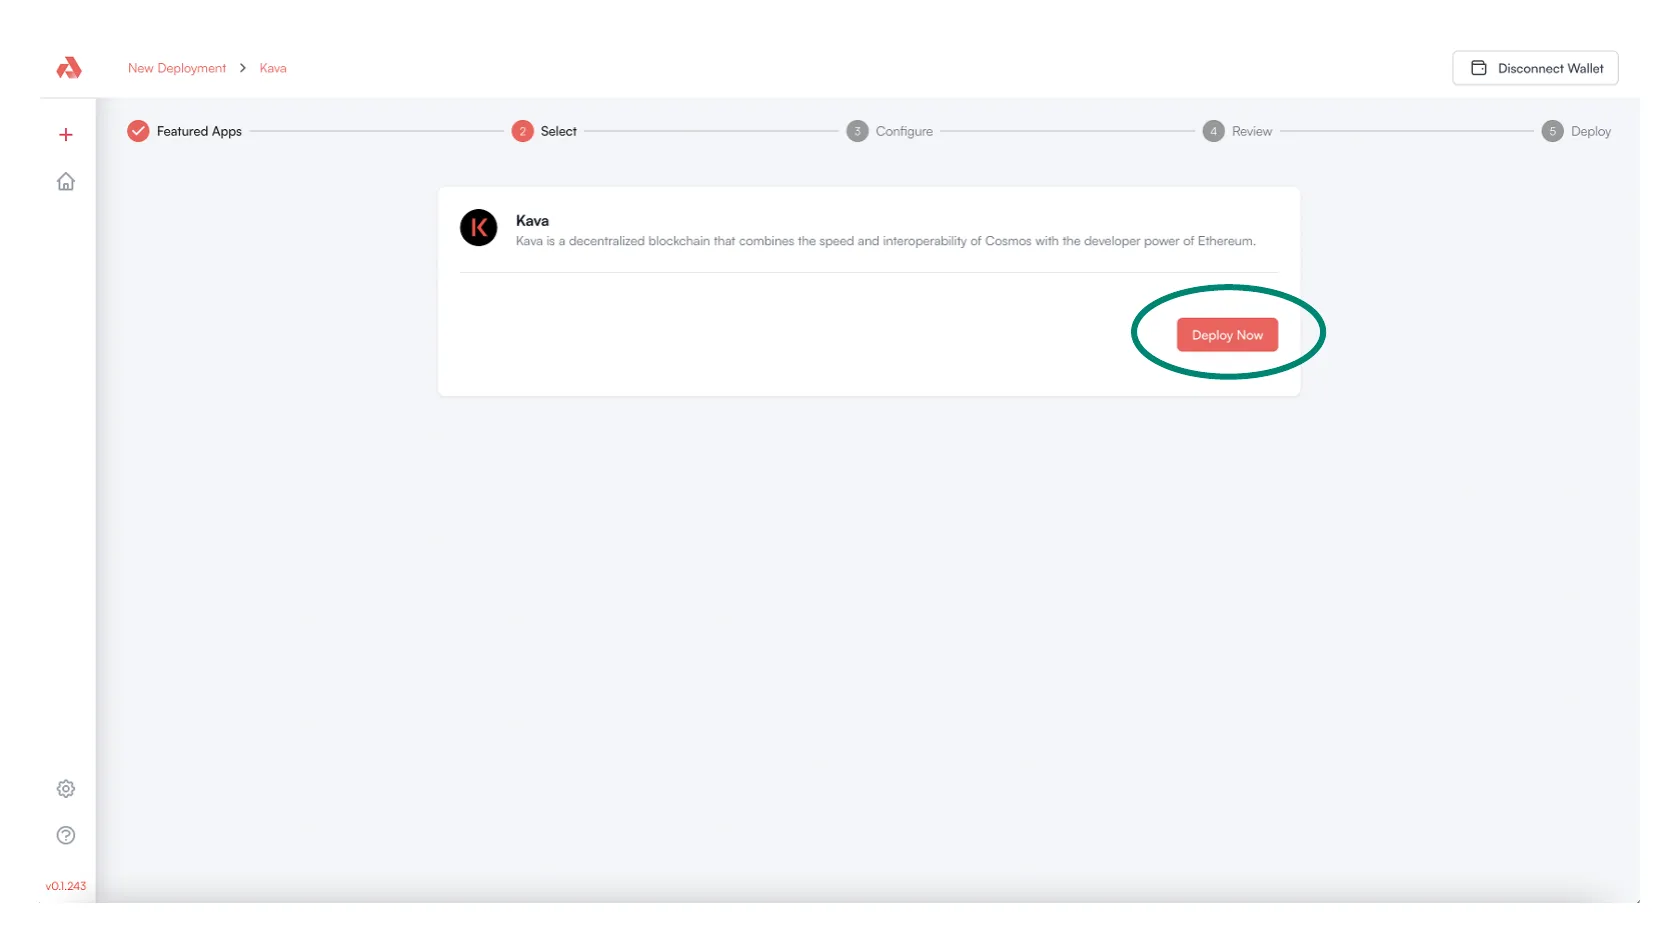
- Proceed with the deployment of the Kava Node by selecting the
Deploy Nowoption
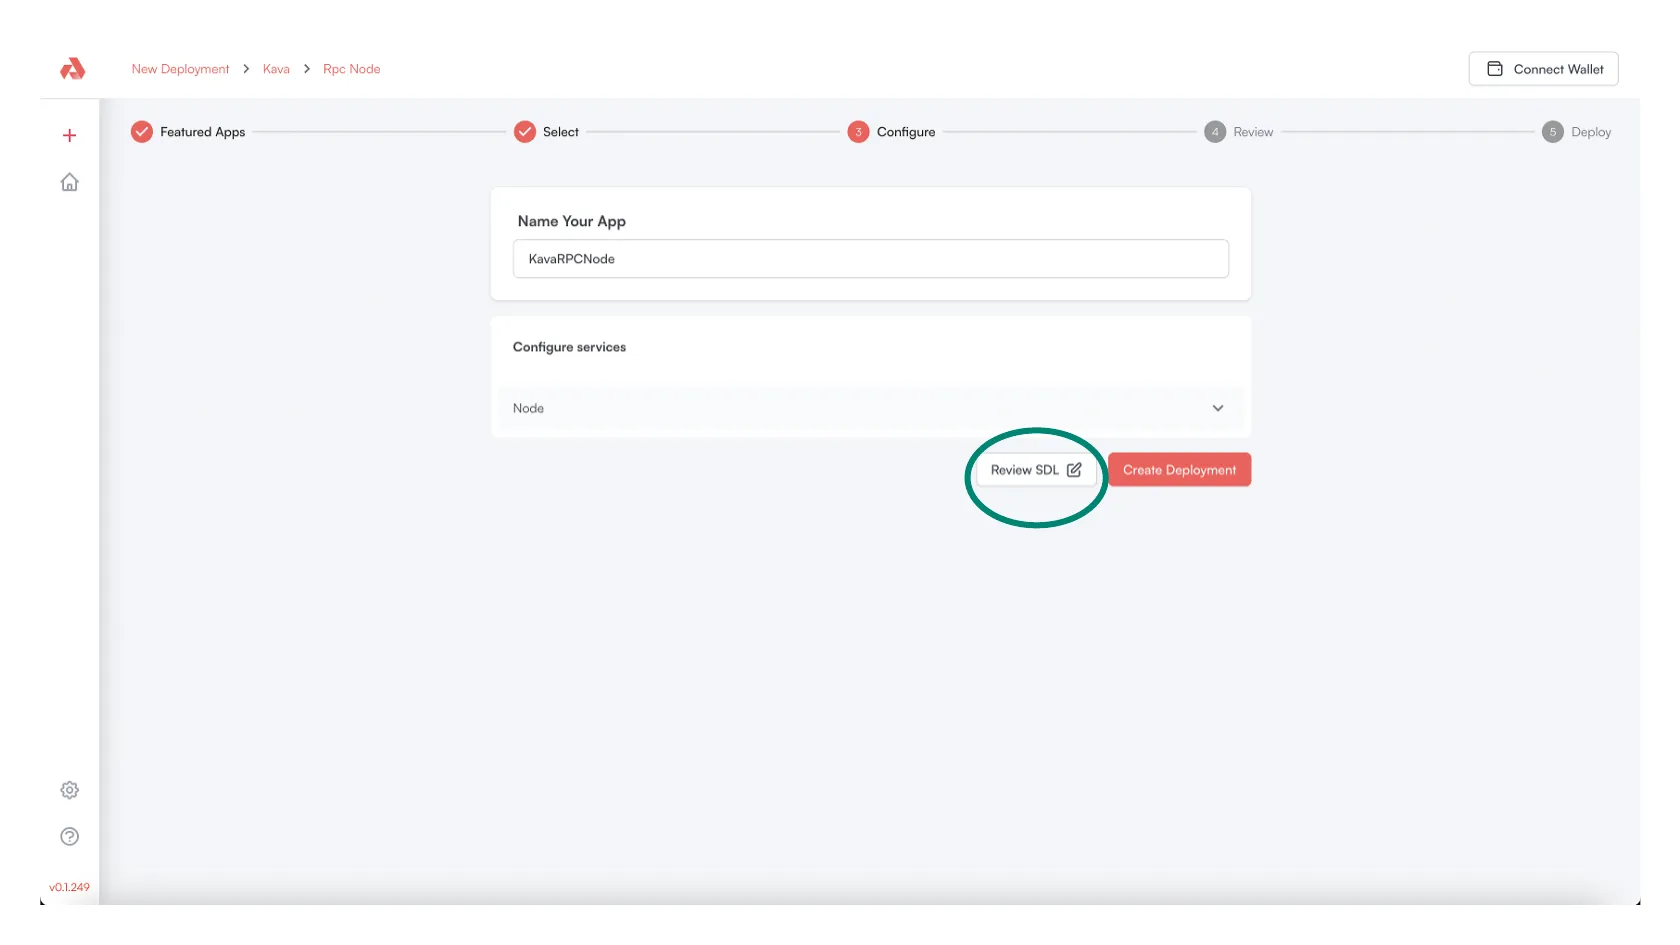
- Assign the Deployment an appropriate name and then click
Review SDL
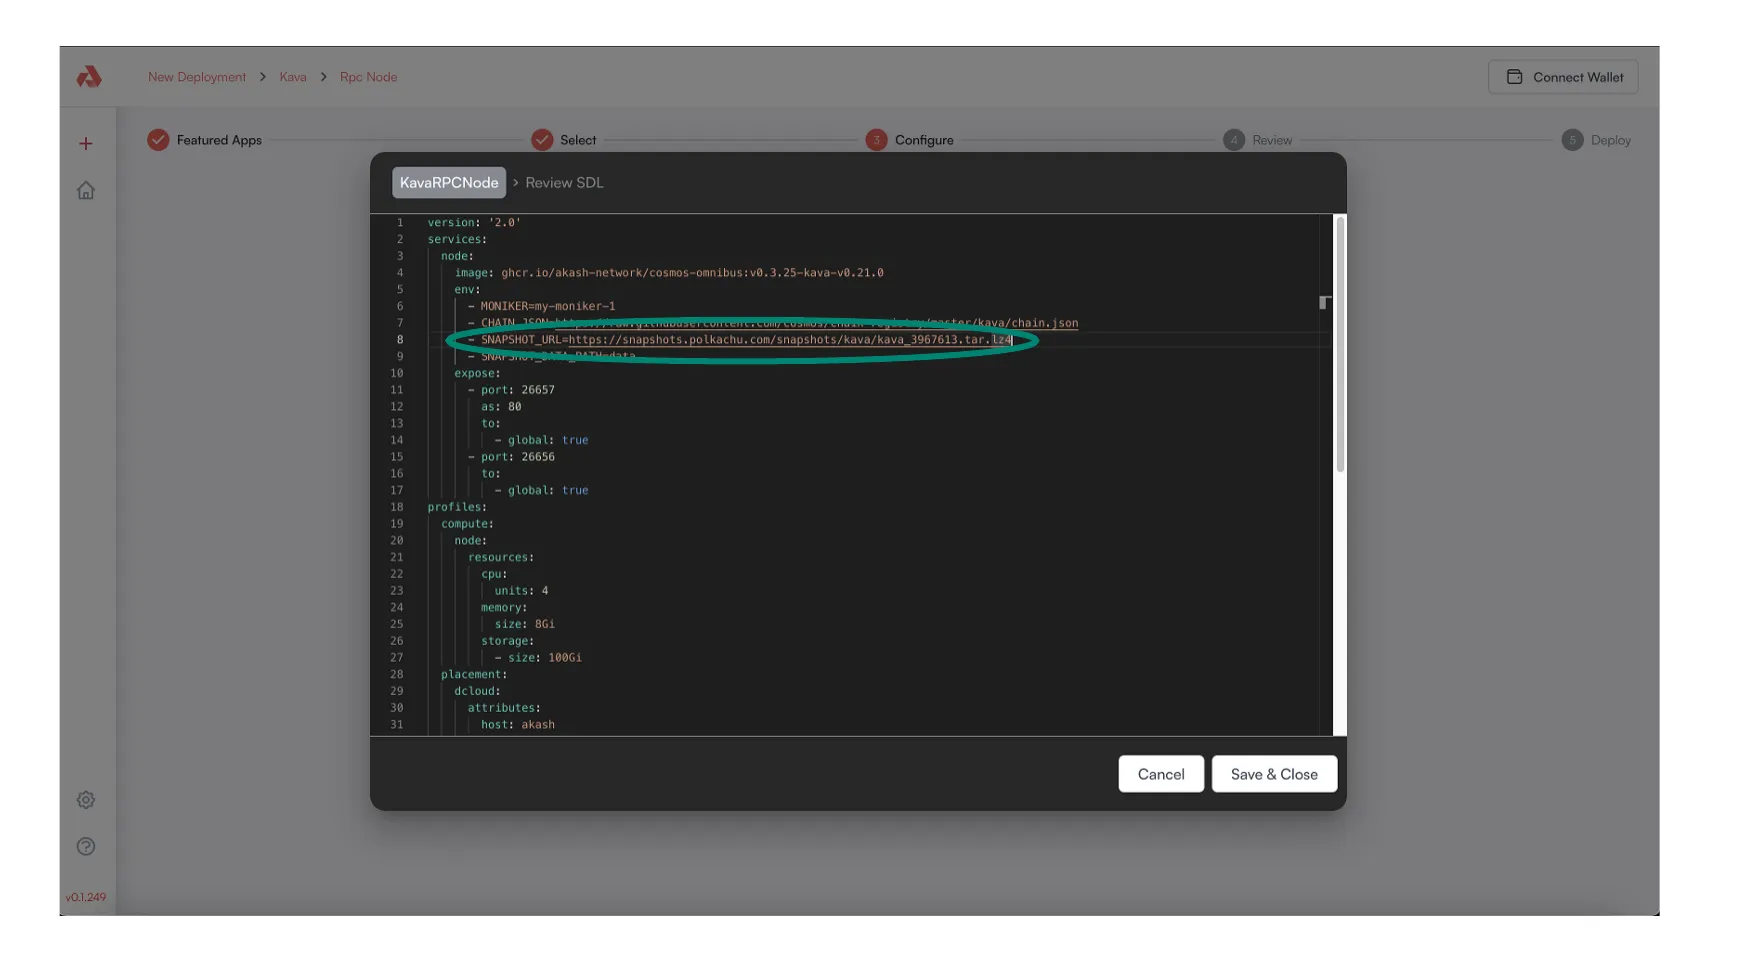
- The Kava RPC Node snapshot is updated every 24 hours and must be changed in the Akash SDL
- Obtain the latest snapshot URL here. Find the
DOWNLOADhyperlink > right click > and Copy Link Address. - Replace the snapshot URL in the field highlighted in the depiction below with the new URL. Ensure the
- SNAPSHOT_URL=portion of the field is left in place followed by the actual URL such as:
- SNAPSHOT_URL=https://<CURRENT_SNAPSHOT_URL>
- Select
Save & Closewhen this single Akash SDL update is in place.
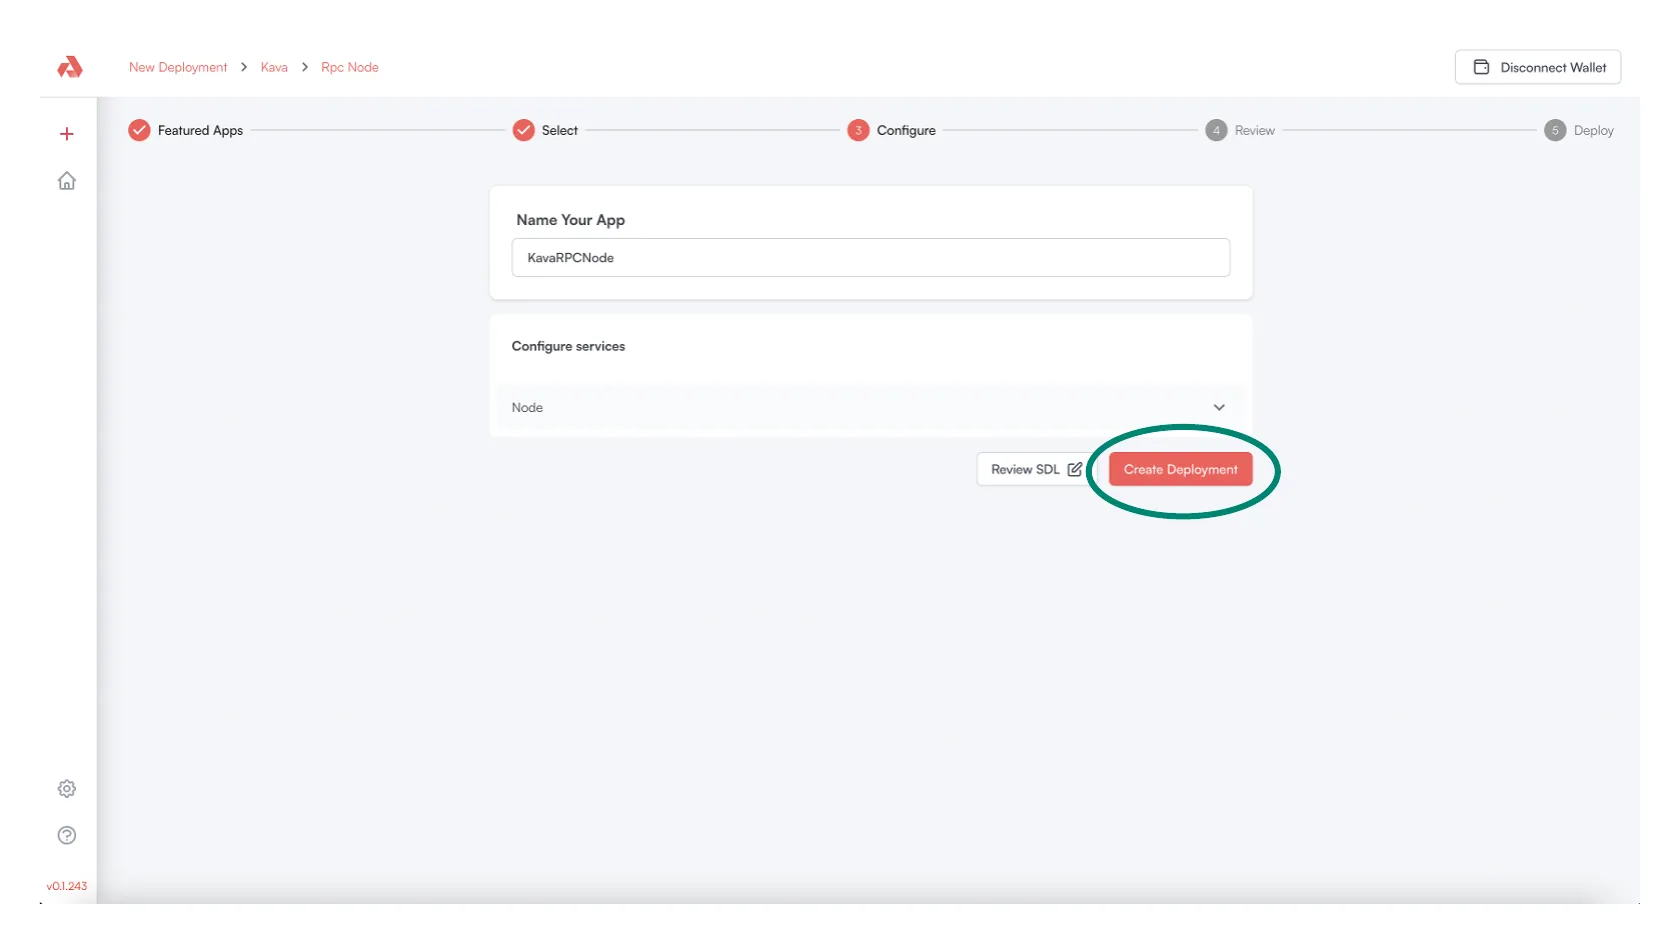
- Proceed by selecting
Create Deployment
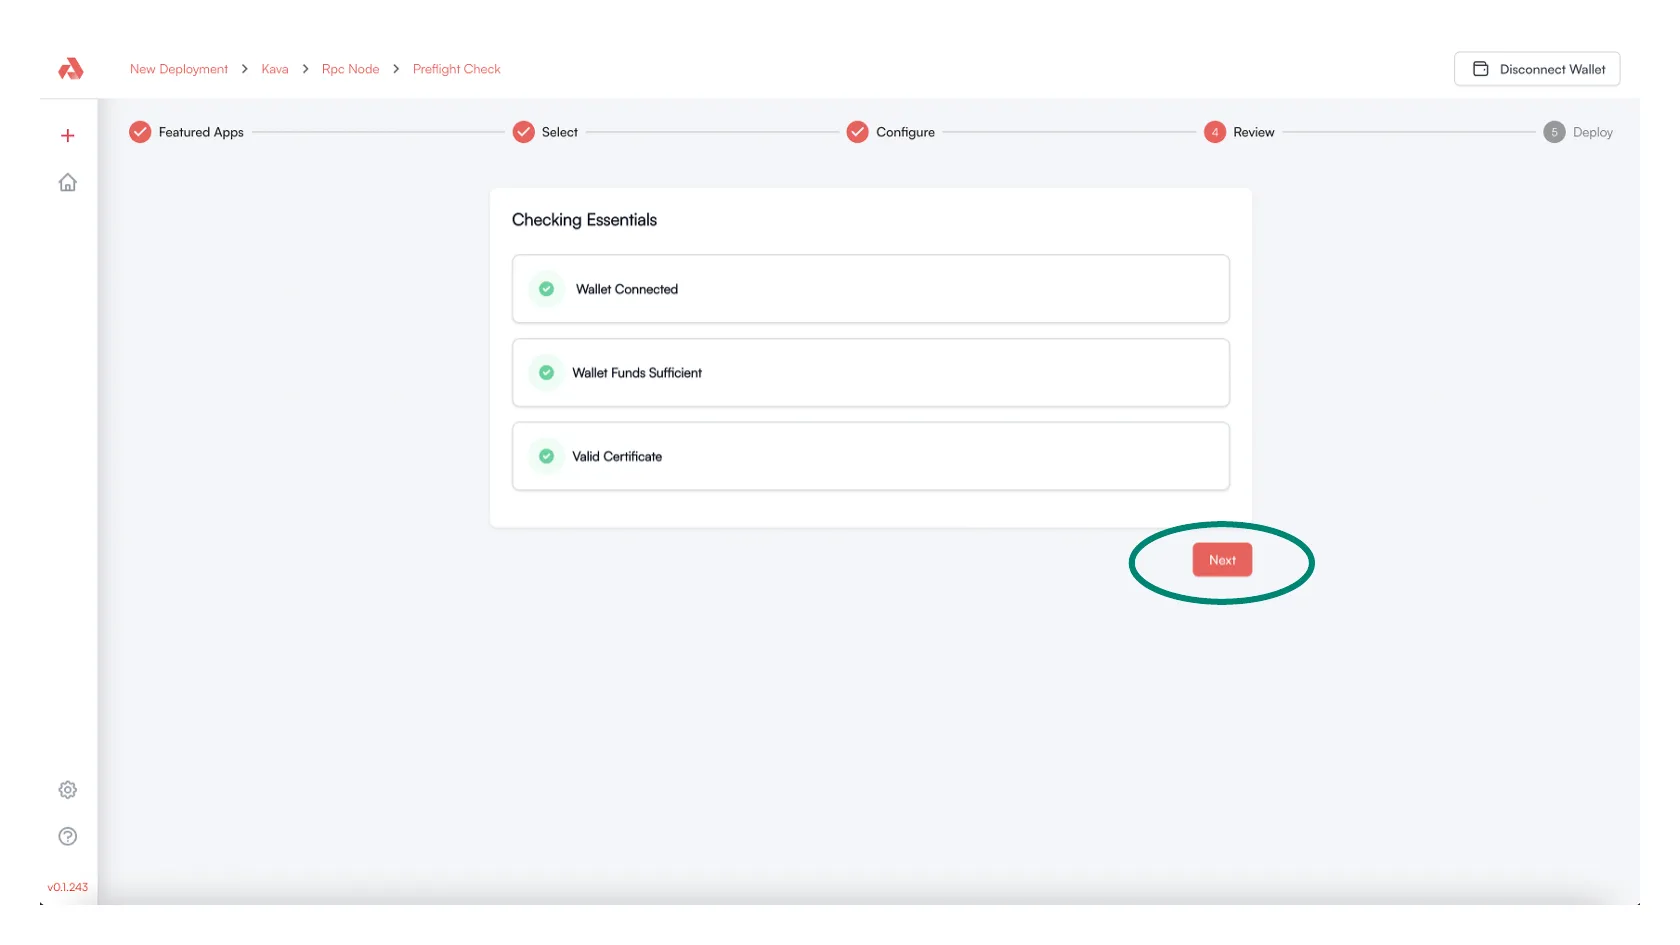
- The Akash Console will conduct necessary pre-deployment verifications to ensure that a wallet is connected with sufficient funds and that a certificate exists to communicate with the deployment
- If all pre-deployment checks pass, select the
Nextoption to proceed
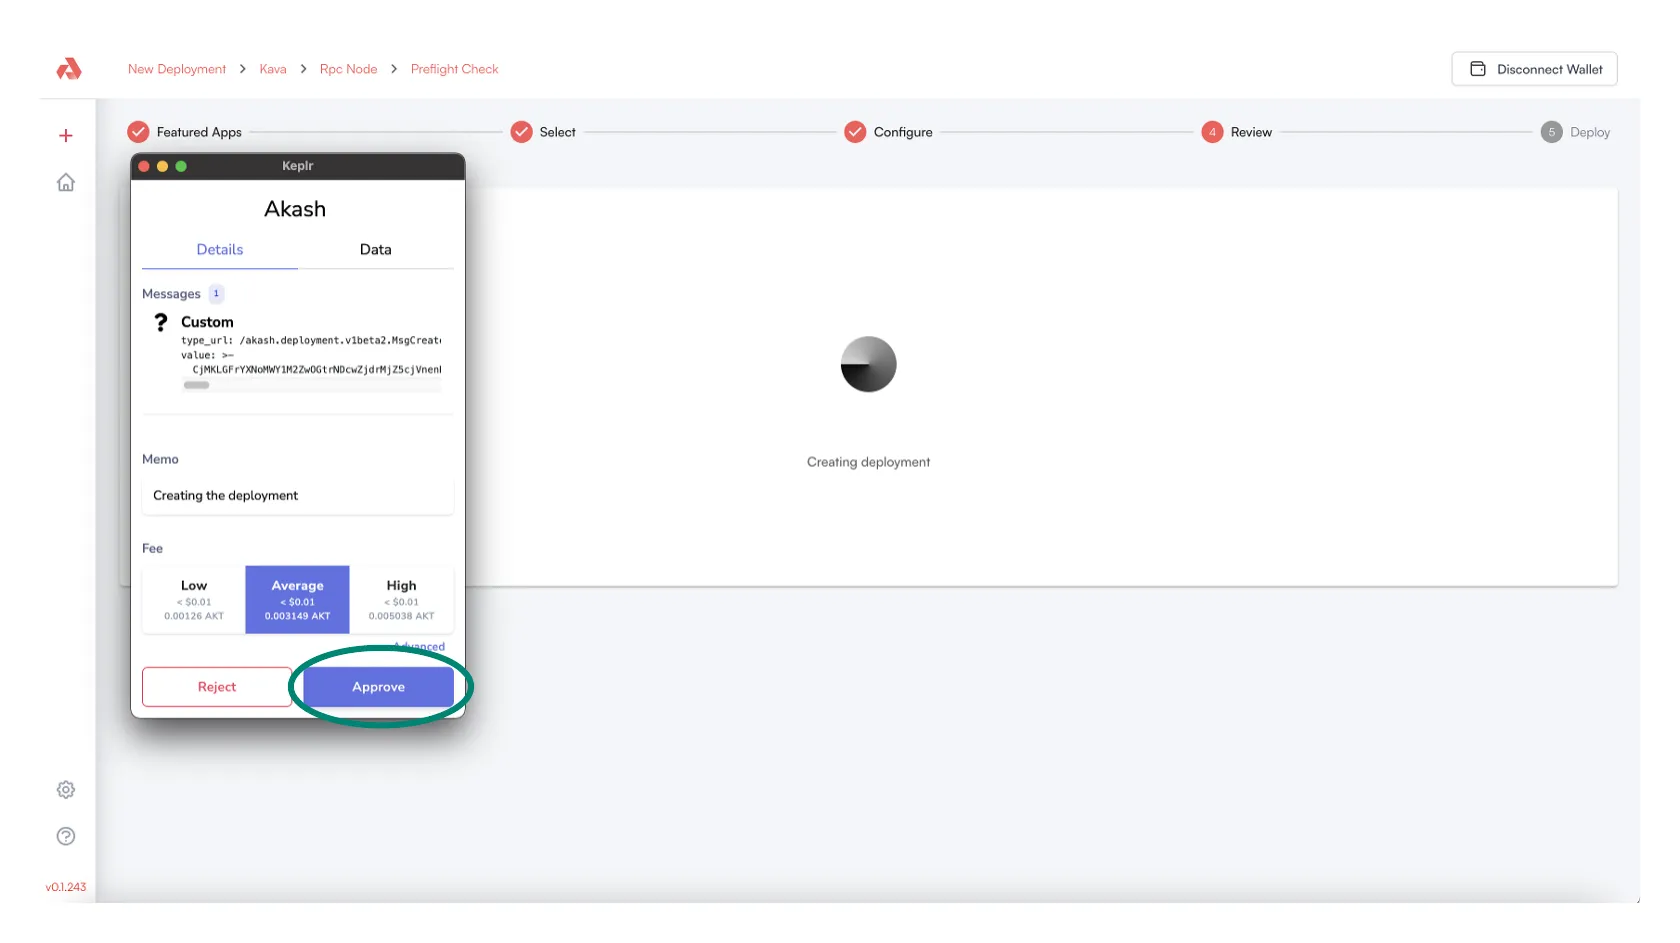
- A Keplr wallet prompt will display requesting approval of a small blockchain fee to proceed with deployment creation
- Select the
Approveoption to proceed
- The Akash open marketplace displays available cloud providers to deploy your Kava RPC Node on
- Select the cloud provider of your preference
- Once the cloud provider is selected, select the
Submit Deploy Requestoption
NOTE - the cloud providers available for your deployment may be different than those shown in the example below

- Accept the Keplr prompt to approve small blockchain fee for lease creation with the selected cloud provider

Kava RPC Node Deployment Complete
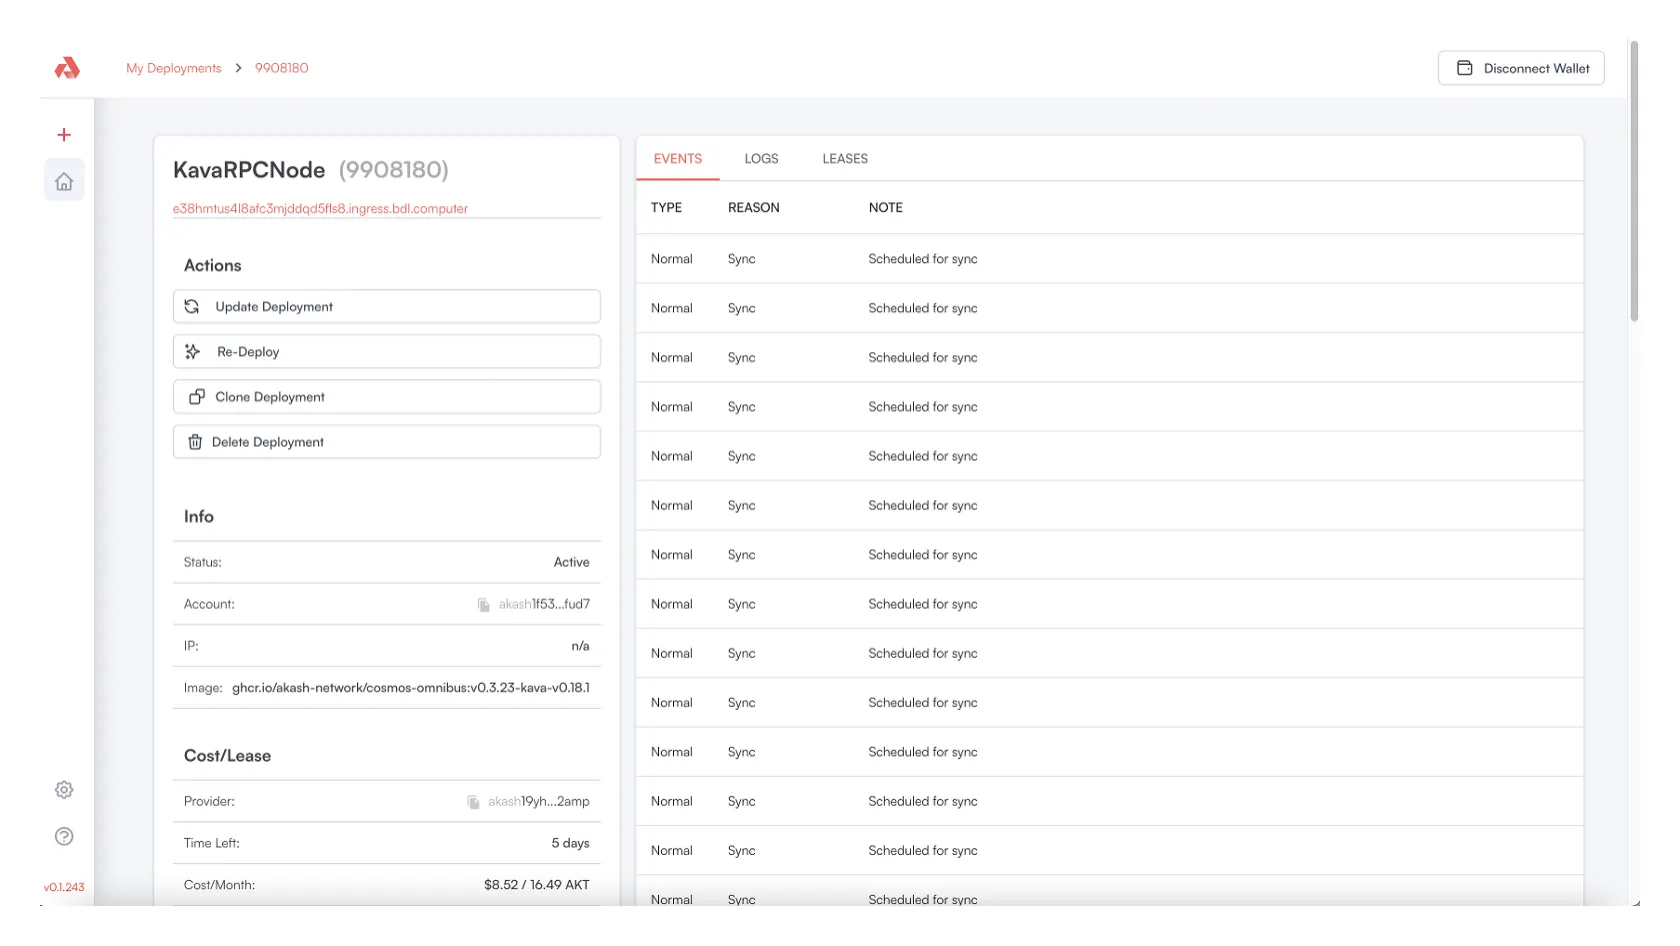
- When the deployment of the Kava RPC Node is complete and live on the selected cloud provider, a verification screen will display
- Proceed to the Kava RPC Node Health Check section to conduct a health/status check of the node
Kava RPC Node Health Check
Kava RPC Node Status Page
- In the Akash Console a URL for the deployment is displayed
- Click on the URL hyperlink
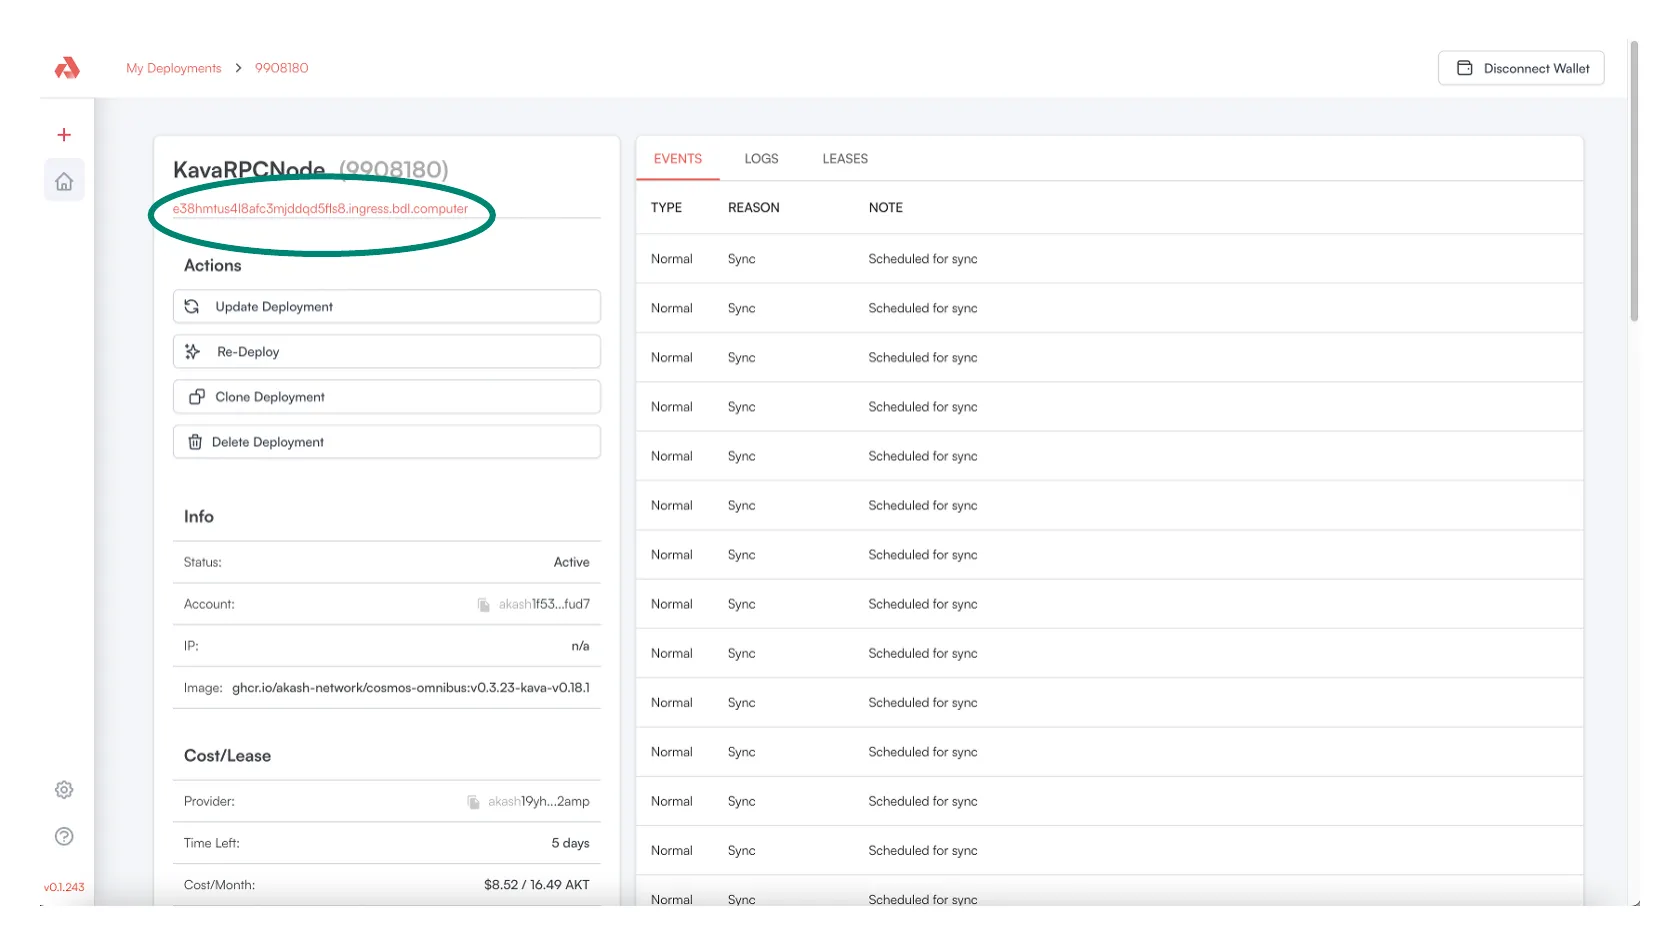
- From the displayed web page, select the
statuslink to view the current state of the Kava RPC Node

Expected Status When Node is in Sync
- When the Kava RPC node is in sync the following, example status should be displayed when the status hyperlink is visited
- Specifically look for
"catching_up":falsestatus indicating that the node is in full sync
NOTE - following the snapshot download the RPC Node may take a couple of hours to catch up on blocks that were written between the time of the snapshot capture and the current state
NOTE - the status output provided below is an example and the block height/other attributes will be different in your use
{"jsonrpc":"2.0","id":-1,"result":{"node_info":{"protocol_version":{"p2p":"8","block":"11","app":"0"},"id":"070d39ea8b993b887f817b3fe6dcfd49cdb4bdf4","listen_addr":"tcp://0.0.0.0:26656","network":"kava_2222-10","version":"v0.34.24","channels":"40202122233038606100","moniker":"my-moniker-1","other":{"tx_index":"on","rpc_address":"tcp://0.0.0.0:26657"}},"sync_info":{"latest_block_hash":"E7069706908F8122C96D87CBBB116DE5AA47503FF468F145411B3871D77320E9","latest_app_hash":"580AE91330C0ADA05FA759C5F8C9B57359275EC494C784C8C4018F921A39C856","latest_block_height":"3974035","latest_block_time":"2023-03-14T19:01:21.683269884Z","earliest_block_hash":"17FD31C78361C31ABDA818174062E72D4094E799E90C82996194C6EAC89AAD35","earliest_app_hash":"CCD5D5D23E985B5DDCE0446662EAF26DEBF26DD4EA322DA1789991C9B974B5B0","earliest_block_height":"3967596","earliest_block_time":"2023-03-14T07:28:43.971699061Z","catching_up":false},"validator_info":{"address":"B45D70839692CE2F731906753A71B867C2B1E7D0","pub_key":{"type":"tendermint/PubKeyEd25519","value":"s0xP4O/qscJ7Ez2KTiNAANkHNAUToWEETwvh6Oq0oAw="},"voting_power":"0"}}}