This is a step-by-step guide for successfully deploying either a FLock Training Node or FLock Validator directly from the Akash Console.
Pre-Requisites
Before running FLock.io Validator and/or Training Nodes on Akash, users must have the following:
-
Whitelisted Ethereum address on train.flock.io. Not whitelisted? Complete FLock.io whitelist form*.
-
Ethereum-supported Web3 wallet, such as MetaMask (used to stake FML, FLock.io’s testnet token on Base Sepolia).
-
IBC-compatible Web3 wallet, such as Keplr (funded with AKT or USDC used to pay for Akash compute).
-
HF_USERNAMEandHF_TOKENfrom a HuggingFace account.
At the time of writing FLock.io’s decentralized training platform is still in private beta. Whitelist restrictions will be lifted in the coming months as the team progressively opens the platform up to the community.
Set up train.flock.io
Before you deploy on Akash, you must first do the following on train.flock.io:
-
Stake FML on the task you wish to participate in.
-
Get the Task ID.
-
Get your API key.
Staking FML makes you eligible to participate in the training task as a Training Node or Validator. Once staked you will need the Task ID and your API key in order to run the deployments on Akash.
1. Select the task you want to stake
NOTE: On the Stake page, be sure you are on the Training Node or Validator tab, depending on how you want to participate in the training task.

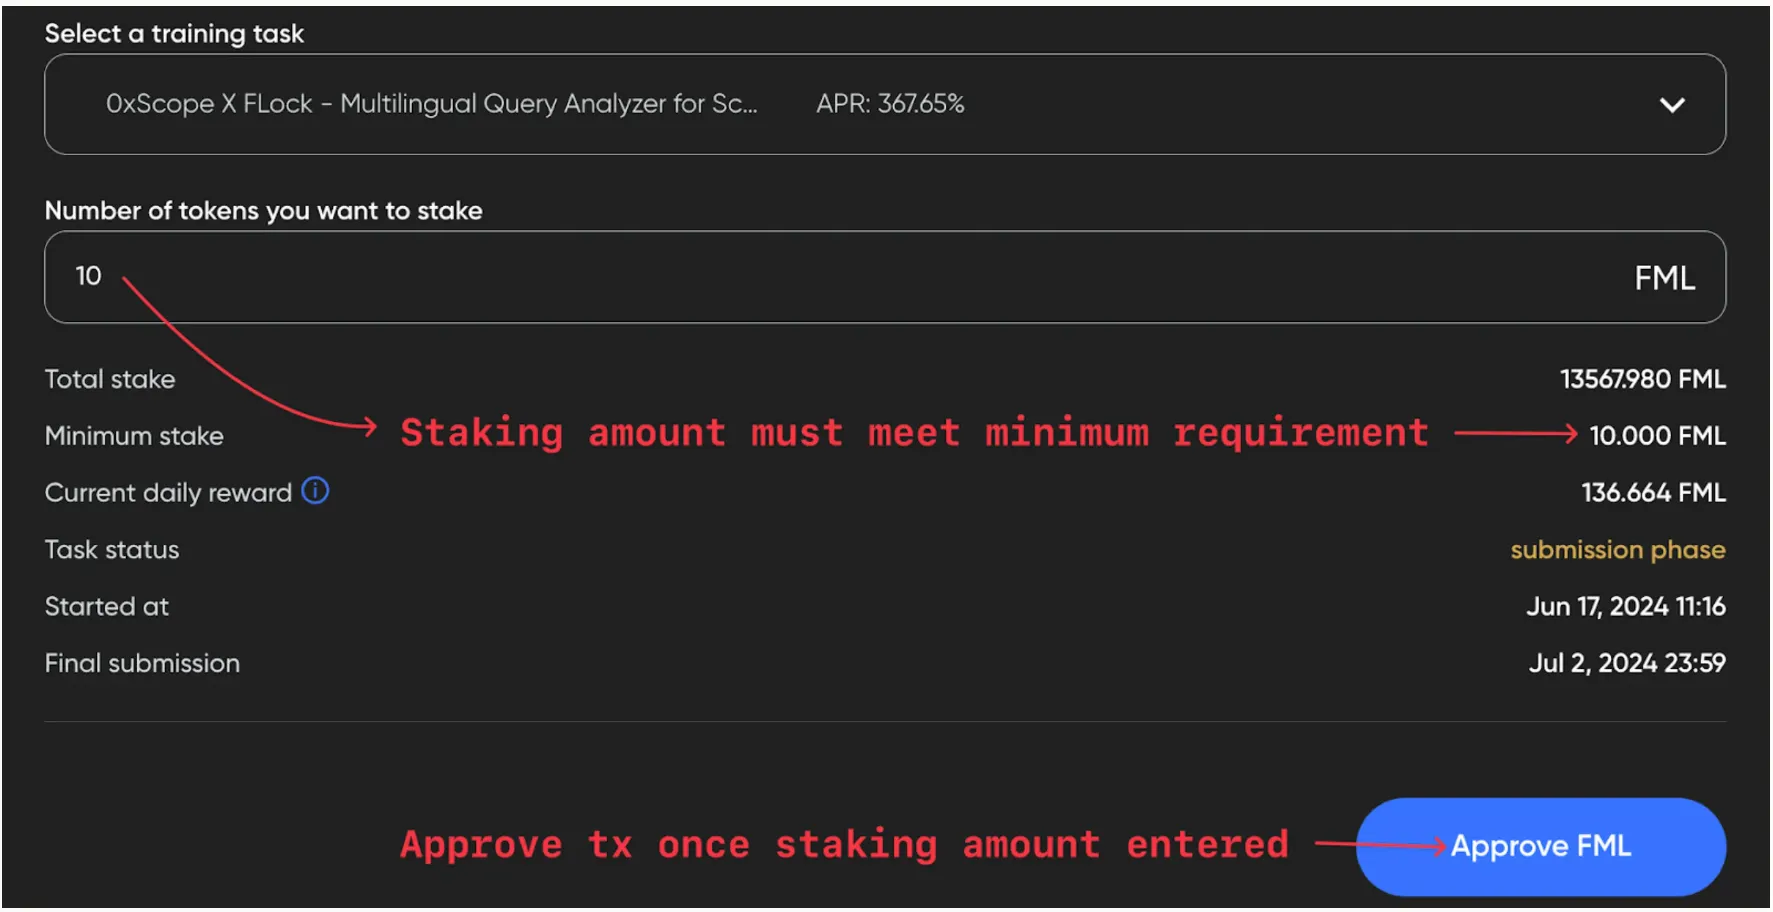
2. Stake FML tokens on the task

3. Get the Task ID & API Key
You can find the Task ID on the Tasks tab, and the API key can be found by clicking the upper right button where your address is displayed.
Now that you’ve successfully staked, and retrieved the Task ID and API key, you are ready to deploy a FLock.io node on Akash.
Running a FLock.io Training Node on Akash
On the Templates page in Akash Console, search and select “FLock-Training-Node”. The SDL (Stack Definition Language) is a pre-populated template of FLock’s testnet-training-node-quickstart script (image: public.ecr.aws/e7z6j8c3/flock:training-quickstart-akash).
This script automates the training process and submits up to 6 models per day. Click “Deploy” and update the SDL with the following environment variables:
-
FLOCK_API_KEY- API key from train.flock.io. -
HF_USERNAME- HuggingFace username. -
TASK_ID- ID for the task that you staked on through train.flock.io. -
HF_TOKEN- token associated with your HuggingFace account
You will also notice an optional GIT_URL environment variable. Trainers who wish to further customize training beyond the out-of-the-box dataset demo_data.json or training_args.yml included in the training script can update GIT_URL.
Here’s a full look at the deploy.yml SDL:
---version: "2.0"
services:  flock-train:    image: public.ecr.aws/e7z6j8c3/flock:training-quickstart-akash    env:      - FLOCK_API_KEY=      - HF_USERNAME=      - TASK_ID=      - HF_TOKEN=      # Choose whether to use your own dataset demo_data.jsonl or training_args.yml      #- GIT_URL=    expose:      - port: 3000        as: 80        to:          - global: true
profiles:  compute:    flock-train:      resources:        cpu:          units: 8        memory:          size: 24Gi        storage:          size: 100Gi        gpu:          units: 1          attributes:            vendor:              nvidia:                - model: h100                - model: a100                - model: rtx3090                - model: rtx4090                - model: rtx8000                - model: rtxa6000                - model: a40                - model: p40  placement:    akash:      pricing:        flock-train:          denom: uakt          amount: 10000
deployment:  flock-train:    akash:      profile: flock-train      count: 1
After you’ve created your deployment, choose a GPU provider commensurate with the task. Most training tasks can be completed using GPU with 16GB vRAM, though 24GB is recommended if you would like to train larger model.
Running a FLock.io Validator Node on Akash
On the Templates page in Akash Console, search and select FLock Validator. The SDL is a pre-populated template of FLock’s llm-loss-validator script (image: ghcr.io/flock-io/llm-loss-validator:v0.0.6).
This script listens for submissions from Training Nodes, then picks up and completes validation assignments. Click “Deploy” and update the SDL with the following environment variables:
-
FLOCK_API_KEY- API key from train.flock.io. -
TASK_ID- ID for the task that you staked on through train.flock.io. -
HF_TOKEN- token associated with your HuggingFace account.
Here’s a full look at the deploy.yml SDL:
---version: "2.0"
services:  flock-validater:    image: ghcr.io/flock-io/llm-loss-validator:v0.0.6    env:      - FLOCK_API_KEY=      # support multi_task, such as 1,2,3      - TASK_ID=      - HF_TOKEN=    expose:      - port: 3000        as: 80        to:          - global: true
profiles:  compute:    flock-validater:      resources:        cpu:          units: 8        memory:          size: 24Gi        storage:          size: 100Gi        gpu:          units: 1          attributes:            vendor:              nvidia:                - model: h100                - model: a100                - model: rtx3090                - model: rtx4090                - model: rtx8000                - model: rtxa6000                - model: a40                - model: p40  placement:    akash:      pricing:        flock-validater:          denom: uakt          amount: 10000
deployment:  flock-validater:    akash:      profile: flock-validater      count: 1
After you’ve created your deployment, choose a compute provider commensurate with the task. Validation assignments require minimal compute so it is possible to complete the task with many of the less resource-intensive options available.