Building an Akash Validator is simplified via the use of Cosmos Omnibus and as detailed in this guide.
NOTE - using the procedures in this guide the Validator private key will be stored within the associated Akash deployment. Ensure that only known, trusted providers are used for such deployments. Additionally consider storing the private key outside of the deployment through the use of TMKMS which is documented here.
The Akash Validator will be built with the following attributes:
- Two Sentry nodes will be created to protect the validator from distributed denial of service (DDOS) attacks
- The Akash Validator will sit behind the Sentry nodes and will not be directly exposed to the internet
- The Sentry nodes and the Akash Validator will launched on the Akash Network as deployments
- This guide will detail the launch of the deployments via the Akash Console tool for ease
Sections within this Guide
STEP 4 - Akash Console Initial Deployment
STEP 5 - Edit SDL with Known IDs
STEP 6 - Redeploy Validator and Sentries with Akash Console
Akash Console Review
While all steps within this guide could be accomplished via the Akash CLI, we will use the Akash Console tool as it has become our most popular deploy tool.
If you have not used Akash Console prior and/or are not overly familiar with the app, please review our Akash Console documentation before getting started with the Validator build steps detailed in subsequent sections.
FileBase Buckets
The Omnibus framework used to build our Akash Validator will store the following info in a S3 bucket for re-use when a deployment is restarted. All data stored will be encrypted.
- Validator’s Private Key
- Node IDs - more detail on the use of these IDs later in this guide
Bucket Creation
We recommend the use of FileBase S3 buckets for this purpose. If you do not have a FileBase account, create a free account for this use.
Create the following buckets within FileBase for upcoming use in the Validator build.
- akashnode1
- akashnode2
- akashvalidator
Access Keys
Visit the FileBase `Access Keys` menu option and capture the KEY and SECRET for use in subsequent steps.
Akash SDL Review
Akash deployments are created using Stack Definition Language (SDL) files that serve as the recipe for your deployments. In this section we detail the Omnibus SDL used for the Akash Validator deployment.
Akash Validator SDL Template
The SDL template for the Akash Validator build is located in this GitHub repository.
Copy the SDL located in the repository into a local editor for customizations covered in upcoming steps.
Initial SDL Customizations
All SDL edits necessary are environment variable related. Within the SDL, we will only edit values within the services section and env subsections. All other segments of the SDL can be used from the template without need to edit.
Validator Service
- The first service listed in the SDL and which requires customization is the
validatorservice - Recommended
envvariable updates are detailed in the code block below - NOTE - eventually we will need to additionally update the AKASH_UNCONDITIONAL_PEER_IDS variable. But at this point in the process these IDs - which are the IDs of the Sentry nodes - are not known. Based on this we will update this field later.
Update the following env variables with suggested values:
AKASH_P2P_PEX=true
P2P_PERSISTENT_PEERS=f997dbd1048af671527857db422291a11d067975@65.21.198.247:26656,[email protected]:2020,[email protected]:26656,[email protected]:26656,[email protected]:26636,[email protected]:26656,[email protected]:26656,[email protected]:26656,[email protected]:26656,[email protected]:26656,[email protected]:26656,[email protected]:28656,[email protected]:26656,[email protected]:26656
STATESYNC_RPC_SERVERS=https://akash-rpc.polkachu.com:443,https://akash-rpc.polkachu.com:443
S3_KEY=<specify the key captured in FileBase>
S3_SECRET=<specify the secret captured in FileBase>
KEY_PASSWORD=<password of your choice that is used in encryption of files in FileBase>
KEY_PATH=akashvalidator
Example/Populated Variables
validator: image: ghcr.io/akash-network/cosmos-omnibus:v0.3.42-akash-v0.22.7 env: - MONIKER=validator - CHAIN_JSON=https://raw.githubusercontent.com/akash-network/net/main/mainnet/meta.json - MINIMUM_GAS_PRICES=0.0025uakt - FASTSYNC_VERSION=v2 - AKASH_MODE=validator - AKASH_P2P_PEX=true - AKASH_UNCONDITIONAL_PEER_IDS=<node-1-id>,<node-2-id>... - AKASH_ADDR_BOOK_STRICT=false - AKASH_DOUBLE_SIGN_CHECK_HEIGHT=10 - P2P_PERSISTENT_PEERS=f997dbd1048af671527857db422291a11d067975@65.21.198.247:26656,[email protected]:2020,[email protected]:26656,[email protected]:26656,[email protected]:26636,[email protected]:26656,[email protected]:26656,[email protected]:26656,[email protected]:26656,[email protected]:26656,[email protected]:26656,[email protected]:28656,[email protected]:26656,[email protected]:26656 - STATESYNC_RPC_SERVERS=node1,node2 - S3_KEY=A397A7<redacted> - S3_SECRET=7ZHVFsE2<redaacted> - KEY_PASSWORD=Validator4Akash!#! - KEY_PATH=akashvalidatorSentry Node #1 Service
- The second service listed in the SDL that requires customization is for the
node1service. - Recommended
envvariable updates are detailed in the code block below - NOTE - eventually we will need to additionally update the
AKASH_PRIVATE_PEER_IDSandAKASH_UNCONDITIONAL_PEER_IDSvariables. But at this point in the process these IDs - which is the ID of the Validator node - is not known. We will update these fields later.
Update the following env variables with suggested values:
STATESYNC_RPC_SERVERS=https://akash-rpc.polkachu.com:443,https://akash-rpc.polkachu.com:443
S3_KEY=<specify the key captured in FileBase>
S3_SECRET=<specify the secret captured in FileBase>
KEY_PASSWORD=<password of your choice that is used in encryption of files in FileBase>
KEY_PATH=akashnode1
Example/Populated Variables
node1: image: ghcr.io/akash-network/cosmos-omnibus:v0.3.42-akash-v0.22.7 env: - MONIKER=private_node_1 - CHAIN_JSON=https://raw.githubusercontent.com/akash-network/net/main/mainnet/meta.json - MINIMUM_GAS_PRICES=0.0025uakt - FASTSYNC_VERSION=v2 - AKASH_MODE=full - AKASH_P2P_PEX=true - AKASH_PRIVATE_PEER_IDS=<validatorid> - AKASH_UNCONDITIONAL_PEER_IDS=<validatorid> - AKASH_ADDR_BOOK_STRICT=false - STATESYNC_RPC_SERVERS=https://akash-rpc.polkachu.com:443,https://akash-rpc.polkachu.com:443 - STATESYNC_SNAPSHOT_INTERVAL=500 - S3_KEY=<redacted> - S3_SECRET=<redacted> - KEY_PASSWORD=<redacted> - KEY_PATH=akashnode1Sentry Node #2 Service
- The third and final service list in the SDL that requires customization is for the
node2service. - Recommended
envvariable updates are detailed in the code block below - NOTE - eventually we will need to additionally update the
AKASH_PRIVATE_PEER_IDSandAKASH_UNCONDITIONAL_PEER_IDSvariables. But at this point in the process these IDs - which is the ID of the Validator node is not known - and based on this we will update this field later.
Update the following env variables with suggested values:
STATESYNC_RPC_SERVERS=https://akash-rpc.polkachu.com:443,https://akash-rpc.polkachu.com:443
S3_KEY=<specify the key captured in FileBase>
S3_SECRET=<specify the secret captured in FileBase>
KEY_PASSWORD=<password of your choice that is used in encryption of files in FileBase>
KEY_PATH=akashnode2
Example/Populated Variables
node2: image: ghcr.io/akash-network/cosmos-omnibus:v0.3.42-akash-v0.22.7 env: - MONIKER=private_node_1 - CHAIN_JSON=https://raw.githubusercontent.com/akash-network/net/main/mainnet/meta.json - MINIMUM_GAS_PRICES=0.0025uakt - FASTSYNC_VERSION=v2 - AKASH_MODE=full - AKASH_P2P_PEX=true - AKASH_PRIVATE_PEER_IDS=<validatorid> - AKASH_UNCONDITIONAL_PEER_IDS=<validatorid> - AKASH_ADDR_BOOK_STRICT=false - STATESYNC_RPC_SERVERS=https://akash-rpc.polkachu.com:443,https://akash-rpc.polkachu.com:443 - STATESYNC_SNAPSHOT_INTERVAL=500 - S3_KEY=<redacted> - S3_SECRET=<redacted> - KEY_PASSWORD=<redacted> - KEY_PATH=akashnode2Akash Console Initial Deployment
The Akash validator build - using a Sentry architecture - requires that the Validator ID is known by the Sentry nodes. Additionally the Sentry node IDs must be known by the Validator. As these IDs are unknown prior to the build process - and are then stored for re-use in the S3 bucket during the build process - we must create an initial deployment, capture the necessary IDs, close the initial deployments, and launch anew the deployments with the IDs specified.
In this section we will create the initial deployments for ID captures.
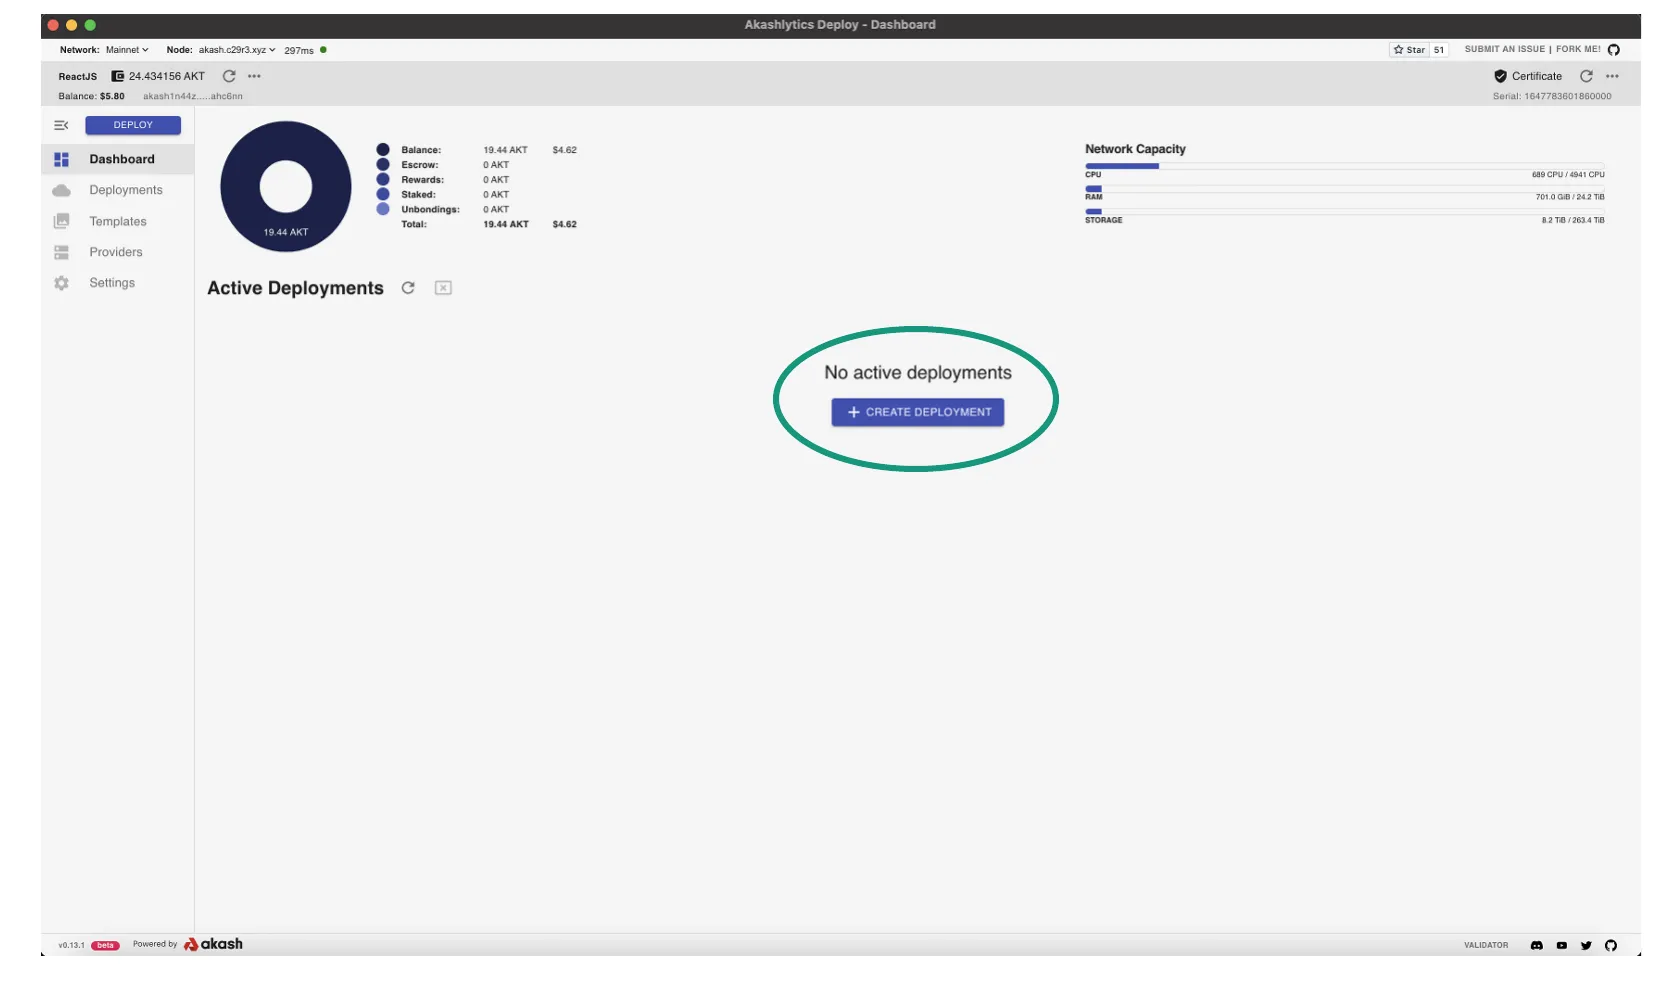
Create Deployments via Akash Console
- Within the Akash Console app, begin the process of creating a new deployment

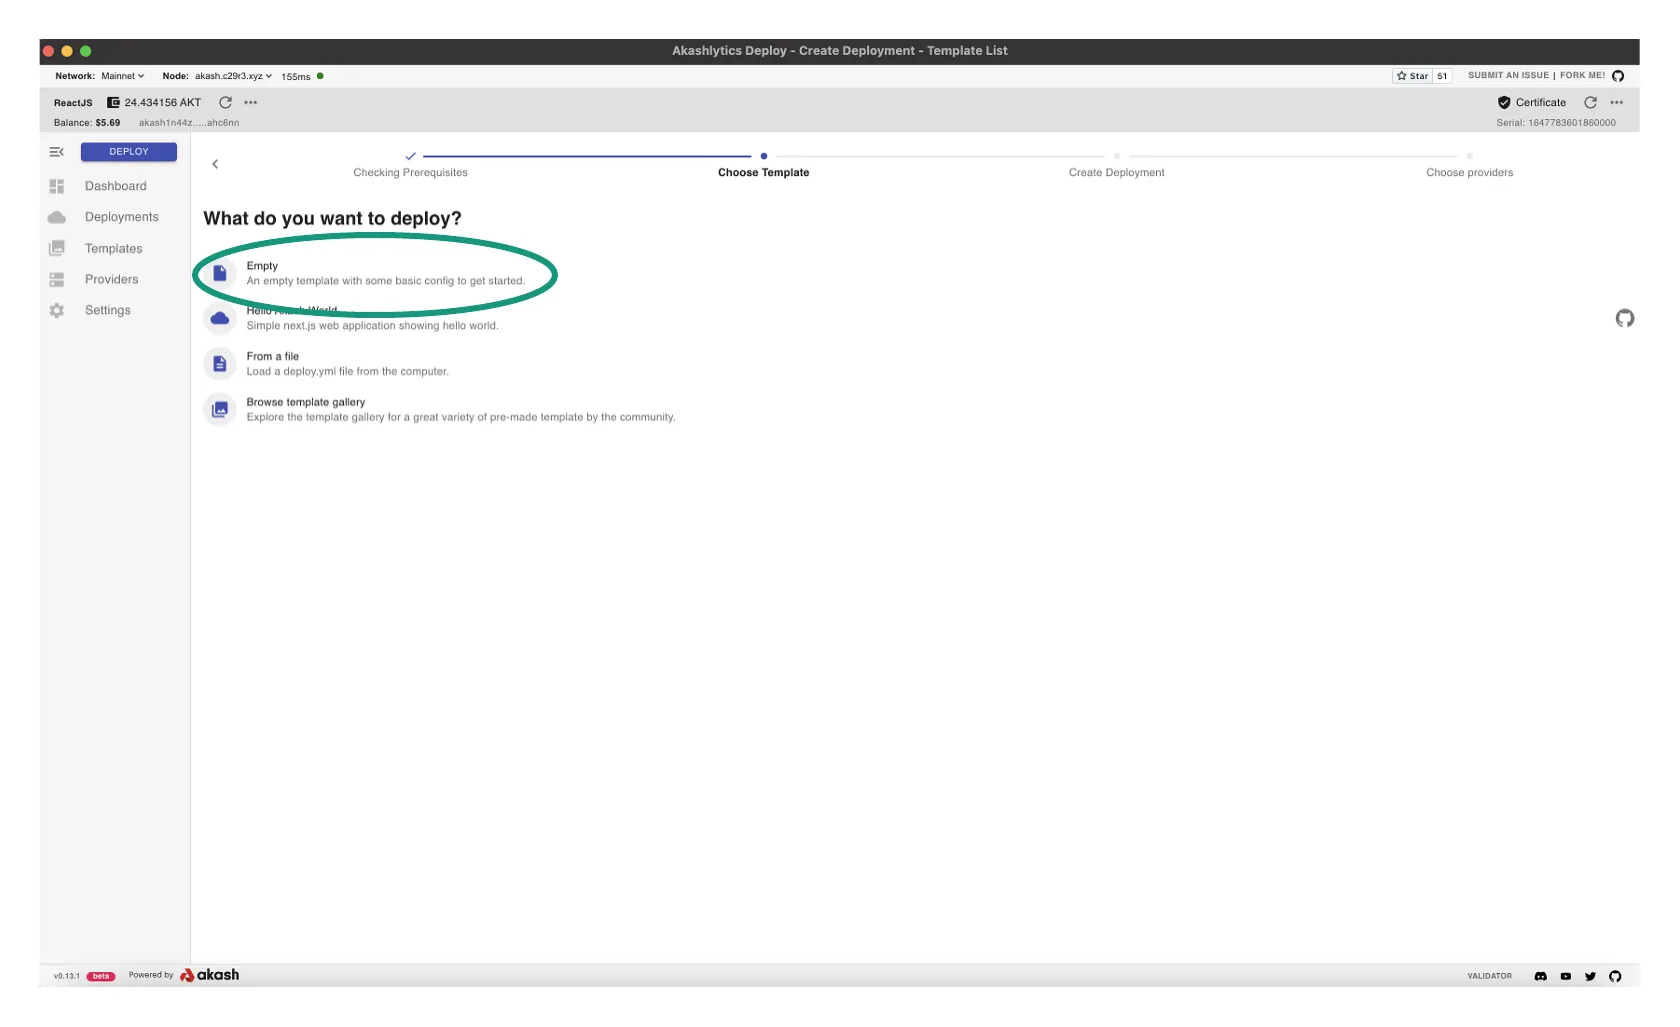
- Select Empty Template for eventual entry of our custom SDL

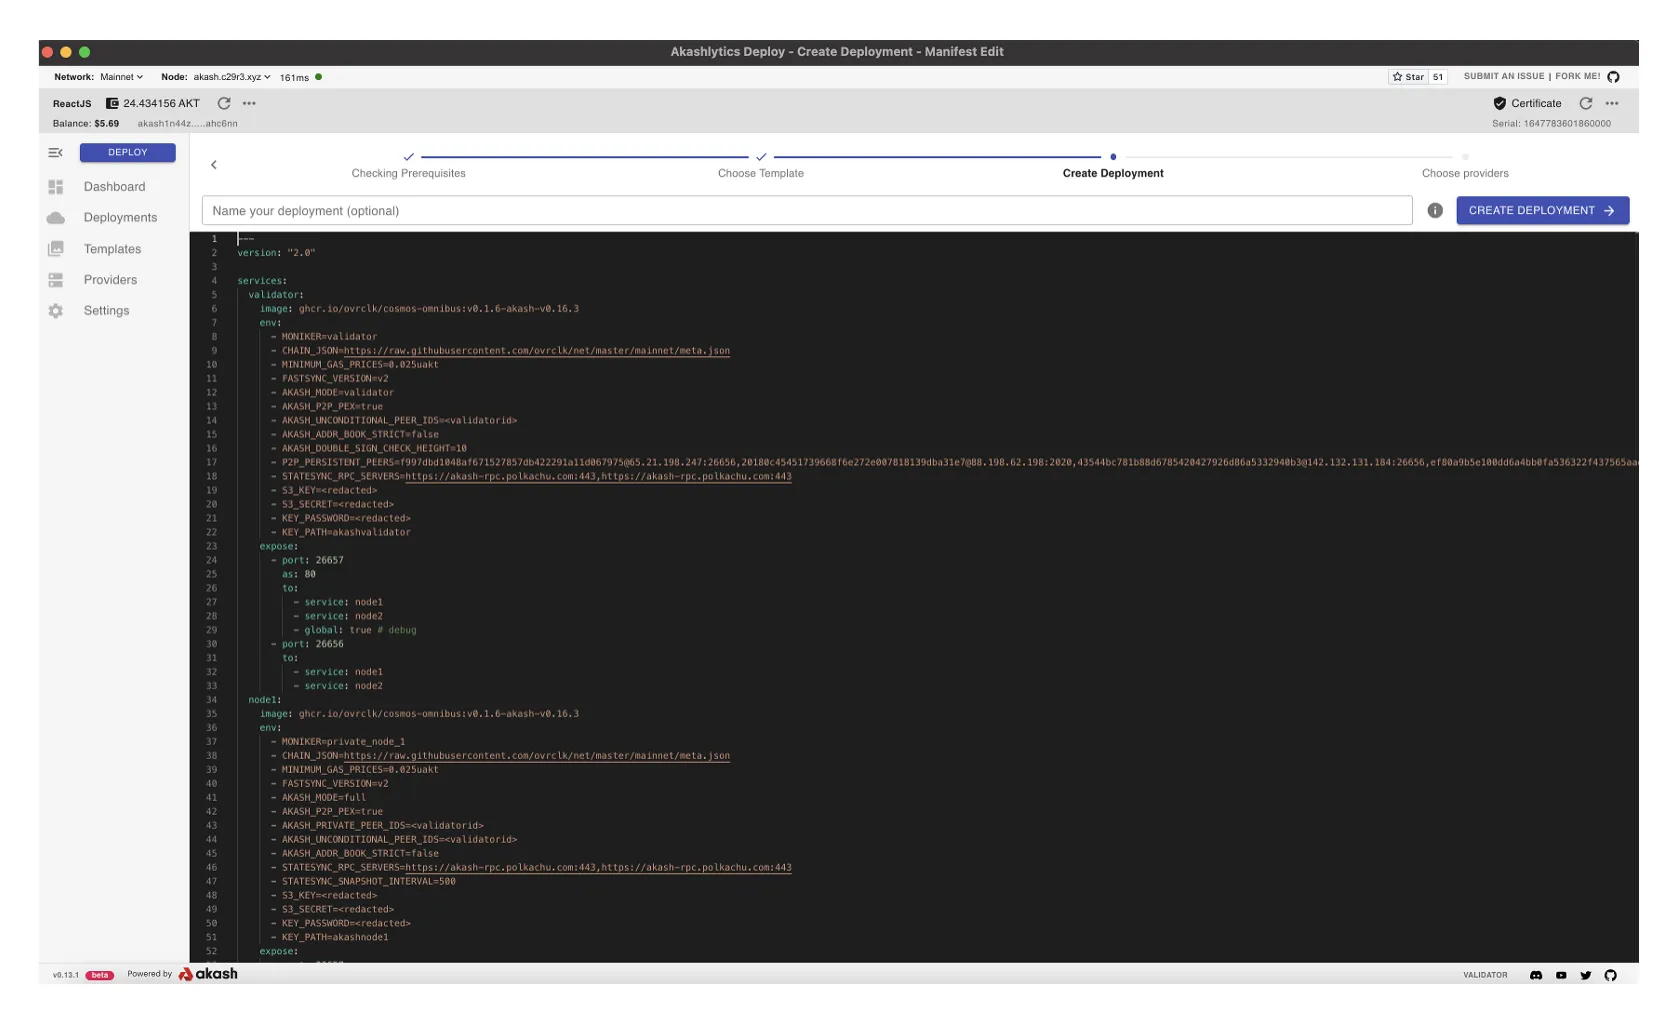
- Copy and paste the SDL we created and edited prior
- Proceed thru steps of accepting necessary gas fees to create the deployment
- When prompted select the desired Provider to host the deployment and complete the deployment process

Capture Validator and Sentry Node IDs
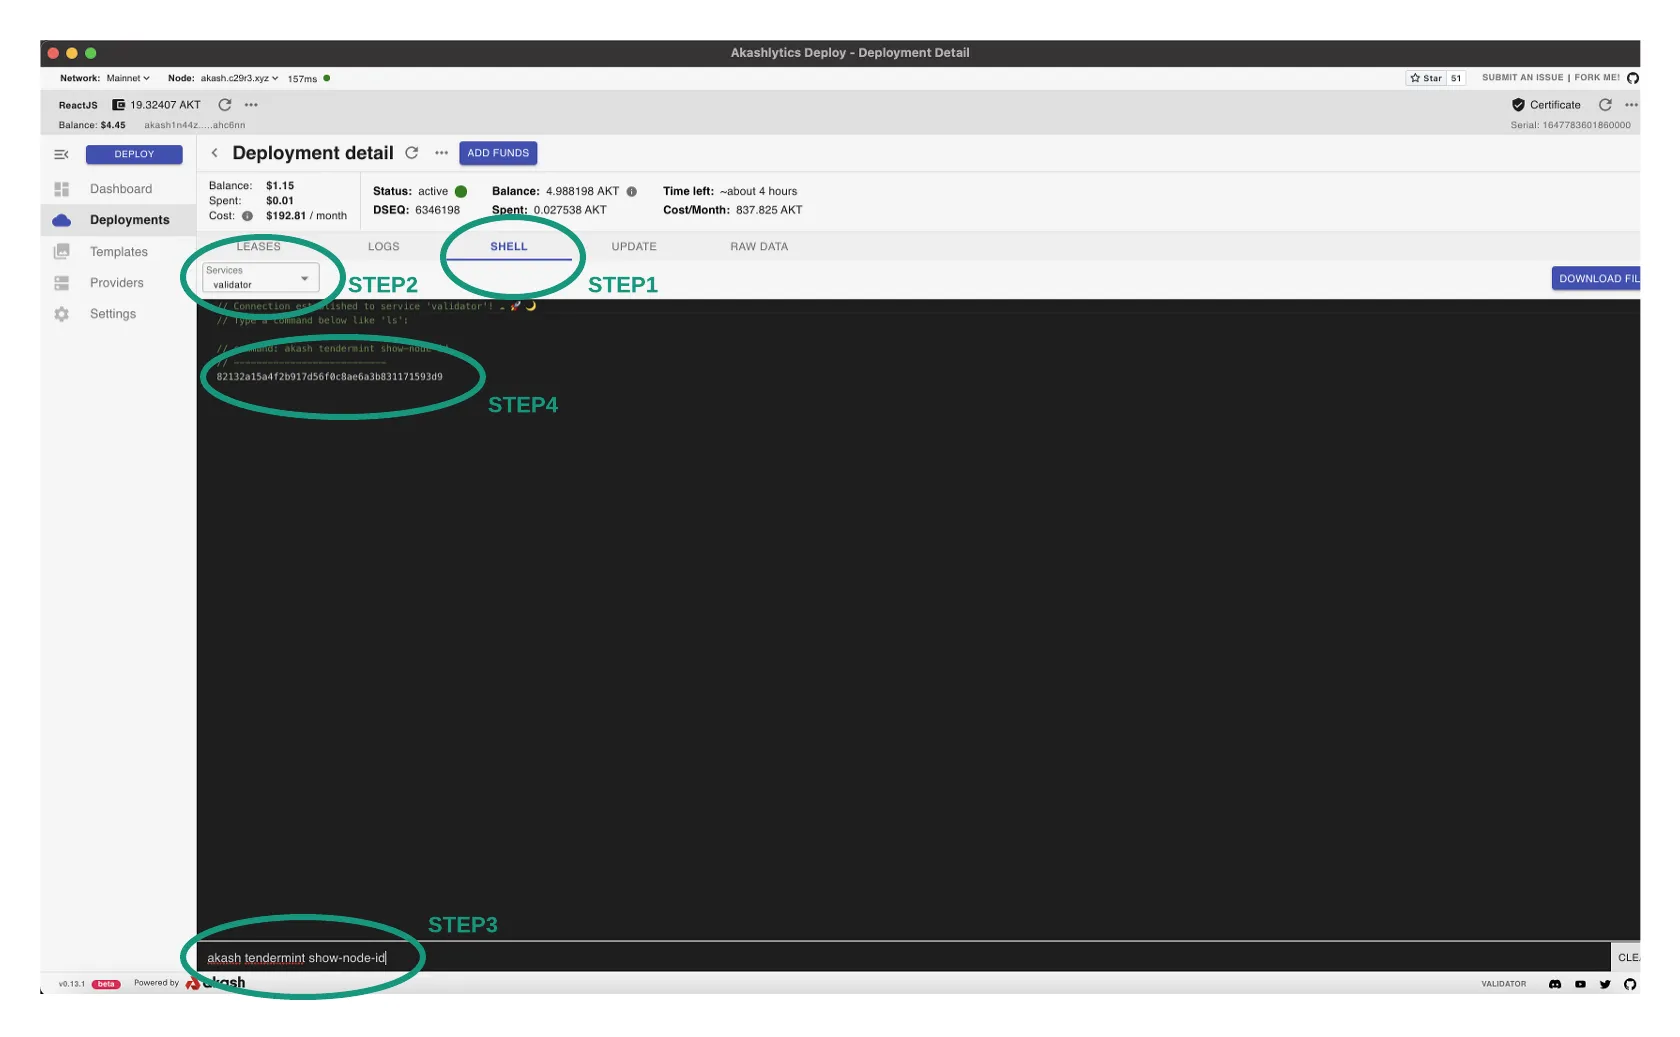
- Within the Akash Console deployment shell tab - as shown in the depiction below - we can capture the necessary IDs for the eventual, permanent Akash Validator deployment
- Select the SHELL tab and select the
validatorinstance from Service drop down - Enter the command
akash tendermint show-node-idin the command line entry box on the bottom of the display - Copy the exposed ID for the validator to a text pad for use in a later step
- Repeat this same process to collect the IDs of node1 and node2 (same steps as above but change the Service drop down to the nodes)

Close the Deployment
With the necessary IDs now captured, close the current deployment. As mentioned previously - we will use the IDs captured to create a permanent deployment in subsequent steps.
Edit SDL with Known IDs
In this step we will revisit and edit our initial SDL file with the known Validator and Node IDs.
Validator Service Update
- Update the following entry in the SDL under the Validator service
AKASH_UNCONDITIONAL_PEER_IDS
- Use the node1 and node2 IDs captured in the previous steps as the comma separated values of this variable
- Once populated this variable should appear as below in the greater section (example IDs shown and should be your own)
validator: image: ghcr.io/akash-network/cosmos-omnibus:v0.3.42-akash-v0.22.7 env: - MONIKER=validator - CHAIN_JSON=https://raw.githubusercontent.com/akash-network/net/main/mainnet/meta.json - MINIMUM_GAS_PRICES=0.0025uakt - FASTSYNC_VERSION=v2 - AKASH_MODE=validator - AKASH_P2P_PEX=true - AKASH_UNCONDITIONAL_PEER_IDS=c955c77516b4c6fc62406a63303395fc97662c1e,b3035d5dfbfeb359c716bcb714ab383e6b73a5fd - AKASH_ADDR_BOOK_STRICT=false - AKASH_DOUBLE_SIGN_CHECK_HEIGHT=10 - P2P_PERSISTENT_PEERS=f997dbd1048af671527857db422291a11d067975@65.21.198.247:26656,[email protected]:2020,[email protected]:26656,[email protected]:26656,[email protected]:26636,[email protected]:26656,[email protected]:26656,[email protected]:26656,[email protected]:26656,[email protected]:26656,[email protected]:26656,[email protected]:28656,[email protected]:26656,[email protected]:26656 - STATESYNC_RPC_SERVERS=https://akash-rpc.polkachu.com:443,https://akash-rpc.polkachu.com:443 - S3_KEY=<redacted> - S3_SECRET=<redacted> - KEY_PASSWORD=<redacted> - KEY_PATH=akashvalidatorNode Service Update
- Update the following entries in the SDL under the node1 and node2 services
AKASH_PRIVATE_PEER_IDS
AKASH_UNCONDITIONAL_PEER_IDS
- Use the validator ID captured in the previous steps as the comma separated values of this variable
- Once populated these variables should appear as below in the greater section (example ID shown and should be your own)
- Only
node1example shown. Identical updates should be made to thenode2service as well.
node1: image: ghcr.io/akash-network/cosmos-omnibus:v0.3.42-akash-v0.22.7 env: - MONIKER=private_node_1 - CHAIN_JSON=https://raw.githubusercontent.com/akash-network/net/main/mainnet/meta.json - MINIMUM_GAS_PRICES=0.0025uakt - FASTSYNC_VERSION=v2 - AKASH_MODE=full - AKASH_P2P_PEX=true - AKASH_PRIVATE_PEER_IDS=2d76800f5a149510229aadf480f8ec02ac6e5297 - AKASH_UNCONDITIONAL_PEER_IDS=2d76800f5a149510229aadf480f8ec02ac6e5297 - AKASH_ADDR_BOOK_STRICT=false - STATESYNC_RPC_SERVERS=https://akash-rpc.polkachu.com:443,https://akash-rpc.polkachu.com:443 - STATESYNC_SNAPSHOT_INTERVAL=500 - S3_KEY=<redacted> - S3_SECRET=<redacted> - KEY_PASSWORD=<redacted> - KEY_PATH=akashnode1Redeploy Validator and Sentries with Akash Console
Within Akash Console using the identical steps covered in the initial Validator deployment but use the updated SDL within IDs populated
Validator Verifications
Confirm Your Validator is Running
Ensure Validator Sync
- Ensure that the field `catching_up` is false and that the latest block corresponds to the current block of the blockchain
- Execute this verification on both the sentry and validator nodes
akash statusExample Output when Validator is in Sync
{"NodeInfo":{"protocol_version":{"p2p":"8","block":"11","app":"0"},"id":"136d67725800cb5a8baeb3e97dbdc3923879461e","listen_addr":"tcp://0.0.0.0:26656","network":"akashnet-2","version":"0.34.19","channels":"40202122233038606100","moniker":"cznode","other":{"tx_index":"on","rpc_address":"tcp://0.0.0.0:26657"}},"SyncInfo":{"latest_block_hash":"4441B6D626166822979597F252B333C131C1DCB2F0467FF282EF0EAA3936B8CC","latest_app_hash":"1ED64AE88E5CFD53651CD2B6B4E970292778071C8FBE23289393B4A06F57975F","latest_block_height":"8284780","latest_block_time":"2022-10-31T15:28:17.565762161Z","earliest_block_hash":"E25CE5DD10565D6D63CDA65C8653A15F962A4D2960D5EC45D1DC0A4DE06F8EE3","earliest_app_hash":"19526102DDBCE254BA71CC8E44185721D611635F638624C6F950EF31D3074E2B","earliest_block_height":"5851001","earliest_block_time":"2022-05-12T17:51:58.430492536Z","catching_up":false},"ValidatorInfo":{"Address":"354E7FA2BF8C5B9C0F1C80F1C222818EC992D377","PubKey":{"type":"tendermint/PubKeyEd25519","value":"1+dVHZD7kfqnDU6I+bKbCv4ZE1LPieyMH+mwsOowhqY="},"VotingPower":"0"}}Confirm Validator’s Staking Status
Template
akash query staking validator <akashvaloper-address>Example
akash query staking validator akashvaloper16j3ge9lkpgtdkzntlja08gt6l63fql60xdupxqExample Output
- Status will display as `BOND_STATUS_UNBONDED` after initial build
commission: commission_rates: max_change_rate: "0.010000000000000000" max_rate: "0.200000000000000000" rate: "0.100000000000000000" update_time: "2022-10-31T15:24:25.040091667Z"consensus_pubkey: '@type': /cosmos.crypto.ed25519.PubKey key: 1+dVHZD7kfqnDU6I+bKbCv4ZE1LPieyMH+mwsOowhqY=delegator_shares: "1000000.000000000000000000"description: details: "" identity: "" moniker: cznode security_contact: "" website: ""jailed: falsemin_self_delegation: "1"operator_address: akashvaloper1jy7ej9t6r8q5dyjrst88nt9rjgkdltgx97wfvdstatus: BOND_STATUS_UNBONDEDtokens: "1000000"unbonding_height: "0"unbonding_time: "1970-01-01T00:00:00Z"Active Set Confirmation
Your validator is active if the following command returns anything
NOTE - this command will only display output of your validator is in the active set
akash query tendermint-validator-set | grep "$(akash tendermint show-validator)"