Use Akash Console with your own crypto wallet for full control and no deployment time limits.
If you already have AKT and prefer direct blockchain access, you can connect your Keplr or Leap wallet to Akash Console instead of using the managed trial wallet.
Why Use Console with Your Own Wallet?
Benefits:
- No deployment time limits - Run indefinitely (trial has 24-hour limit)
- Full blockchain control - Direct access to your AKT and transactions
- No credit card required - Use your existing AKT holdings
- Lower fees - Pay network fees directly, no payment processing fees
- Visual interface - Easier than CLI for most users
Best For:
- Users who already own AKT
- Those comfortable with crypto wallets
- Anyone wanting deployments longer than 24 hours
- Users who prefer visual tools over CLI
Prerequisites
Before you start, you need:
-
A Keplr or Leap Wallet
- Install Keplr (Chrome, Brave, Edge, or mobile)
- Install Leap (Chrome, Brave, Edge, or mobile)
-
AKT Tokens in Your Wallet
- Minimum: 1 AKT (for deposit + gas fees)
- Recommended: 5+ AKT for comfortable testing
-
Where to Get AKT:
- Osmosis DEX - Swap from other Cosmos tokens
- Centralized exchanges: See full list
- Bridge from other chains
Step 1: Visit Akash Console
Open your browser and go to console.akash.network
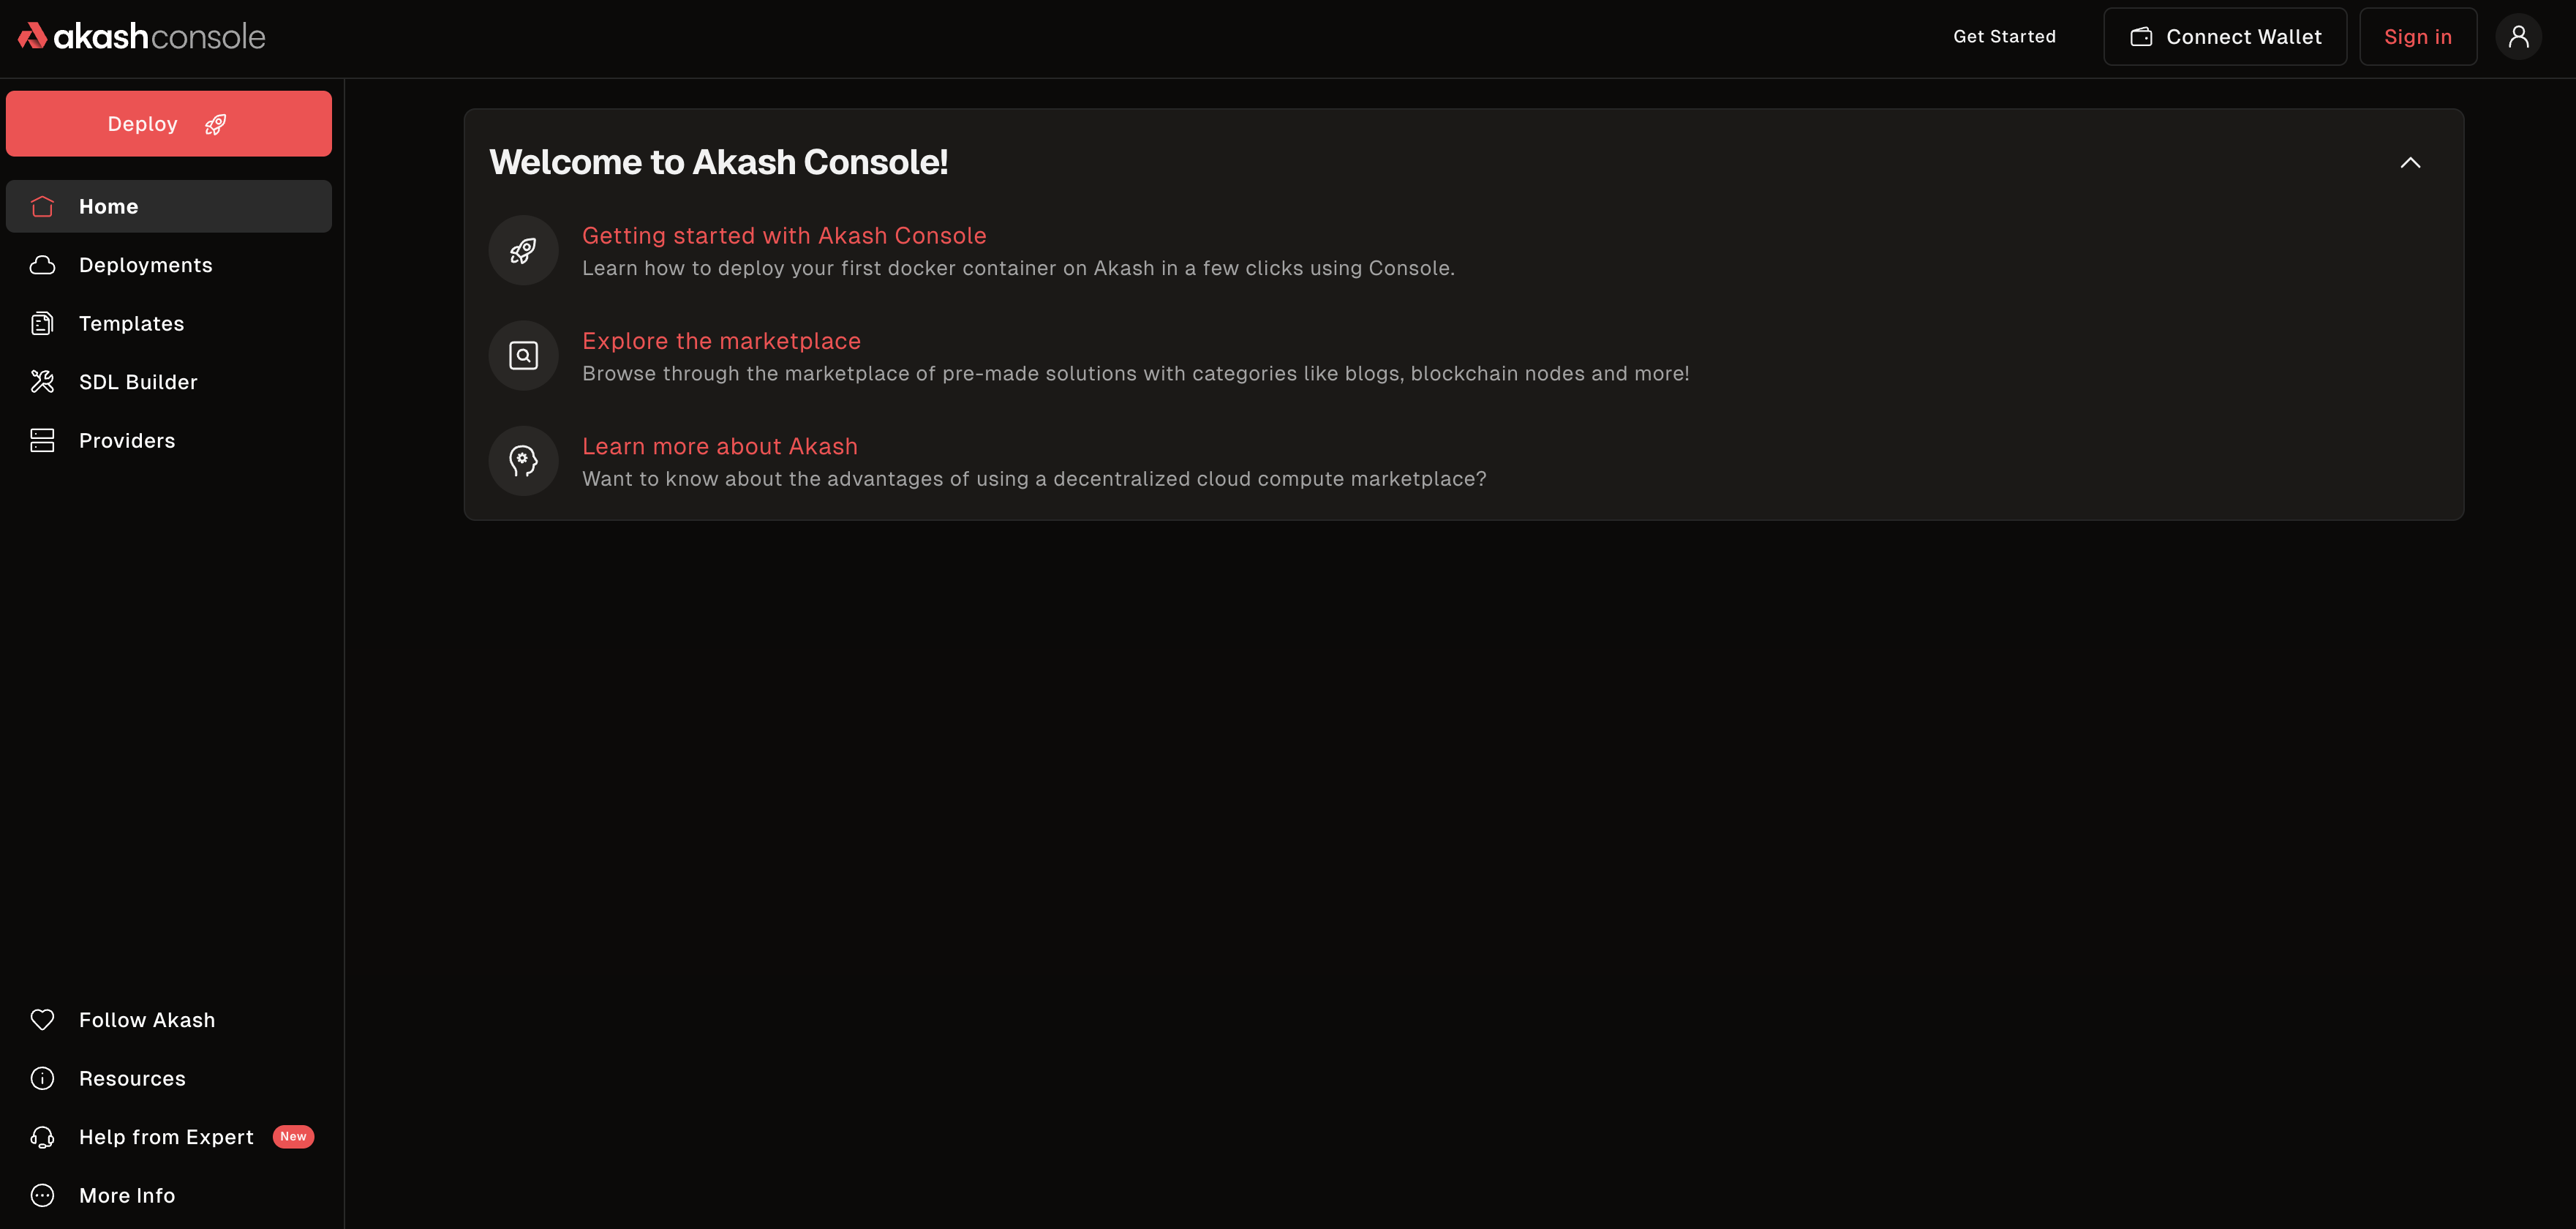 Akash Console homepage - Click “Connect Wallet” in the top right
Step 2: Connect Your Wallet
-
Click “Connect Wallet” in the top right corner
-
Choose your wallet provider:
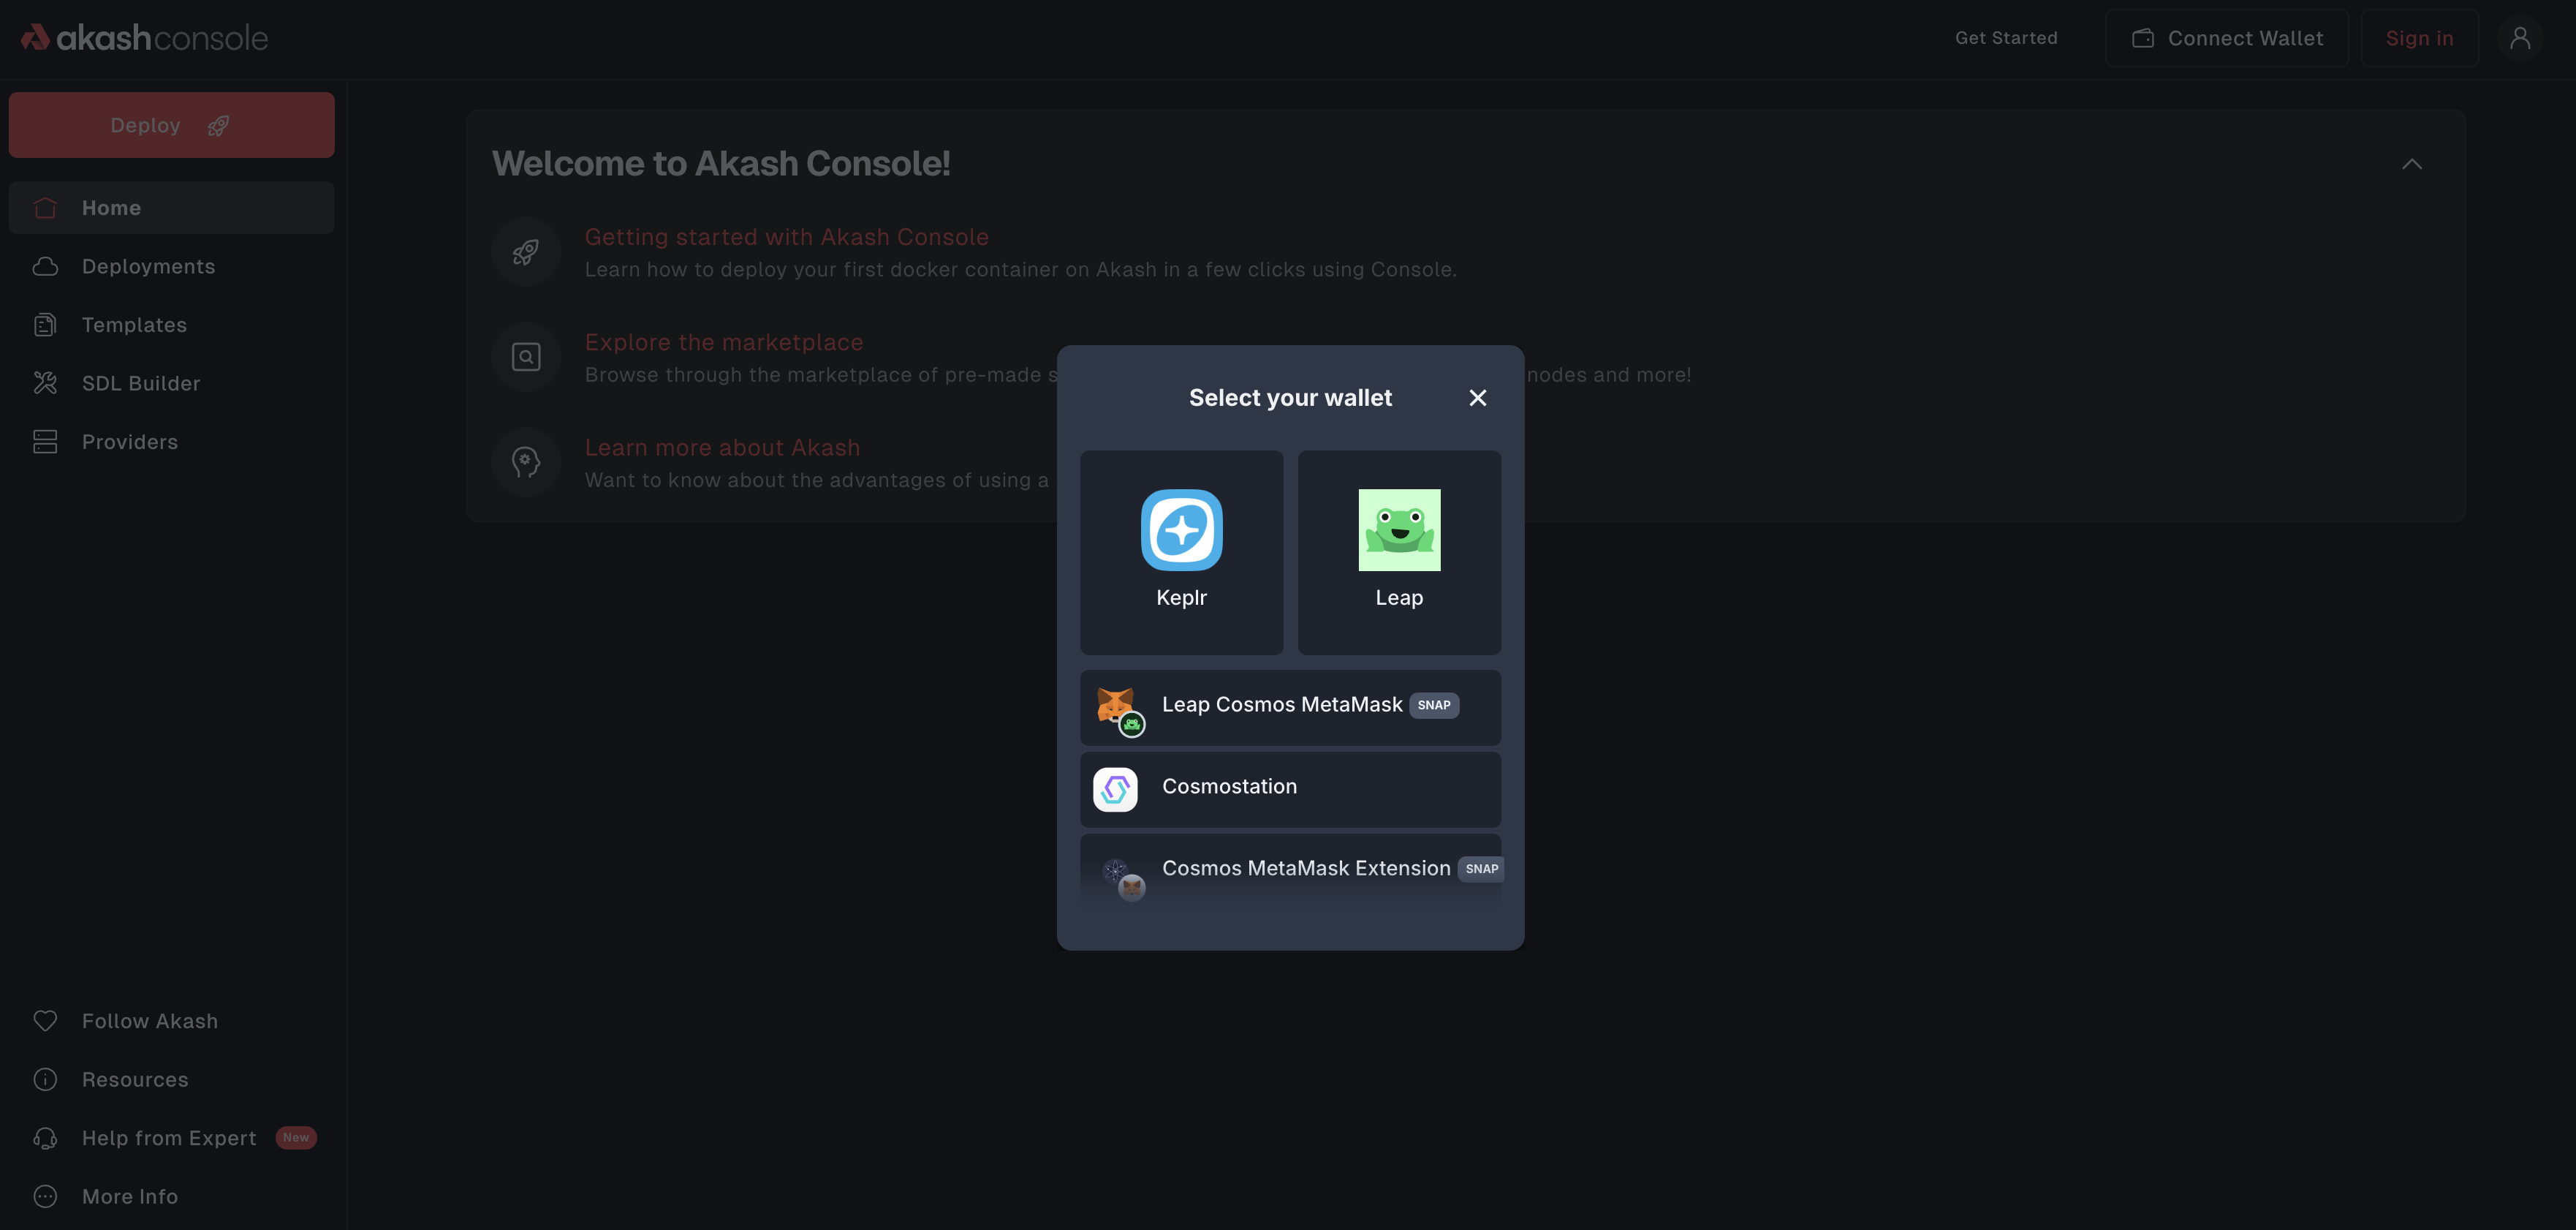 Select Keplr or Leap wallet to connect
-
Approve the connection in your wallet extension - Allow Console to:
- View your Akash address
- Request transaction approvals
- Query your balance
-
Your wallet address and AKT balance will appear in the top right
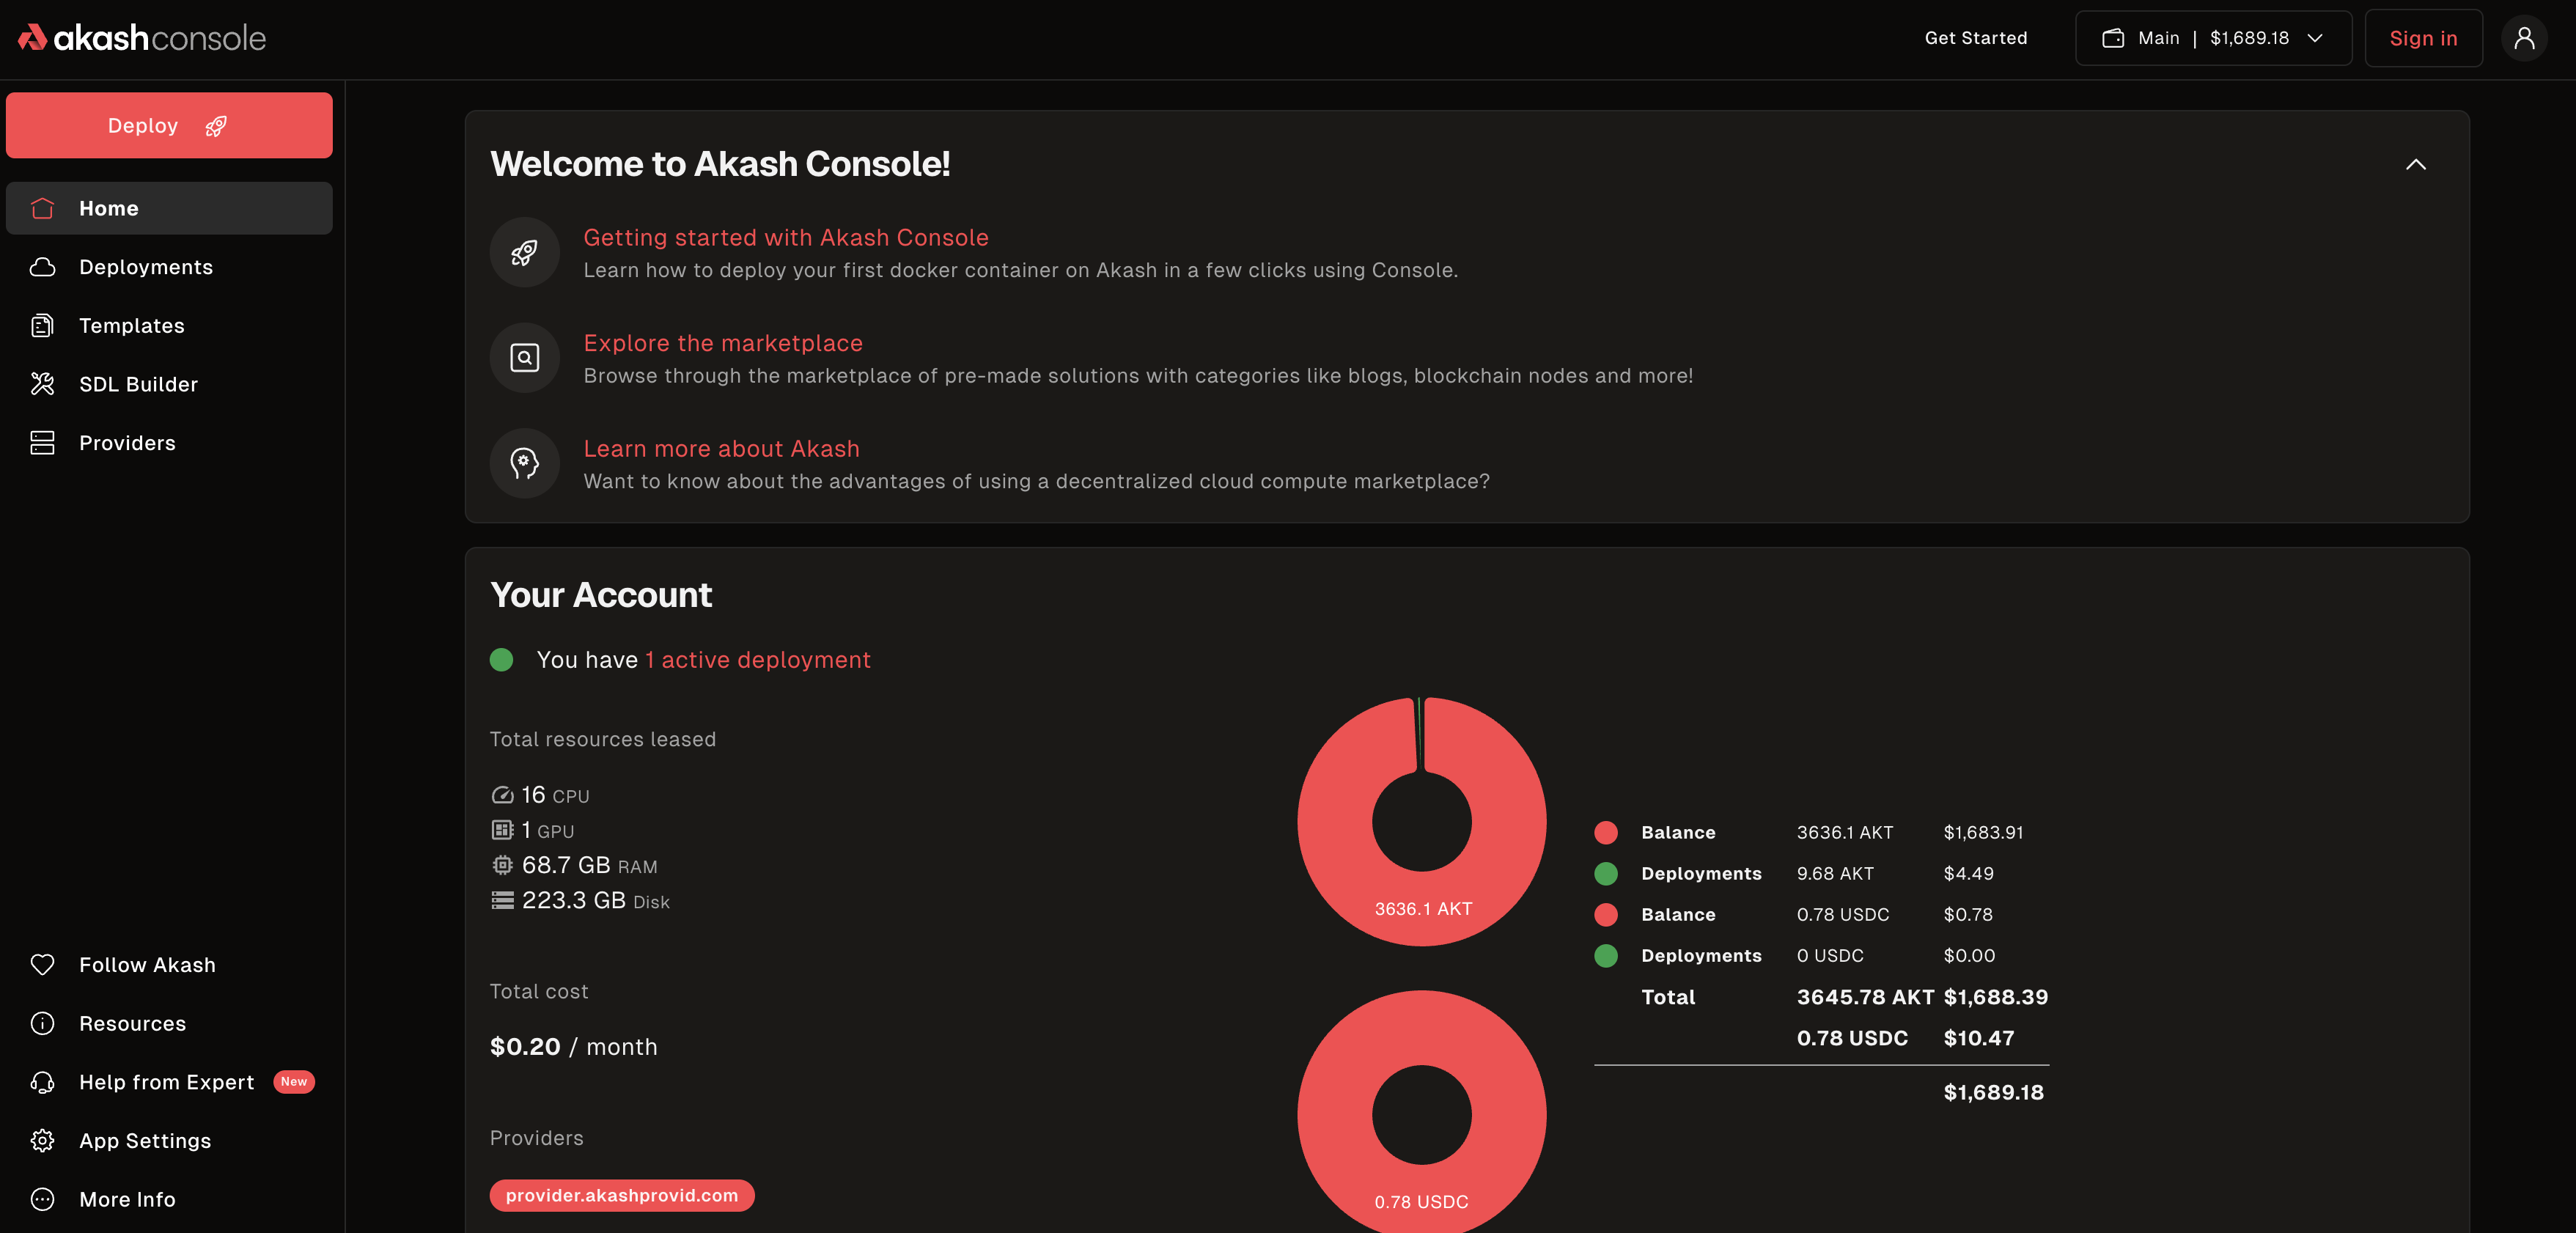 Successfully connected - your address and AKT balance are now visible
- Swap AKT for ACT
- Hover over your wallet in the top right of the screen and click on Wallet Actions -> Mint ACT
- Select how many AKT you would like to swap for ACT (keeping in mind the minimum swap is for 10 ACT or more)
- Note: remember to leave some AKT for transaction fees
- Click Mint ACT and approve transaction
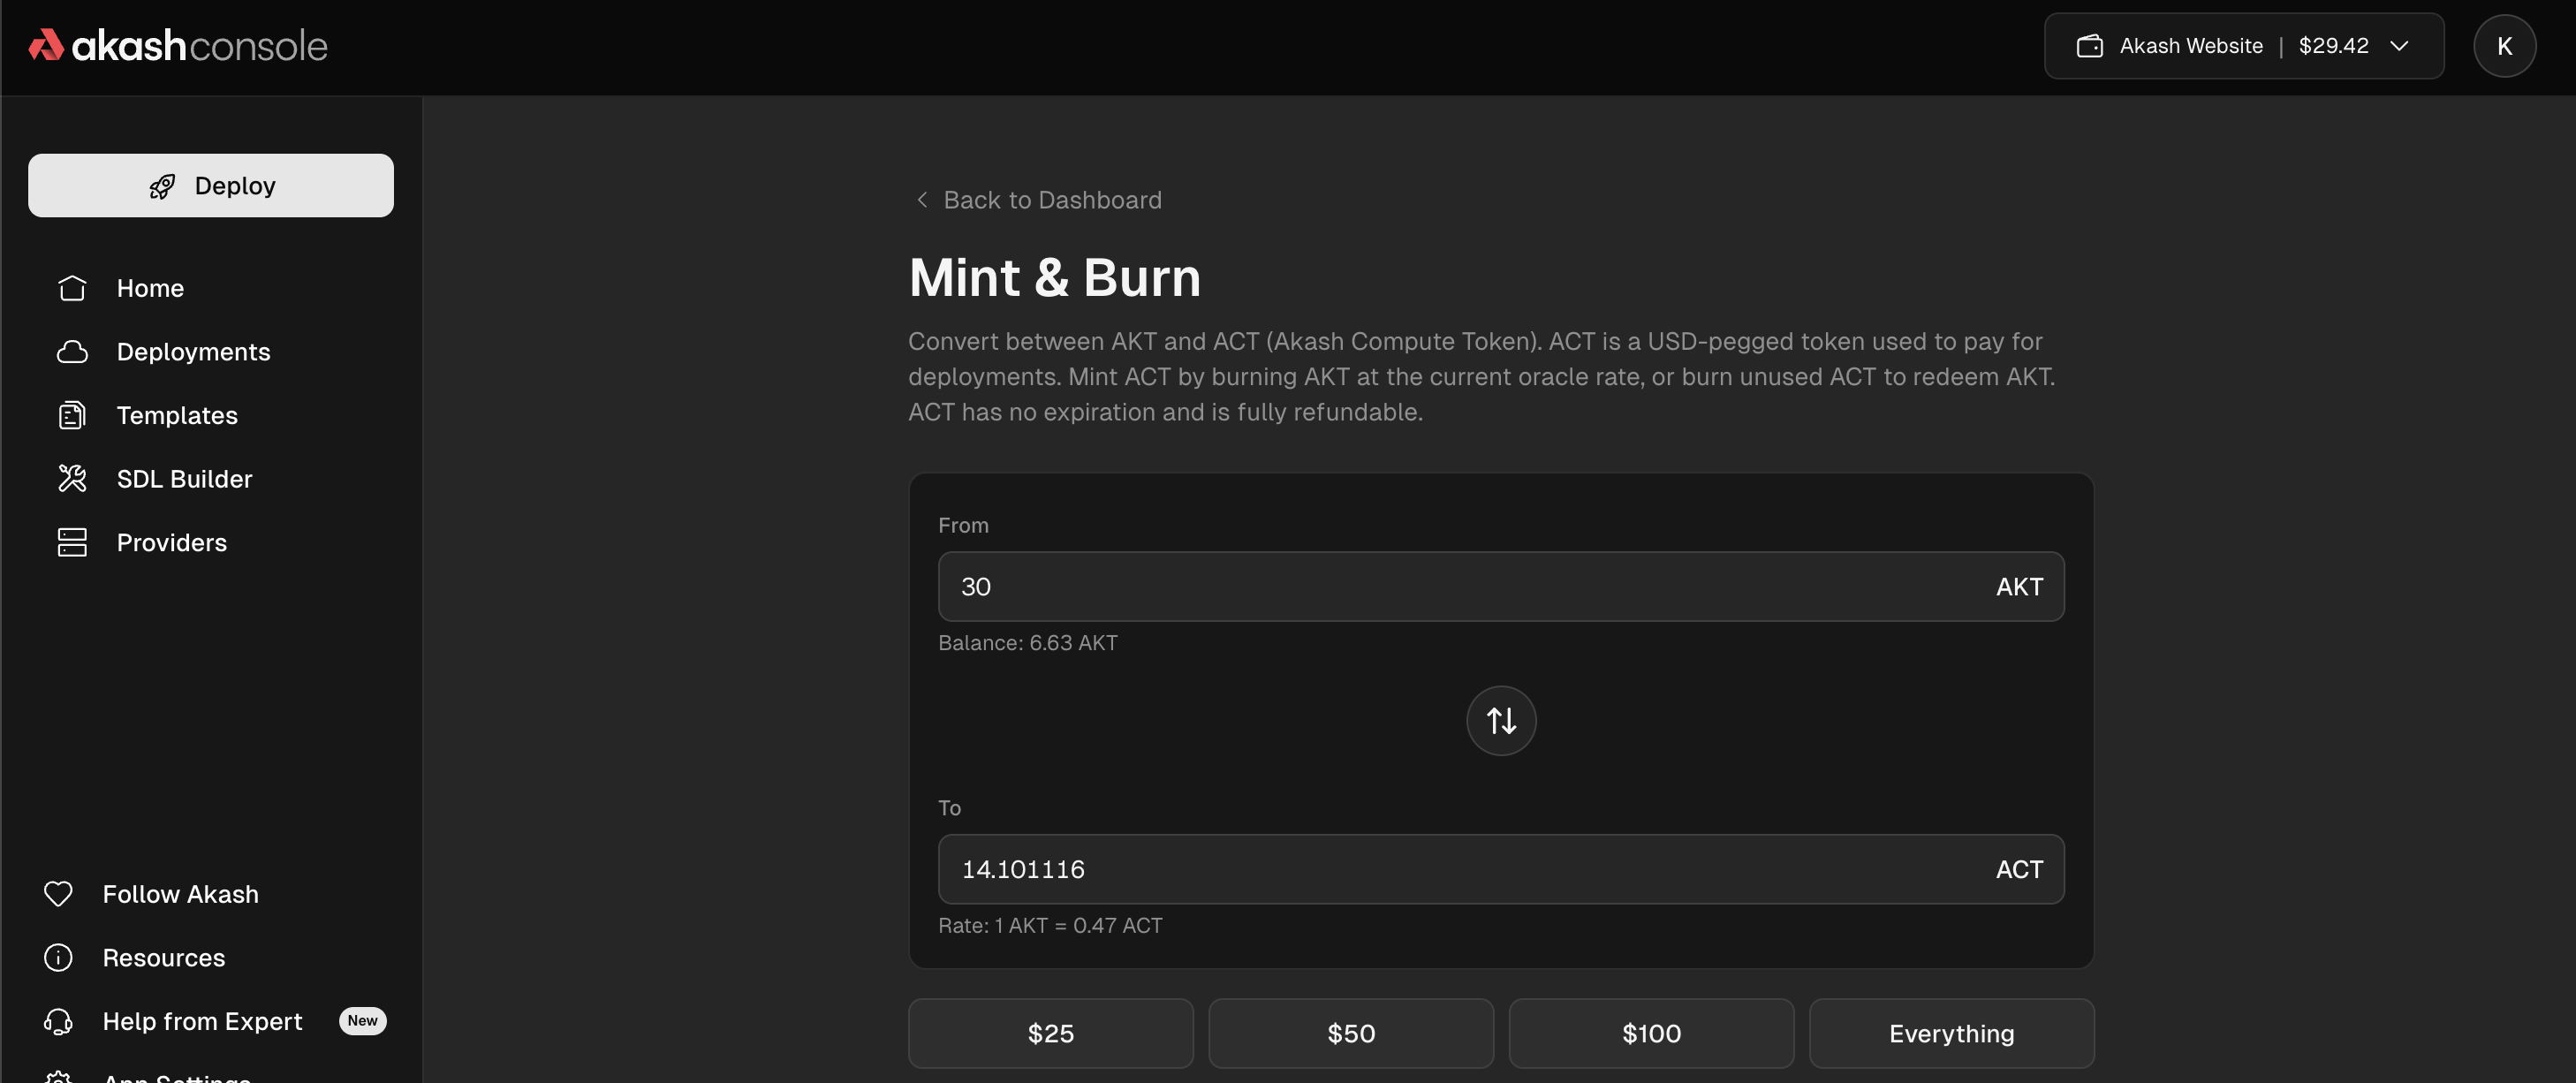 Mint ACT
**You’re now connected with your own wallet with both AKT and ACT!
Step 3: Understanding the Console Interface
After connecting, you’ll see:
Top Bar
- Your Address - Shortened wallet address (e.g.,
akash1abc...xyz) - Balance - Your available AKT
- Network Status - Connection indicator
Sidebar Navigation
- Home - Dashboard overview
- Deployments - Your active and past deployments
- Templates - Pre-built deployment templates
- SDL Builder - Visual deployment editor
- Providers - Browse available providers
Main Dashboard
- Active Deployments - Running deployments and status
- Quick Actions - Deploy button, add funds, settings
- Account Overview - Balance, escrow (ACT), and spending
 Your Console dashboard showing deployments and quick actions
Step 4: Deploy Your First Application
Option A: Use a Template (Recommended)
- Click “Templates” in the sidebar
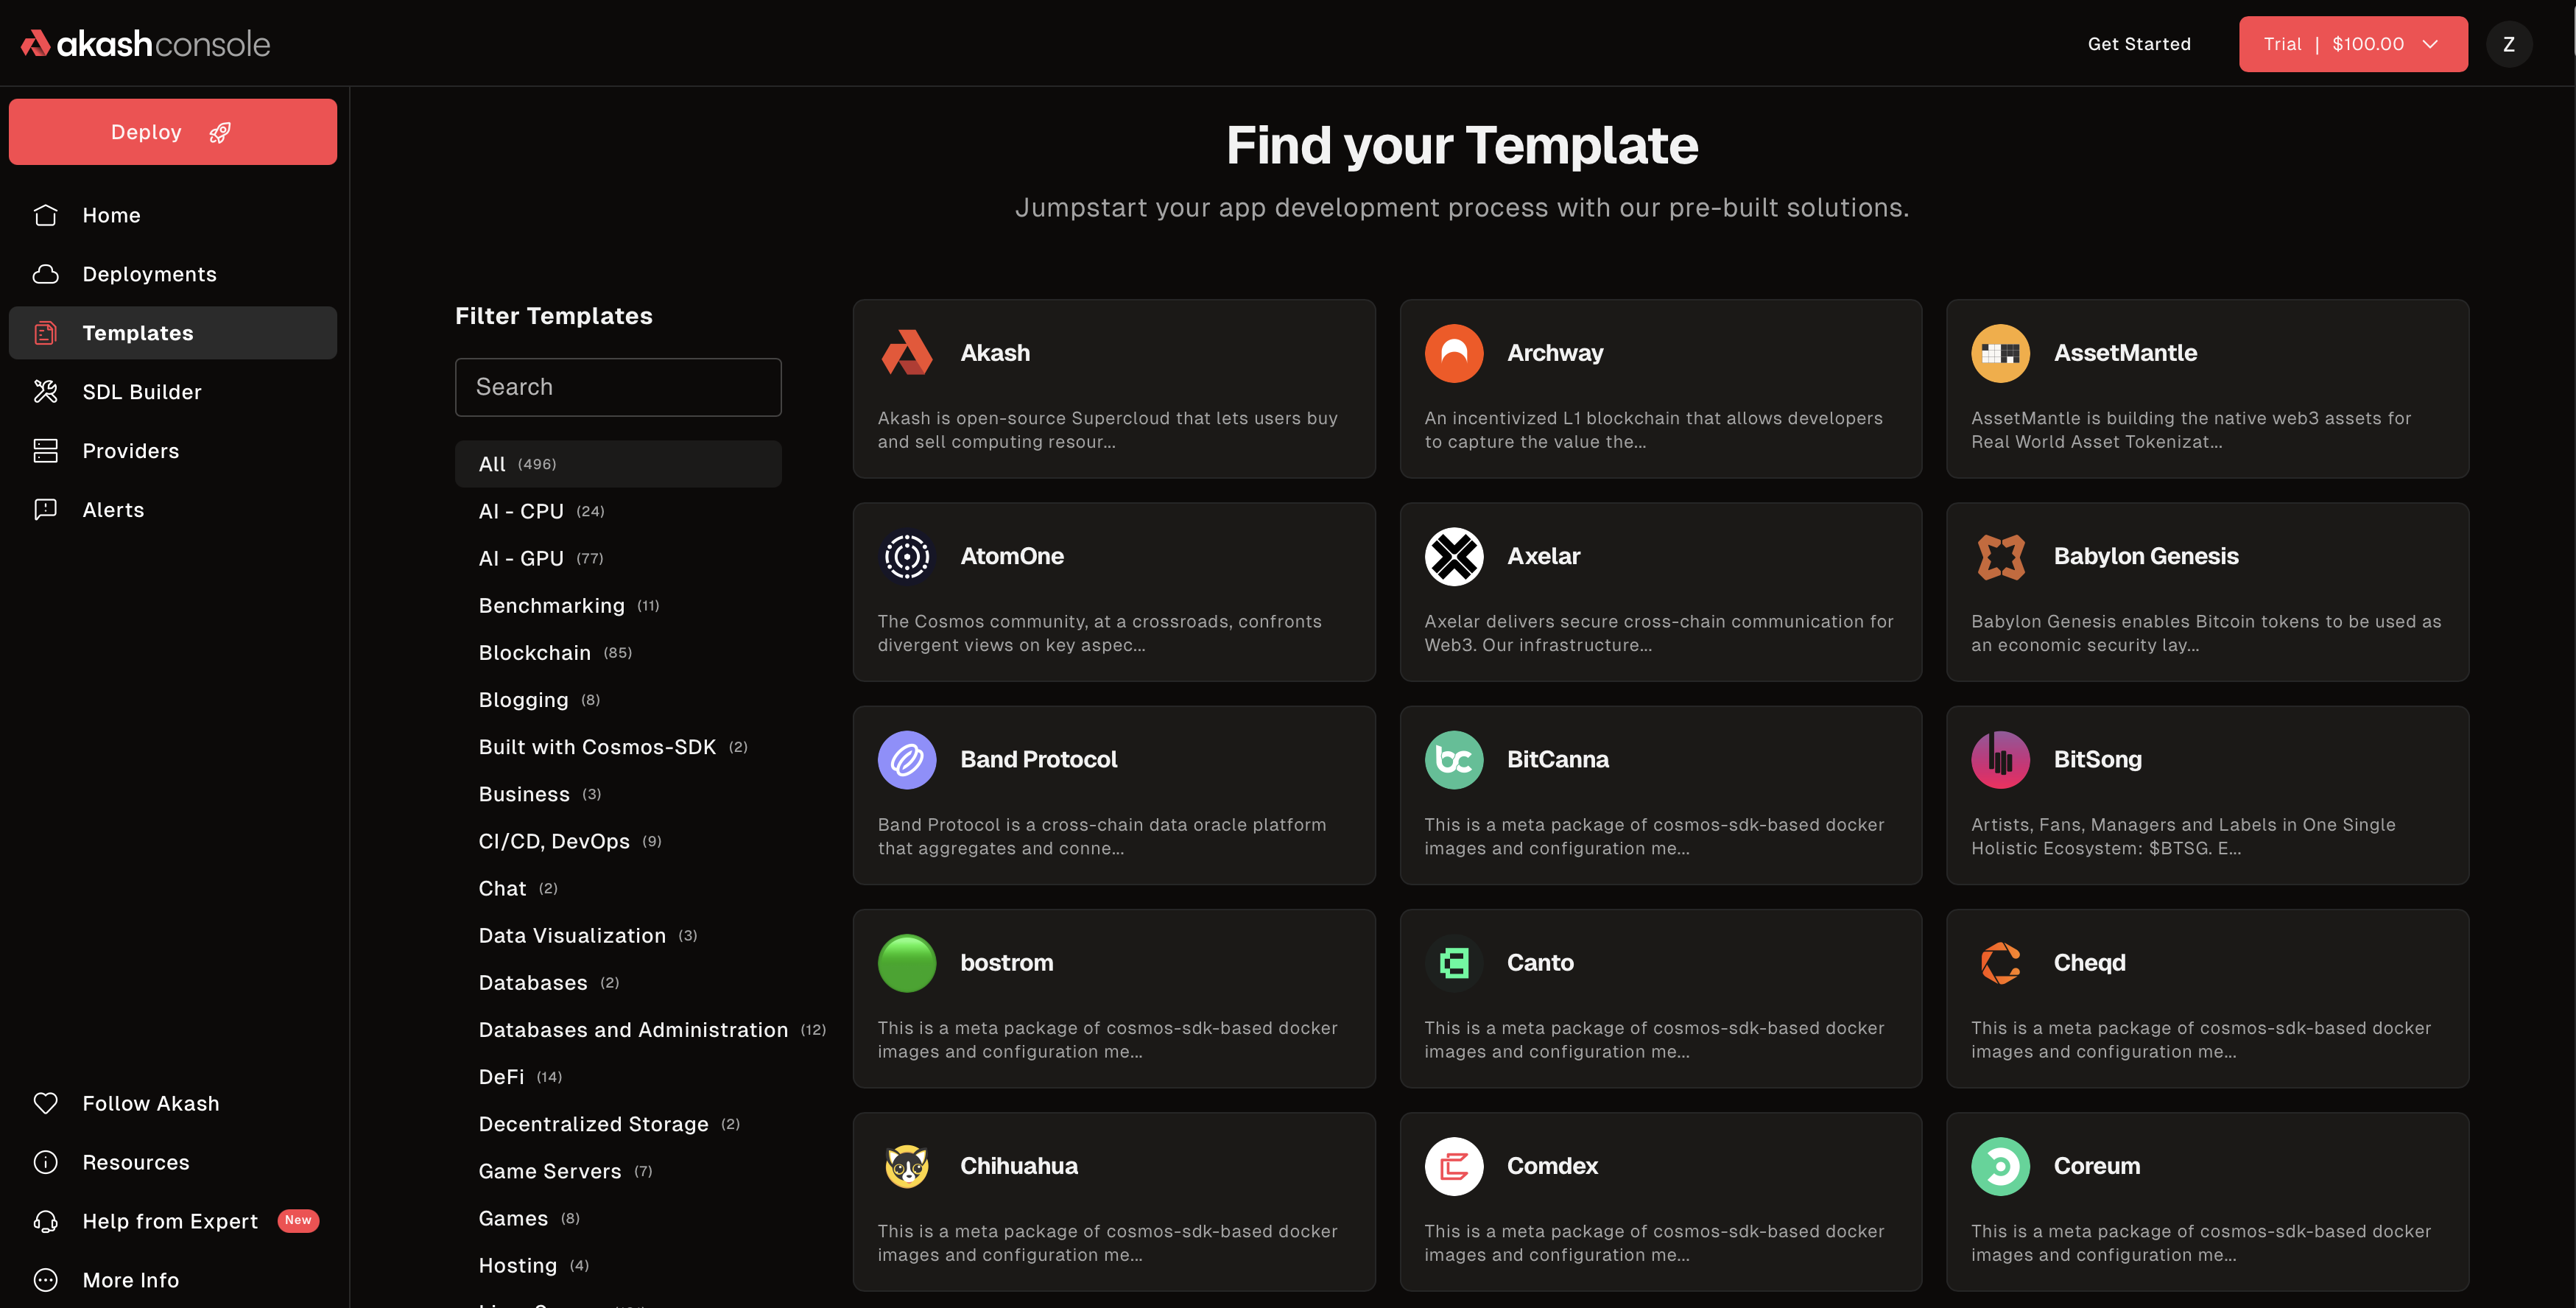 Browse 290+ pre-built templates for common applications
- Choose a template and click “Deploy”
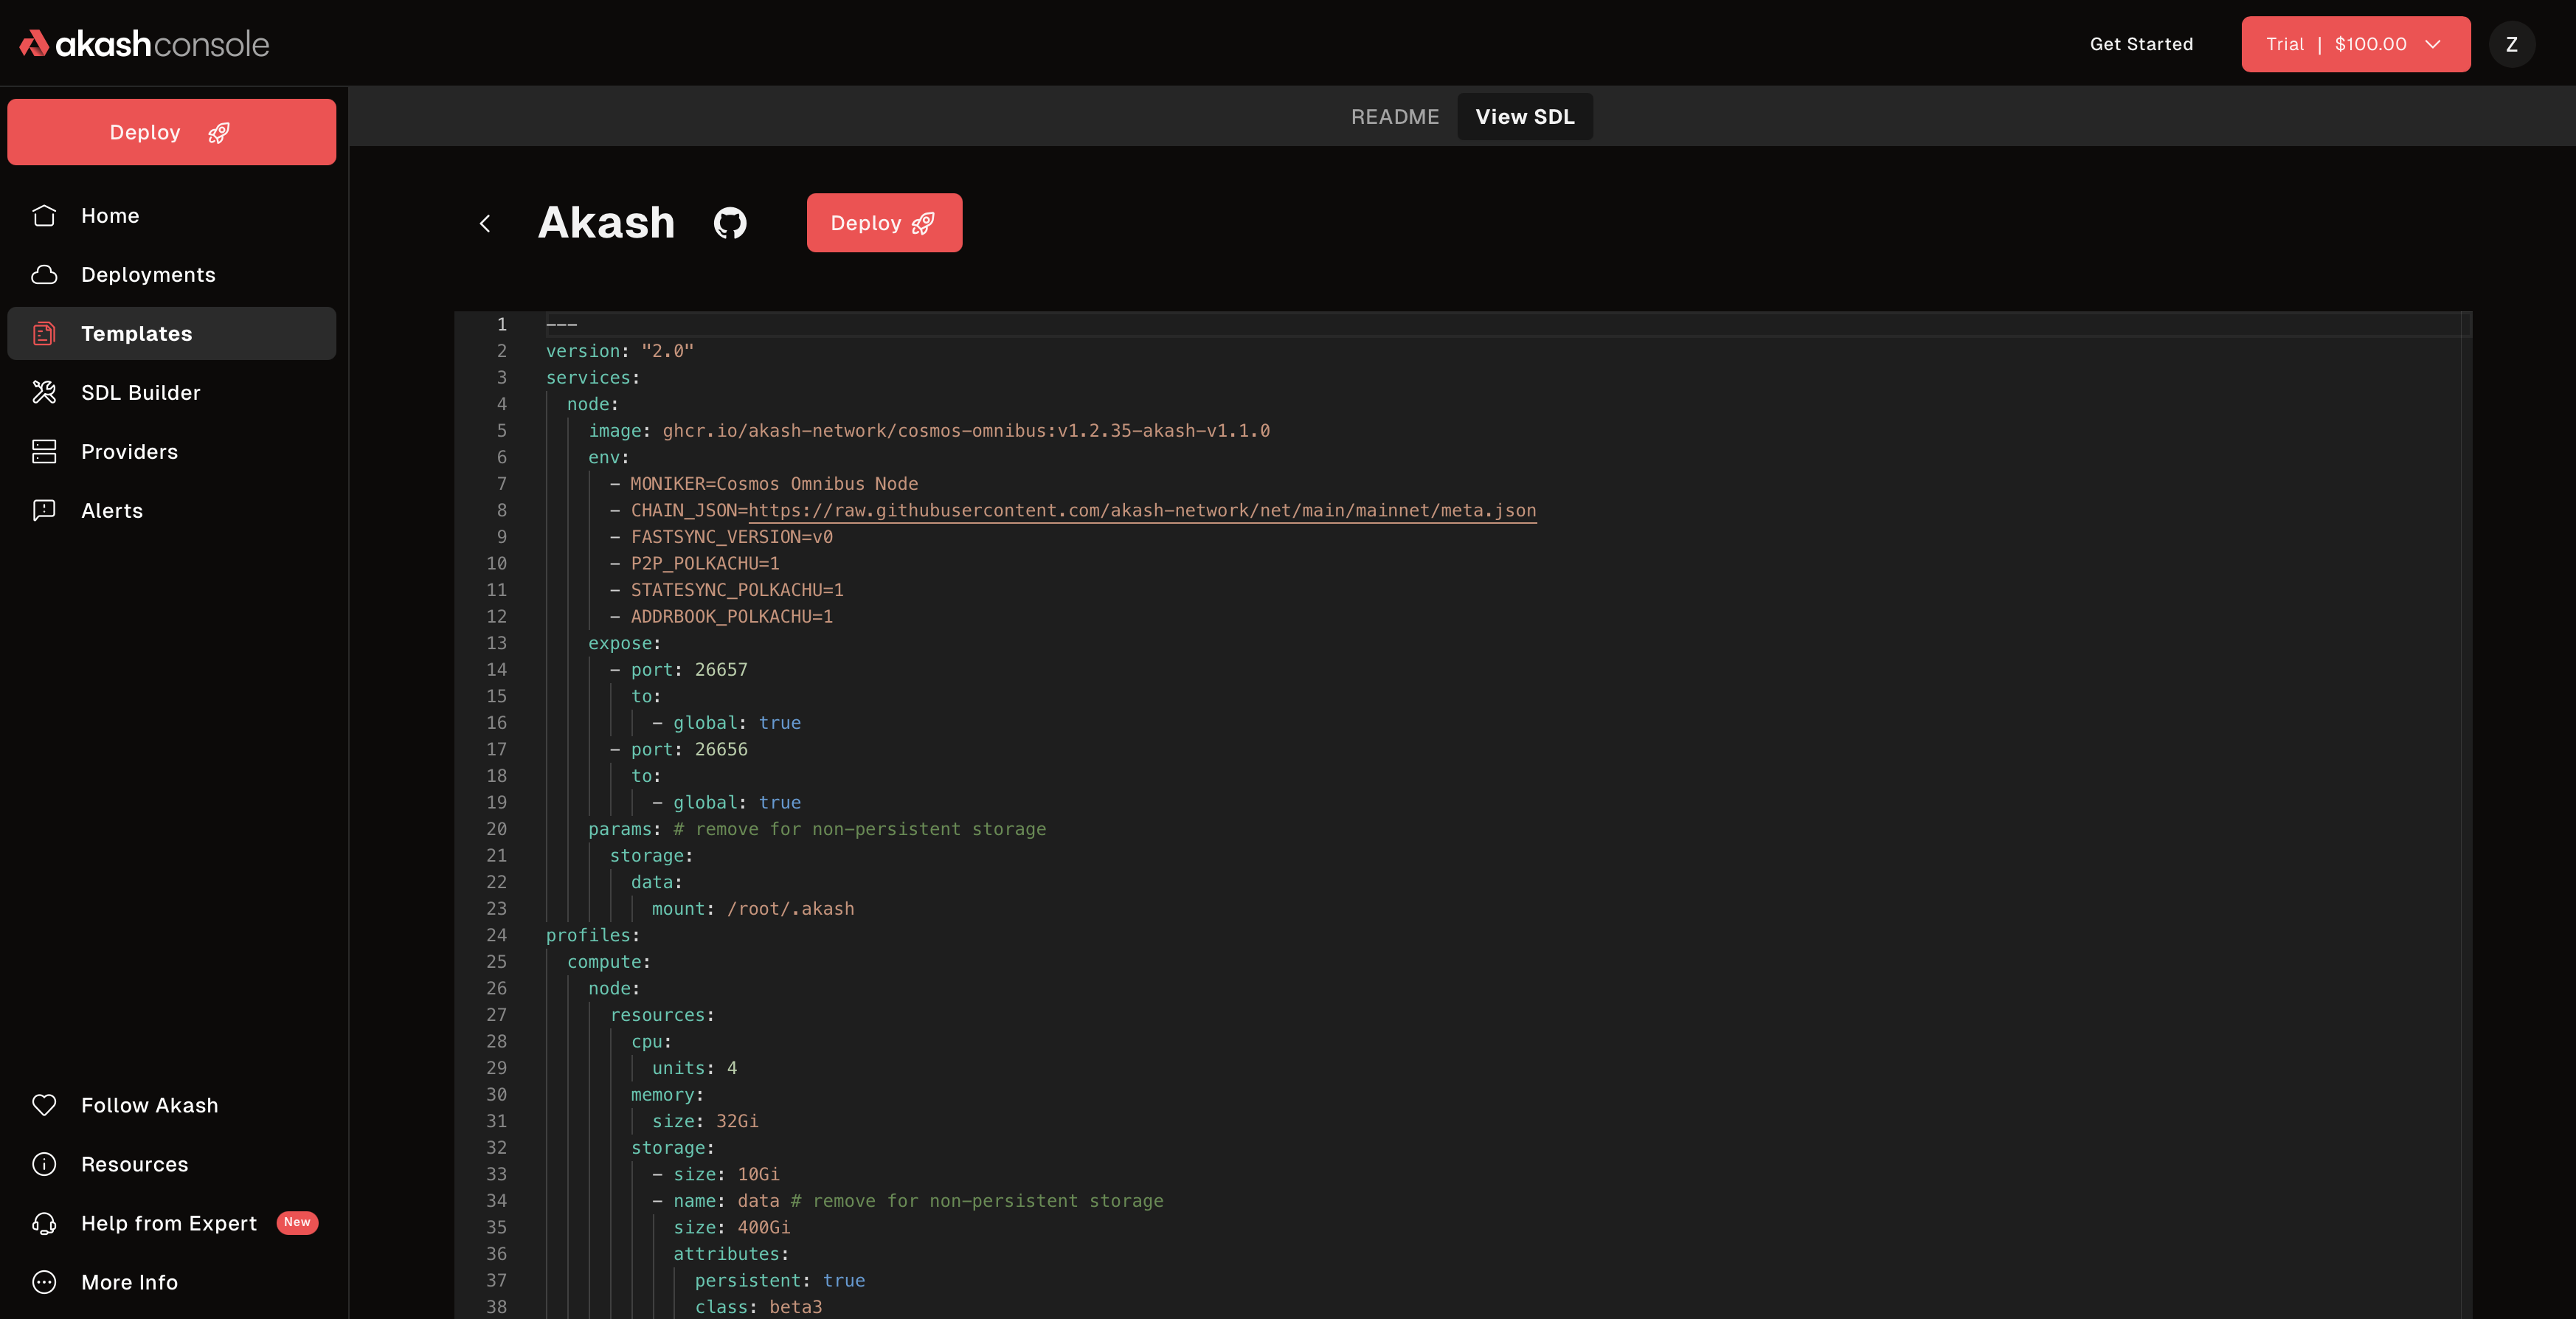 Review template details and deploy with one click
- Review the pre-filled SDL configuration
- (Optional) Customize CPU, memory, storage
- Click “Create Deployment”
Option B: Custom Deployment
- Click “Deploy” button (top left or center)
- Choose “Empty Template” or “SDL Builder”
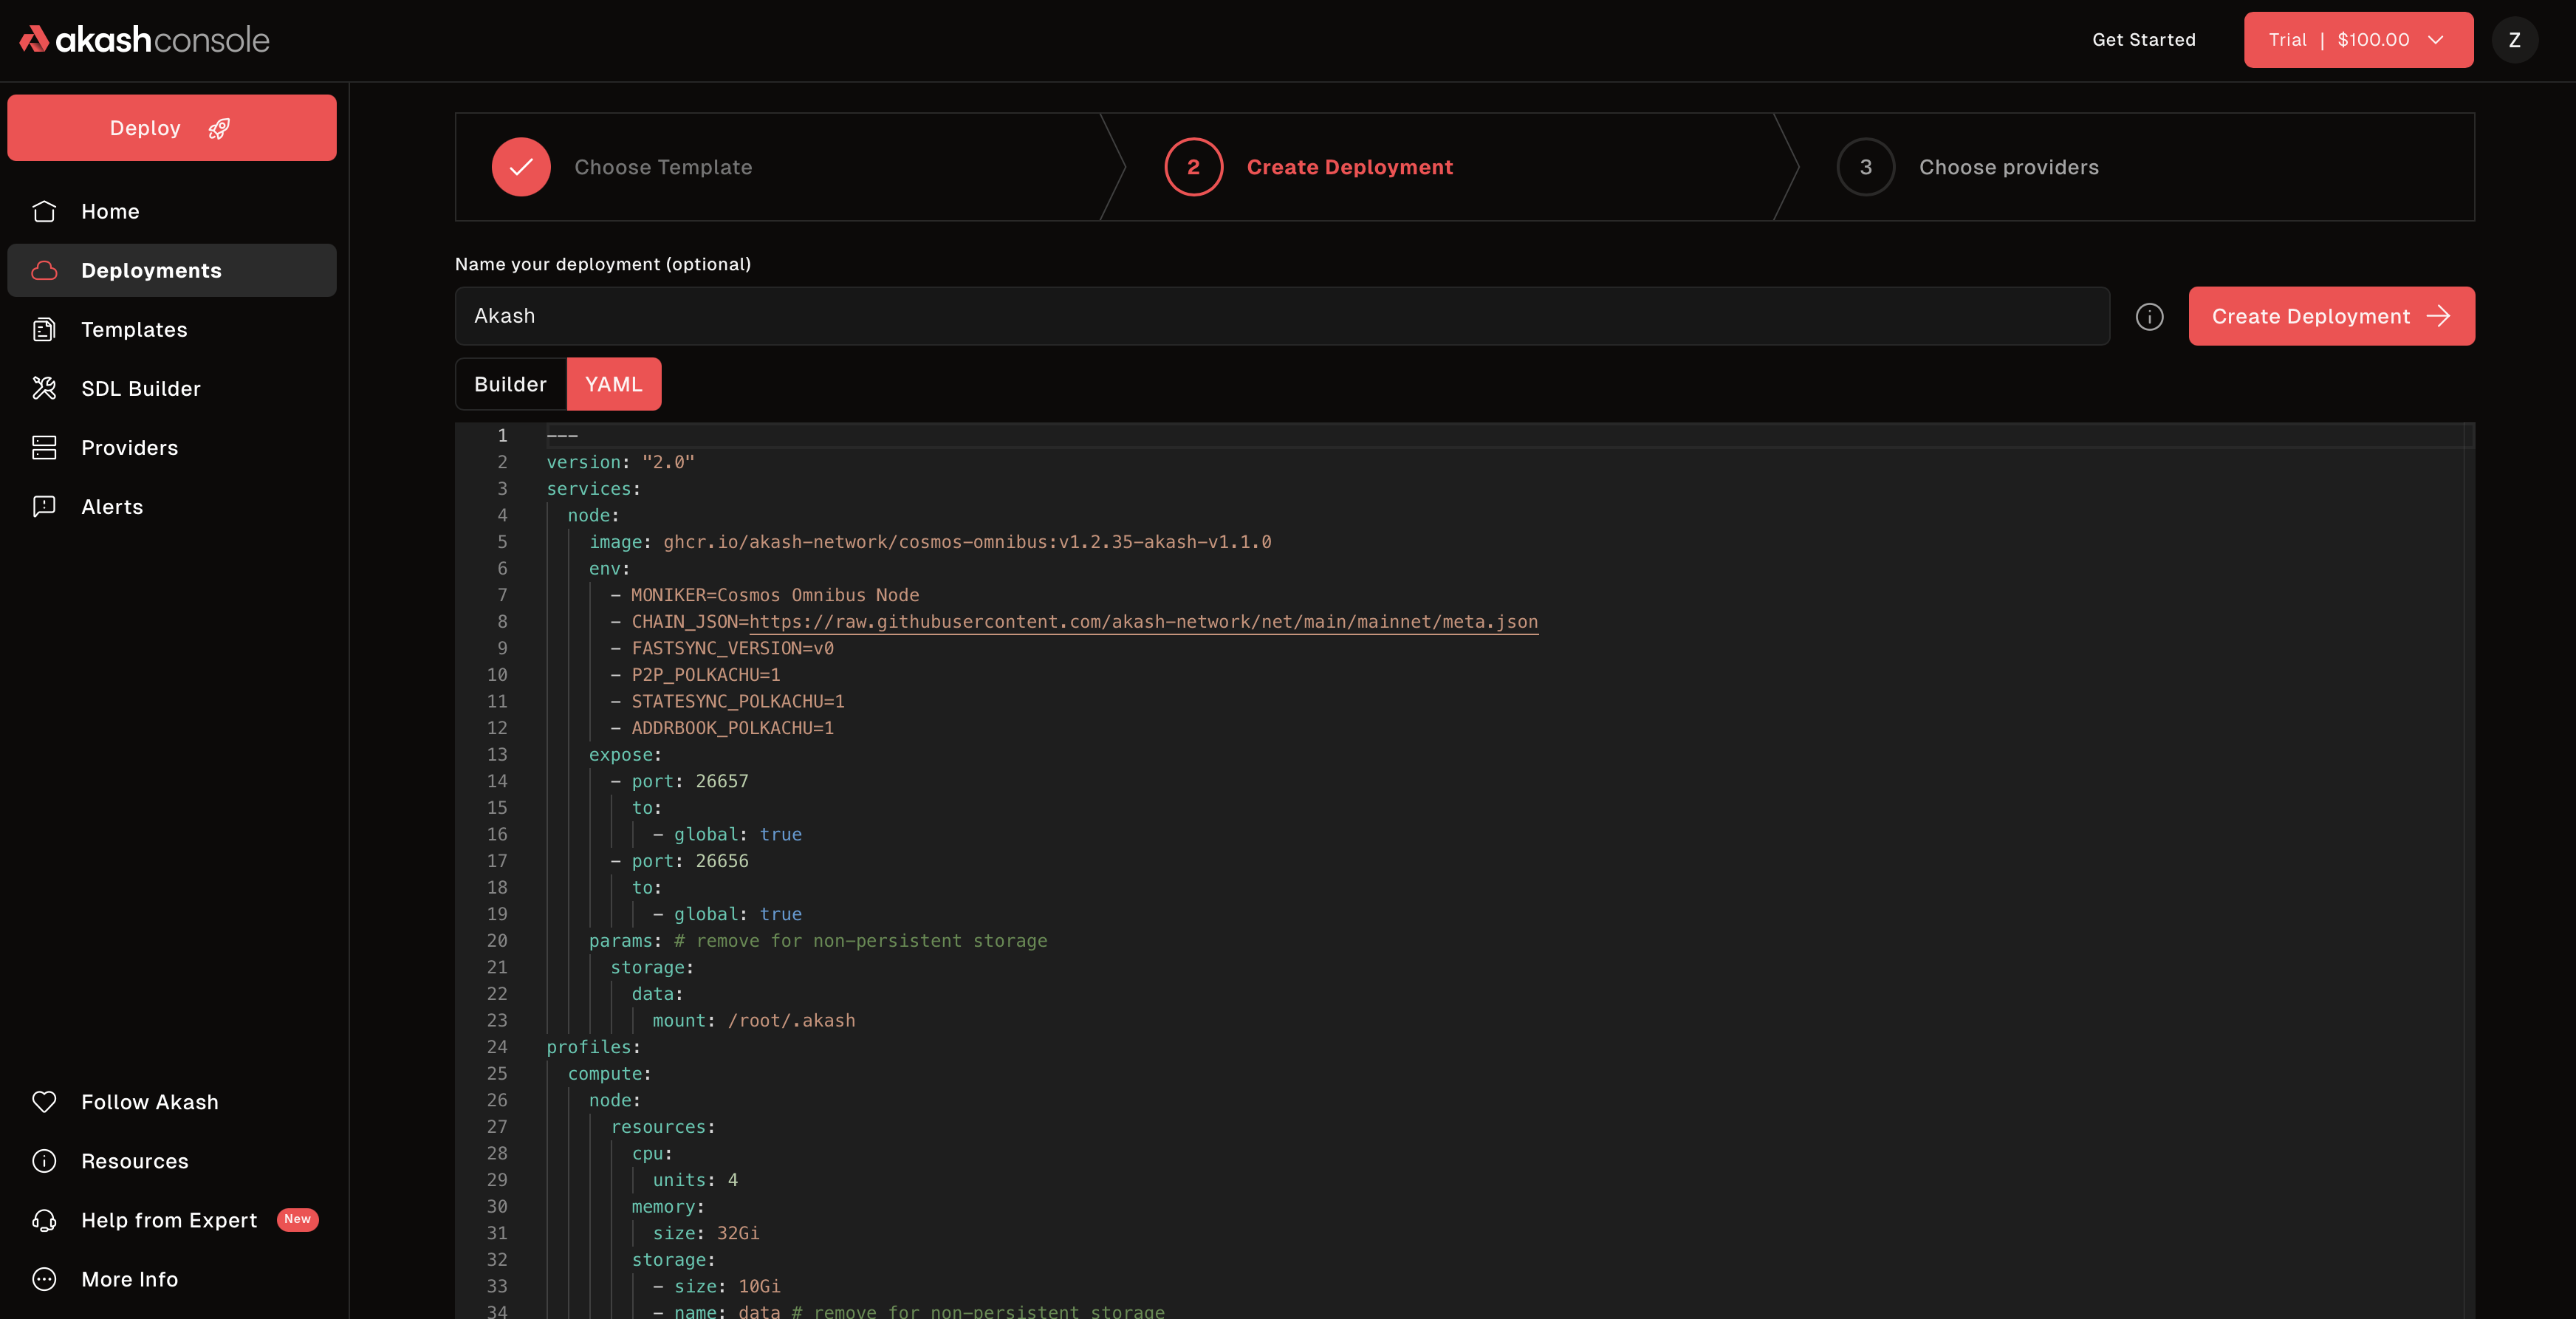 Build your deployment configuration using the SDL editor
- Write or build your SDL configuration
- Click “Create Deployment”
Step 5: Create the Deployment
After clicking “Create Deployment”:
- Set Deposit Amount
- Default is usually fine (in ACT depending on resources)
- This is held in escrow (ACT), refunded when you close
- Not a fee—just a security deposit. Use ACT only unless circuit breaker is in effect.
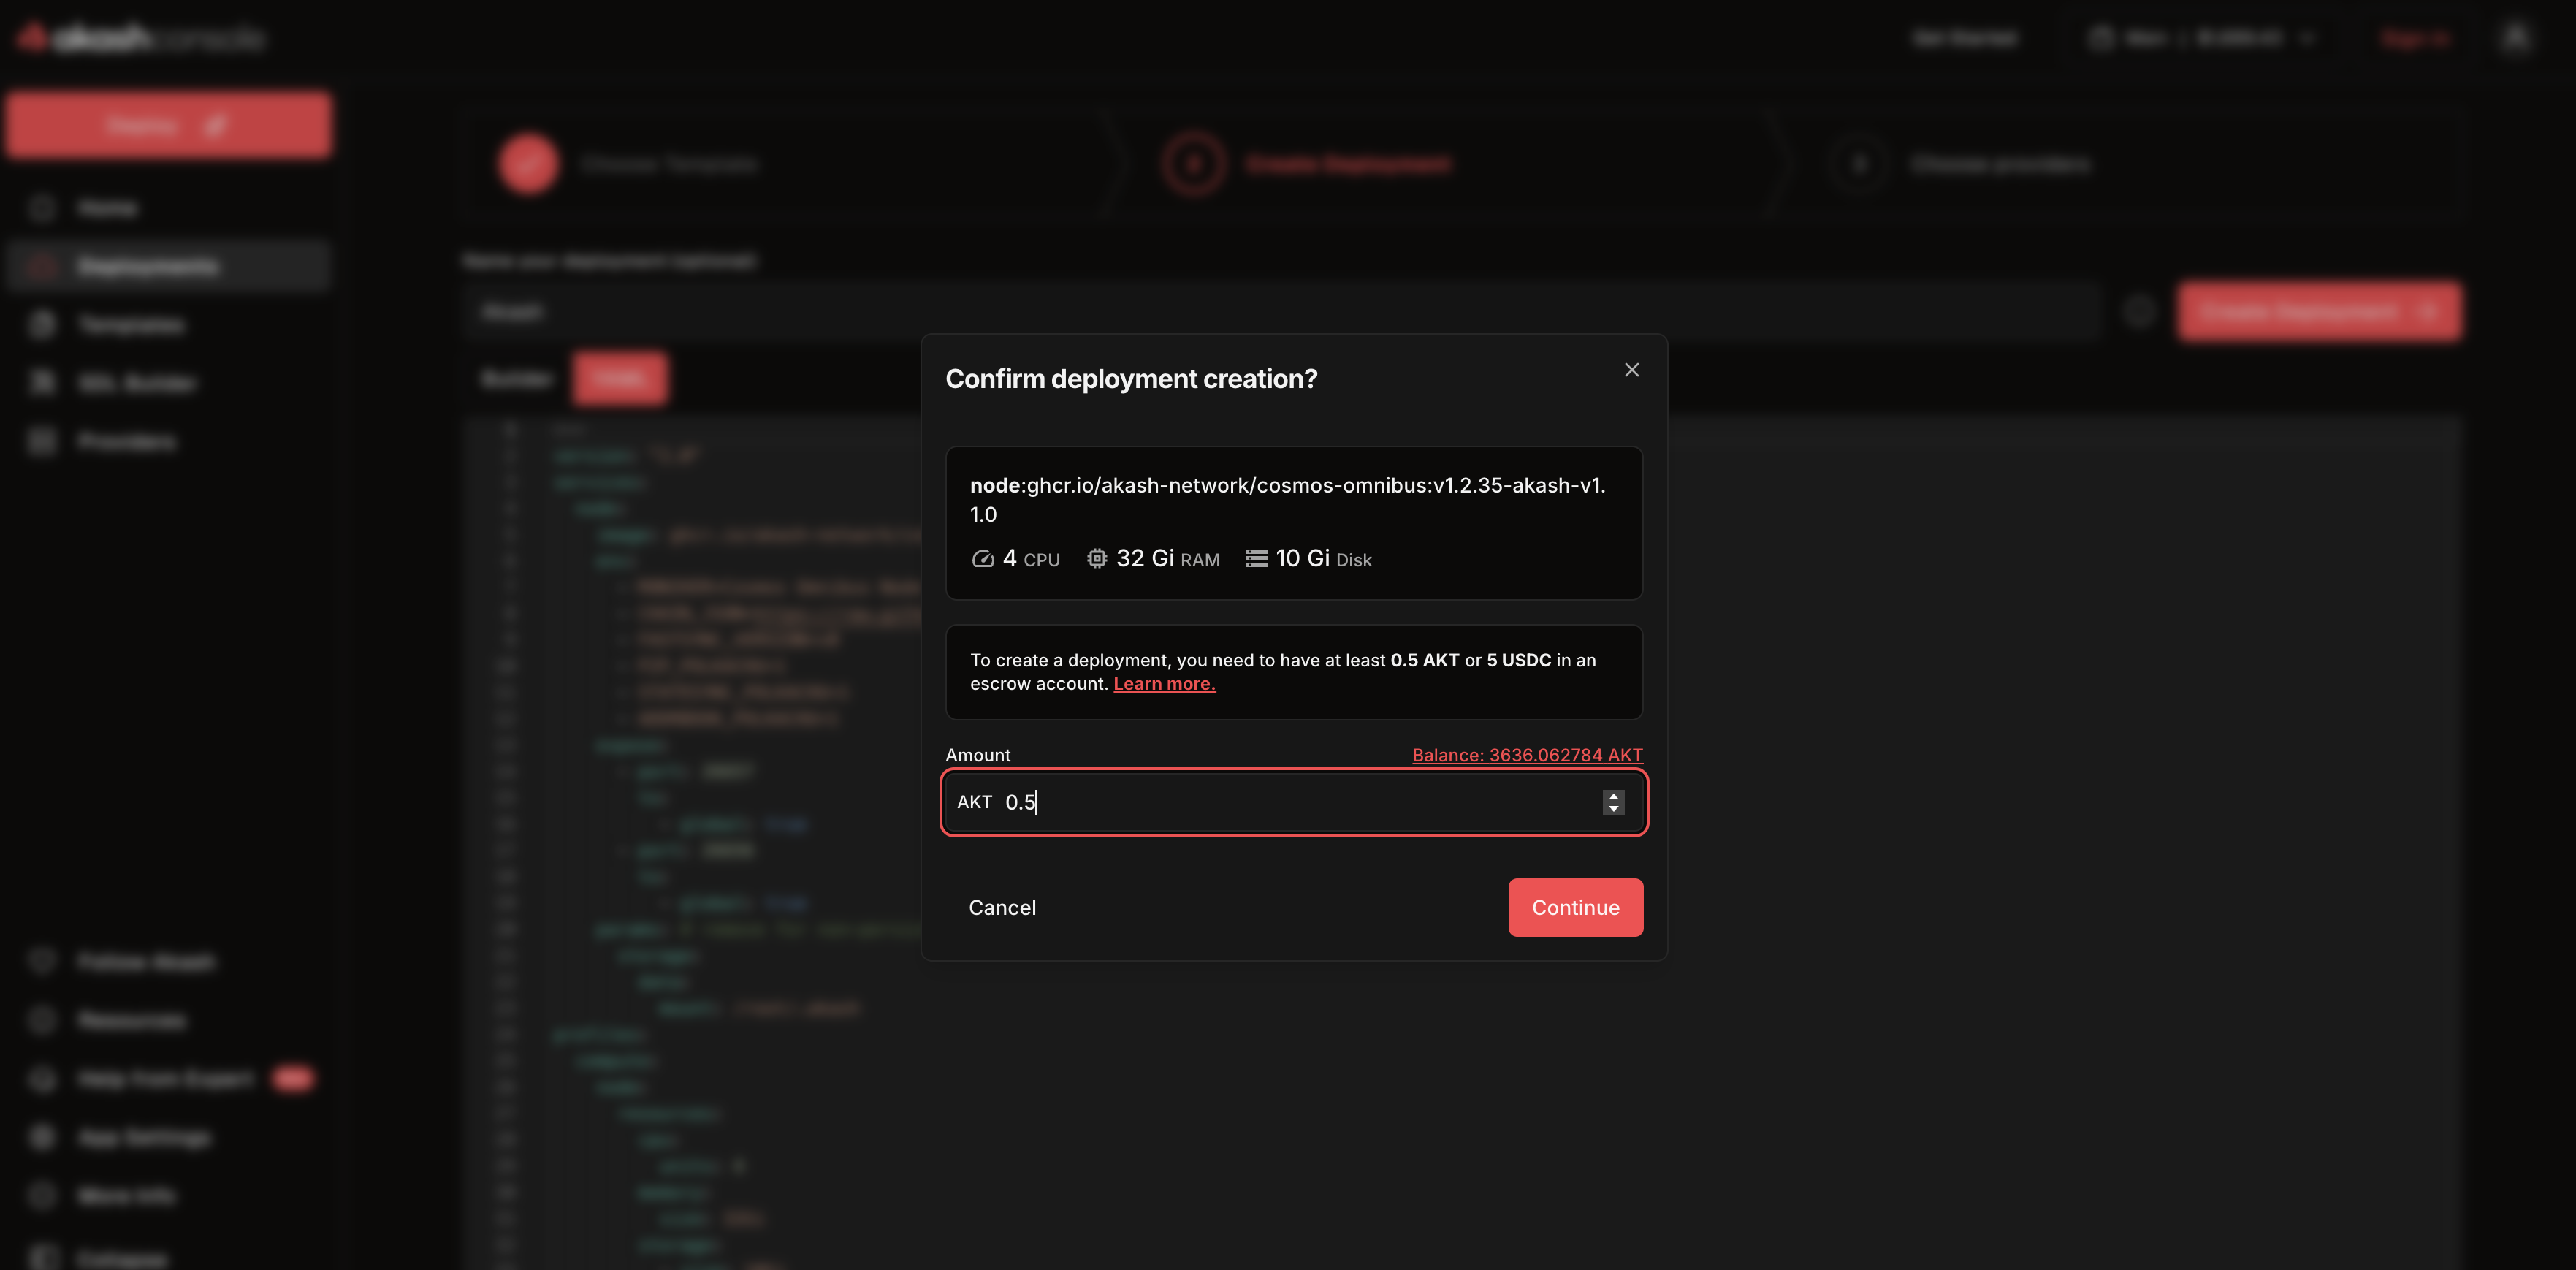 Set your deposit amount (ACT) - held in escrow and refunded when you close
- Approve Transaction in Wallet
Your wallet (Keplr/Leap) will popup requesting approval:
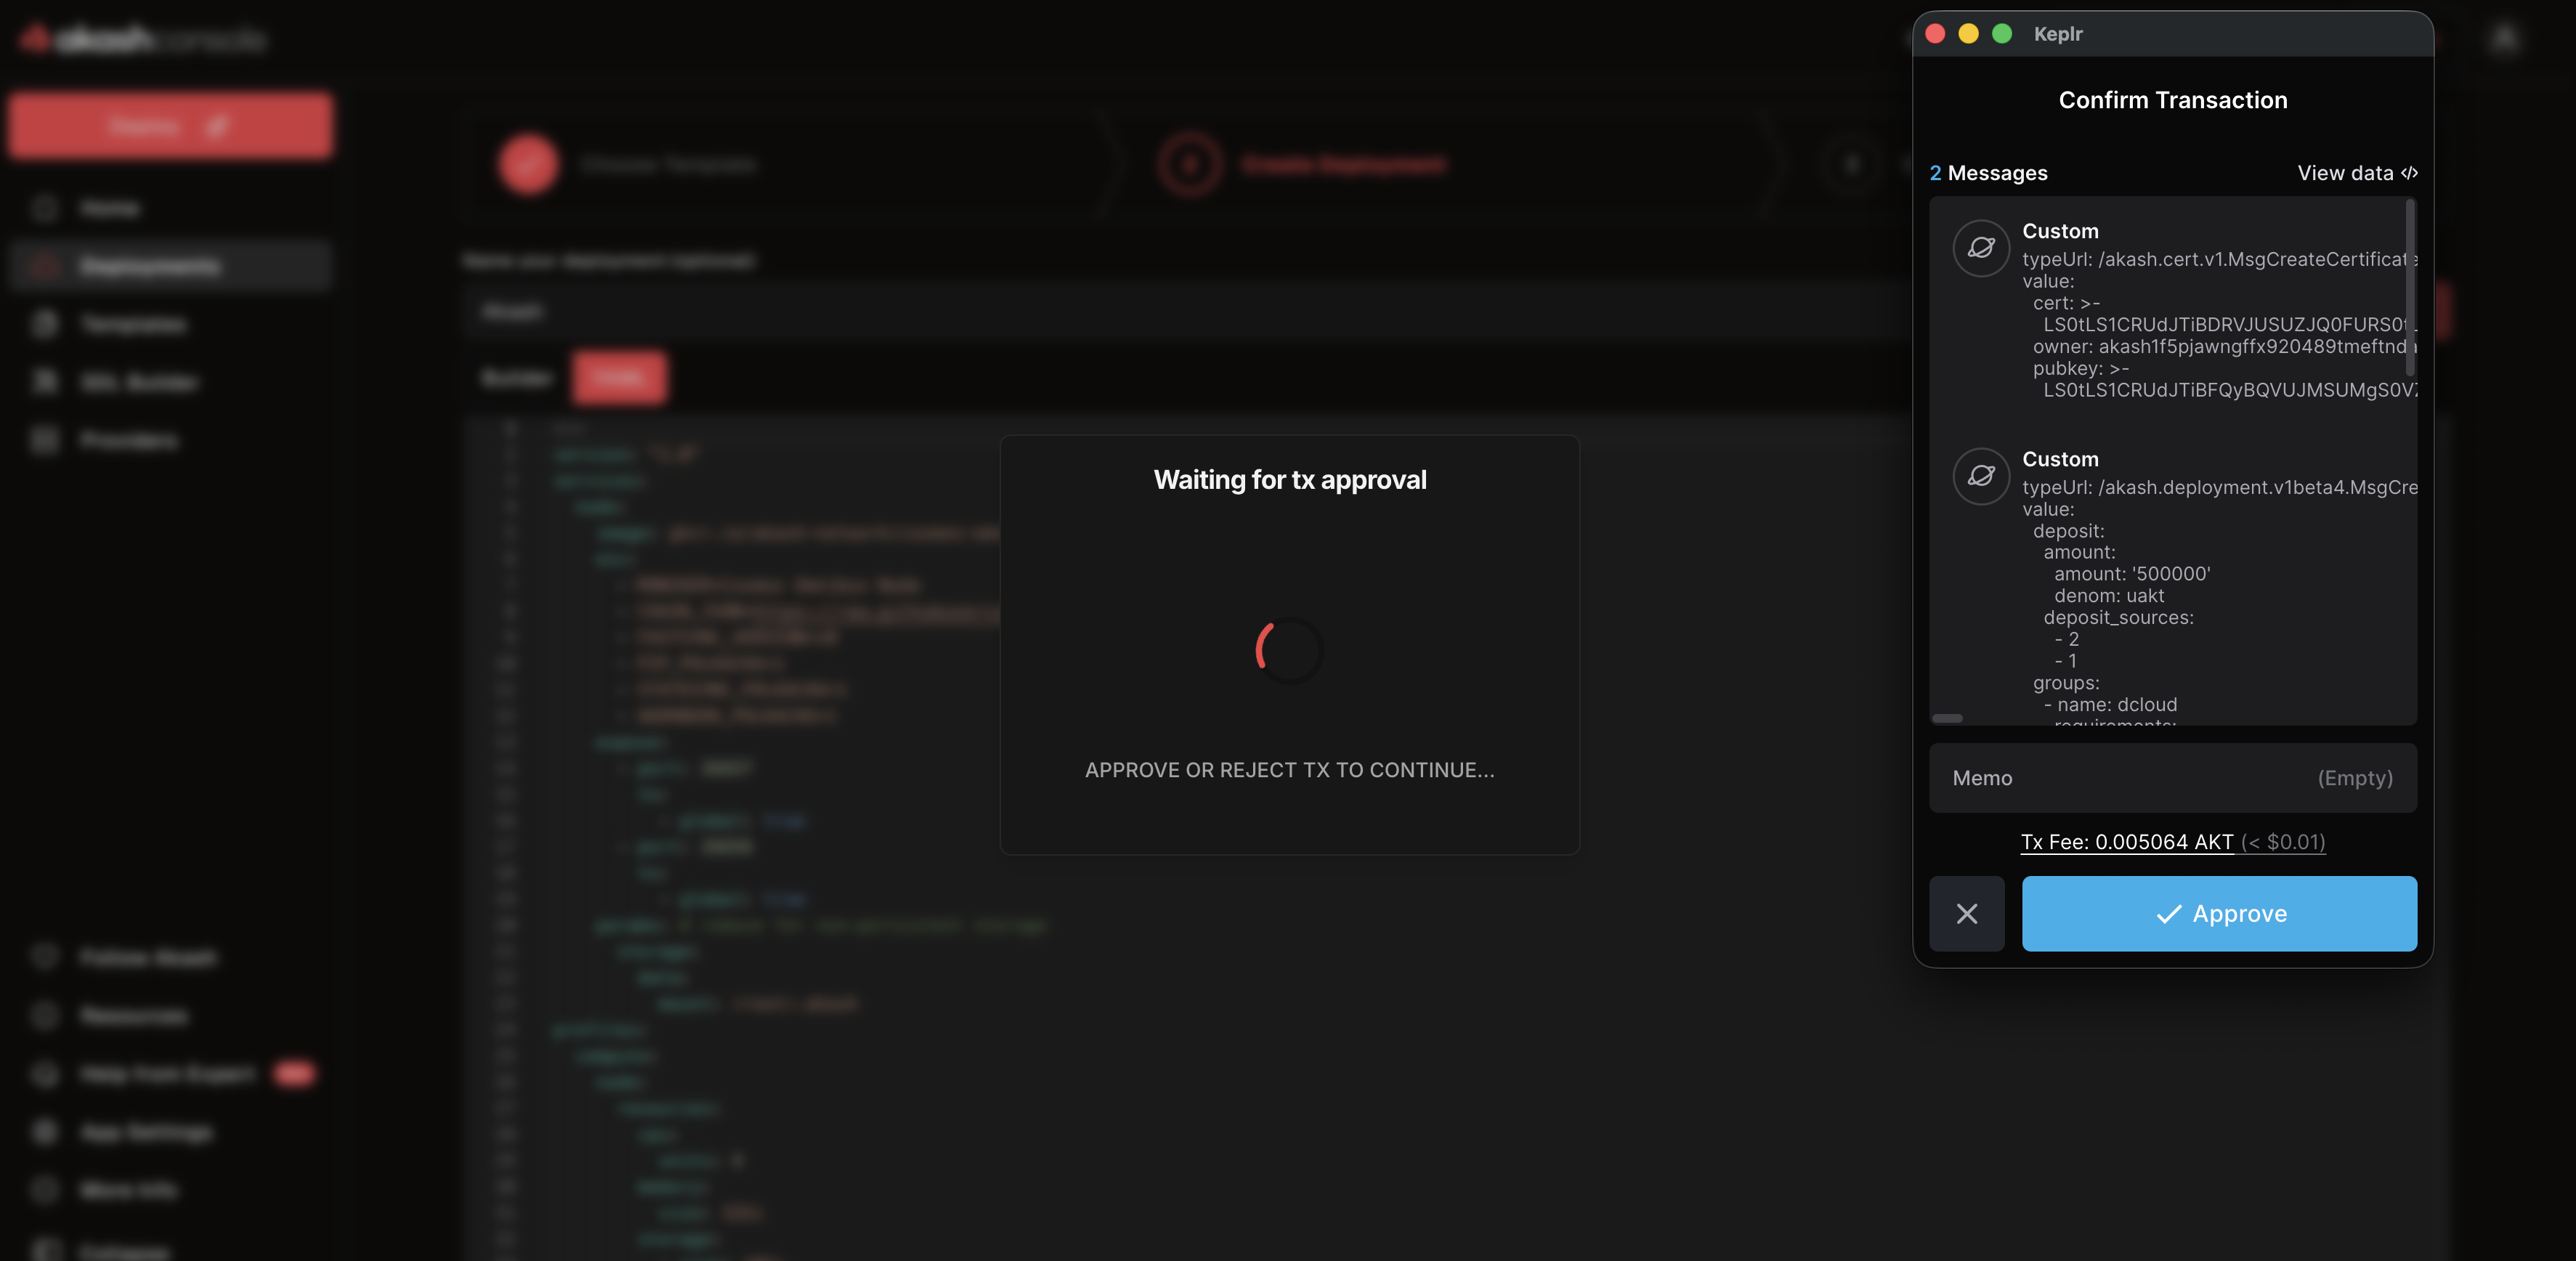 Approve the deployment creation transaction in your wallet
Review the transaction details:
- Deposit amount
- Gas fee (usually < 0.1 AKT)
- Total cost
Click “Approve”
Wait ~30 seconds for blockchain confirmation
**Deployment created! Now waiting for provider bids…
Step 6: Accept a Provider Bid
After creating your deployment, providers will bid to host it:
- View Bids - Click “View Bids” button (wait 30-60 seconds for providers to respond)
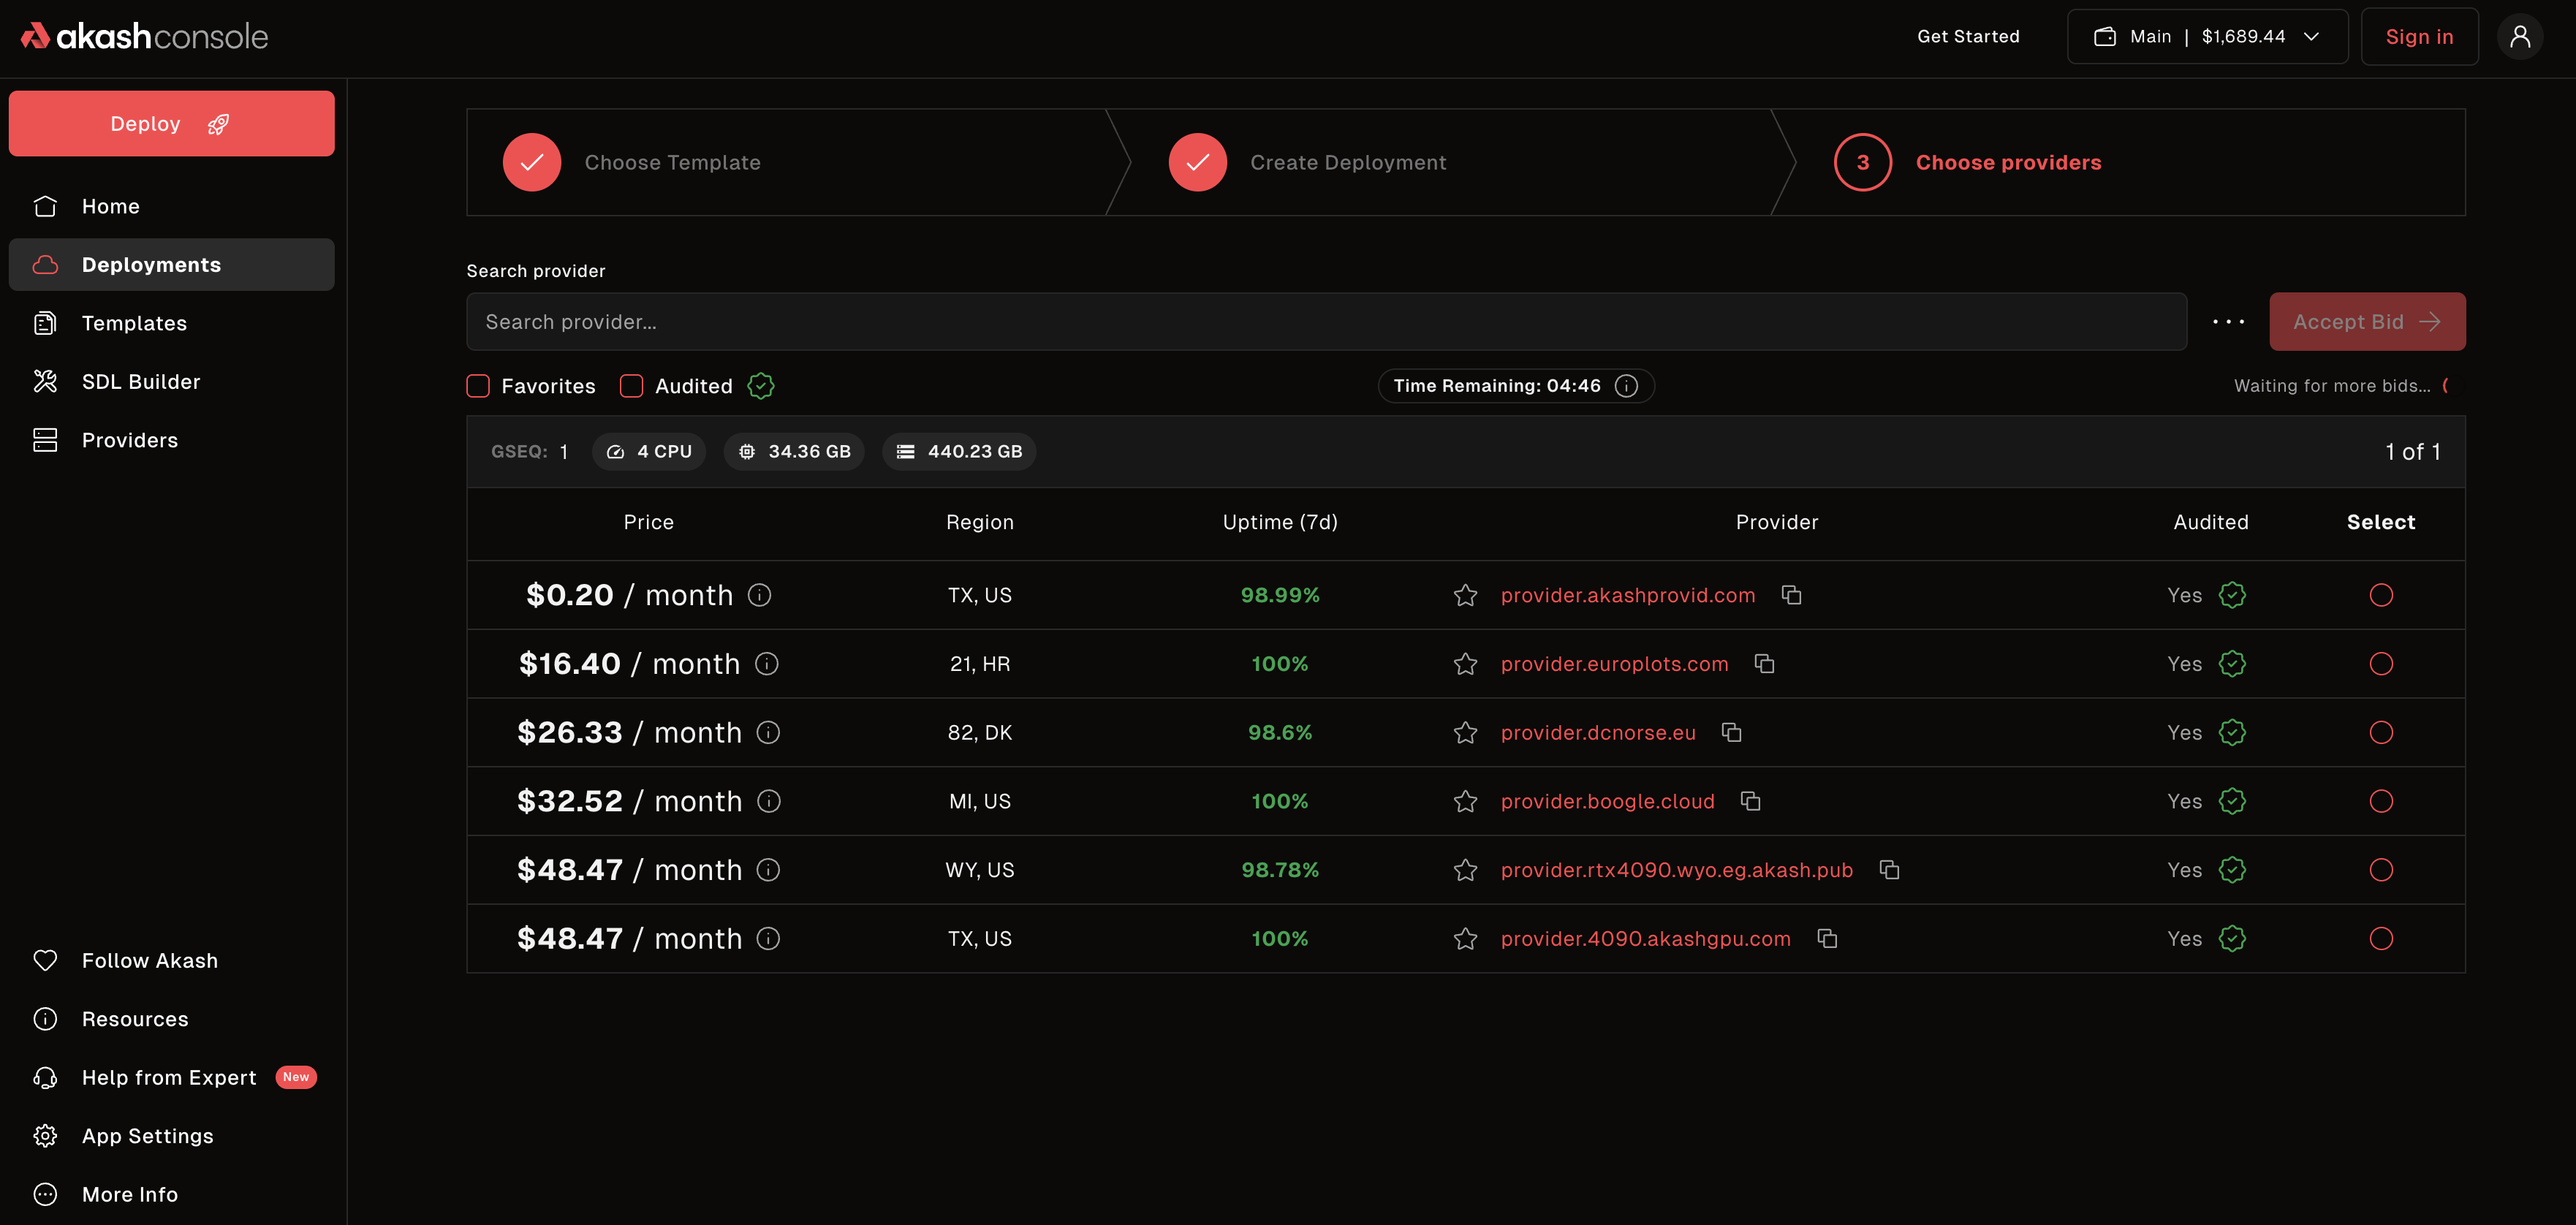 Review and compare provider bids - choose based on price, location, and attributes
-
Review Bids - You’ll see:
- Provider name and reputation
- Price per month
- Location and attributes
- Available resources
-
Select a Provider
- Sorted by price (lowest first)
- Check attributes and location
- For testing, lowest price is fine
-
Accept Bid
- Click “Accept” on your chosen provider
- Approve the lease transaction in your wallet
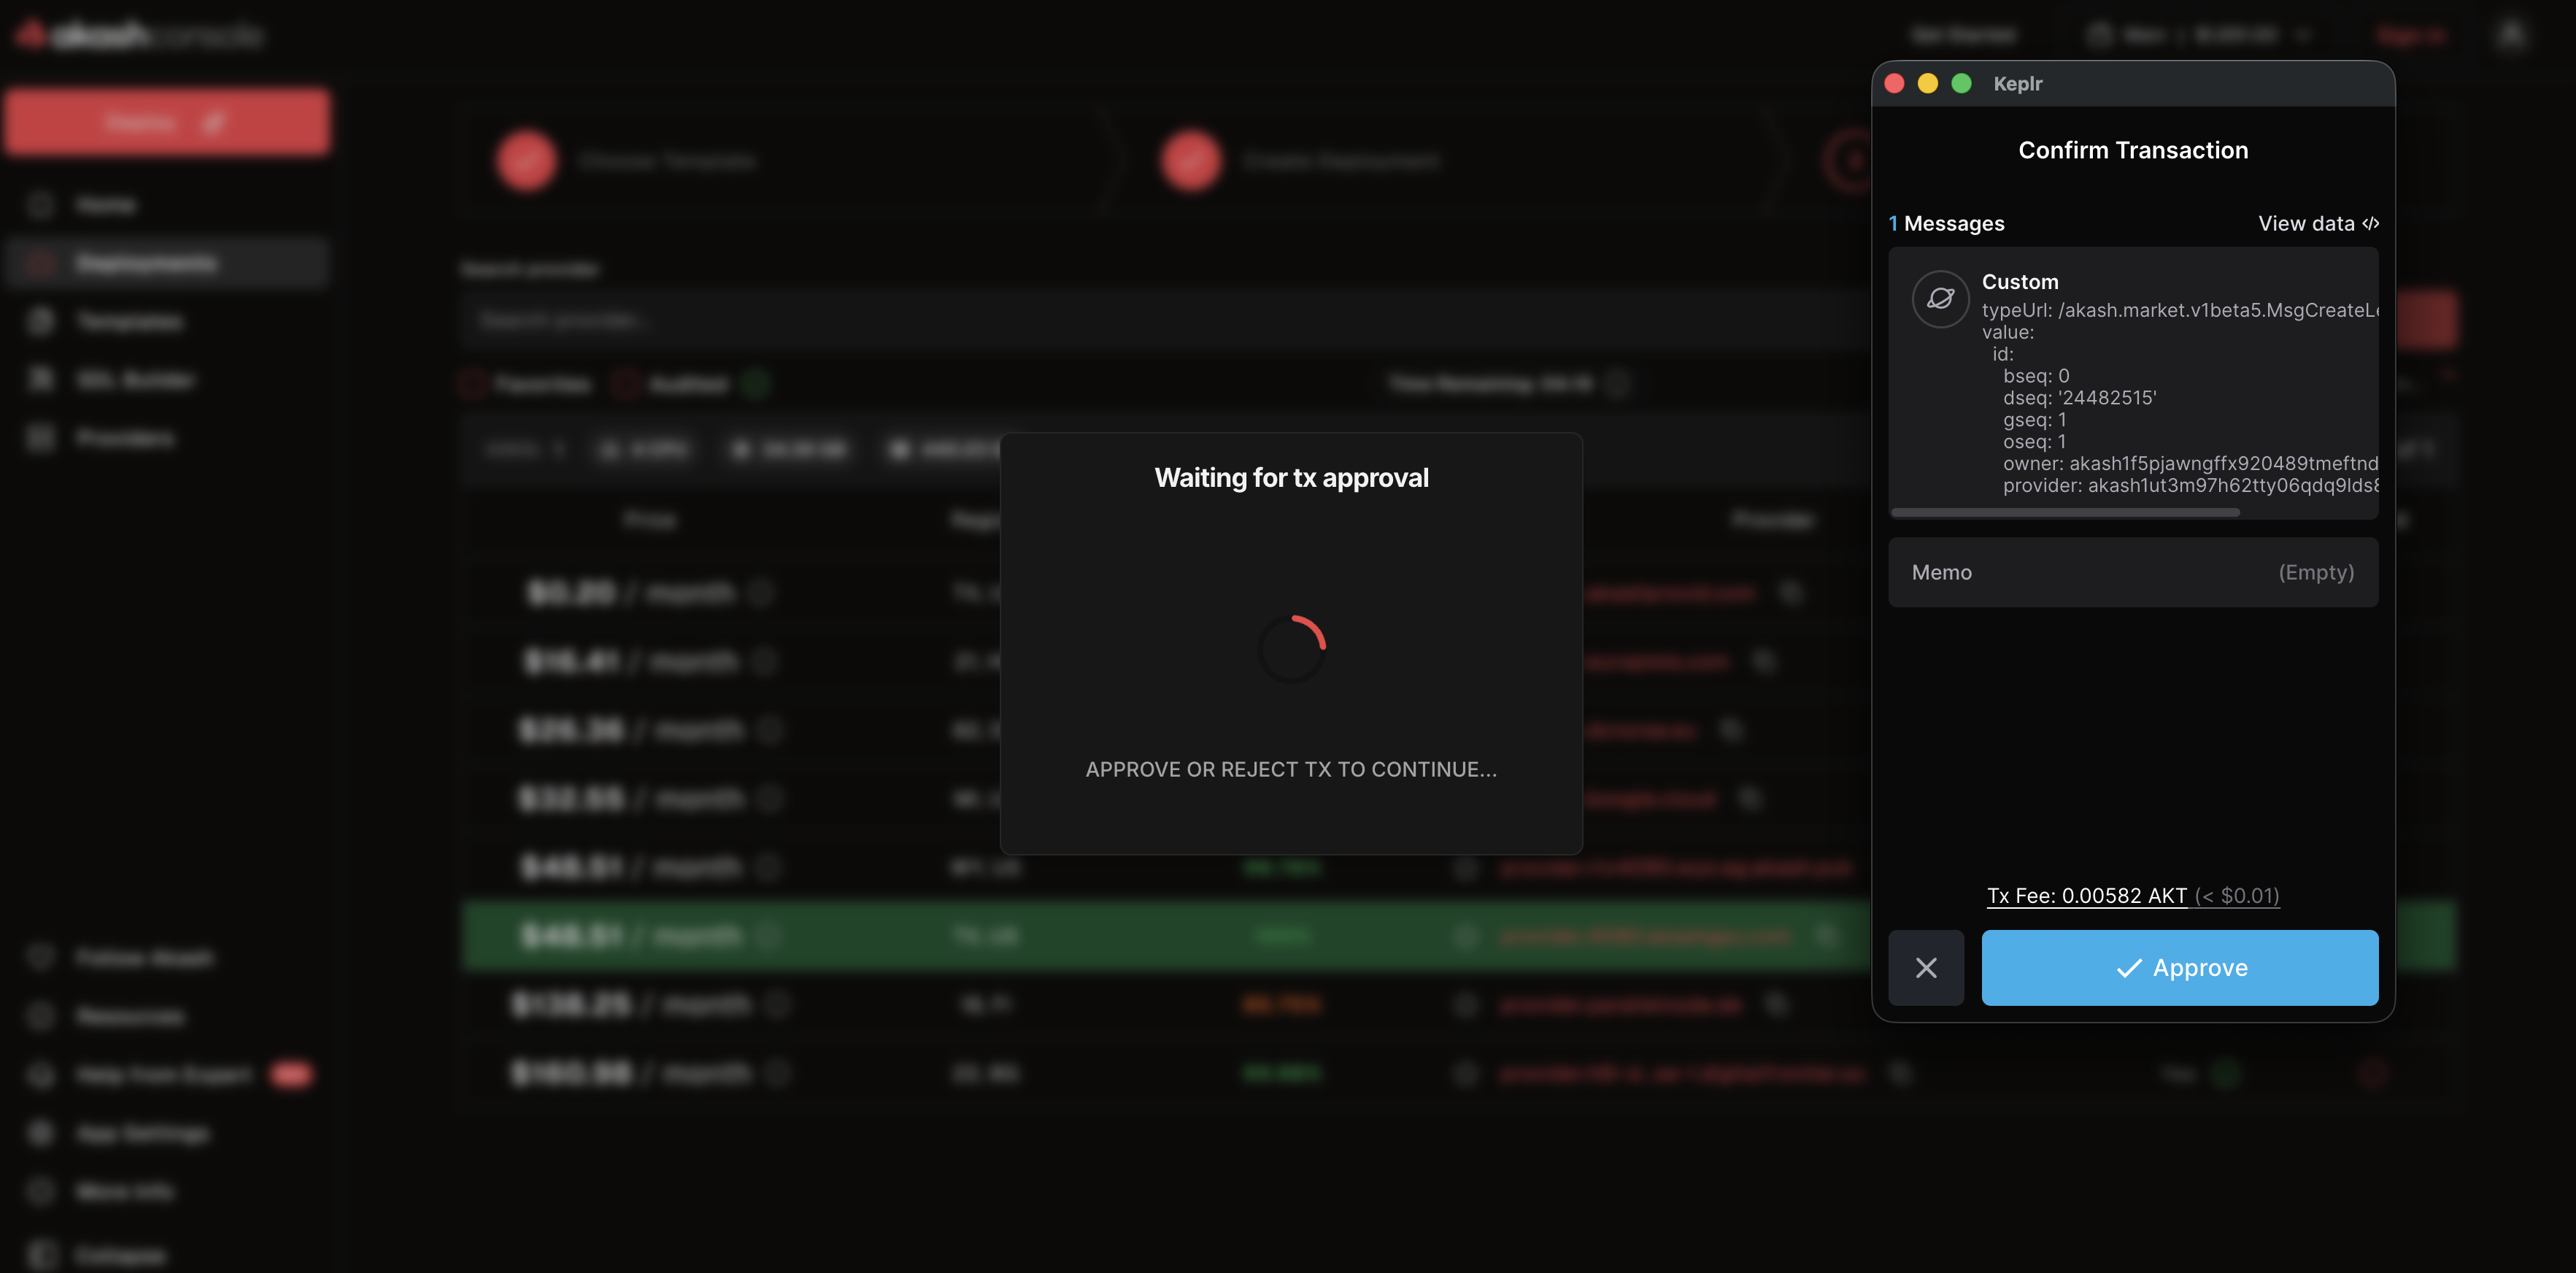 Approve the lease creation transaction to accept the provider’s bid
Wait ~20 seconds for lease creation and manifest to be sent
Step 7: Send Manifest
Once the lease is created:
- Console automatically sends your manifest to the provider (no wallet approval needed)
Wait 30-60 seconds for your container to start
Status will change:
- “Manifest Received”
- “Starting Services…”
- “Active”
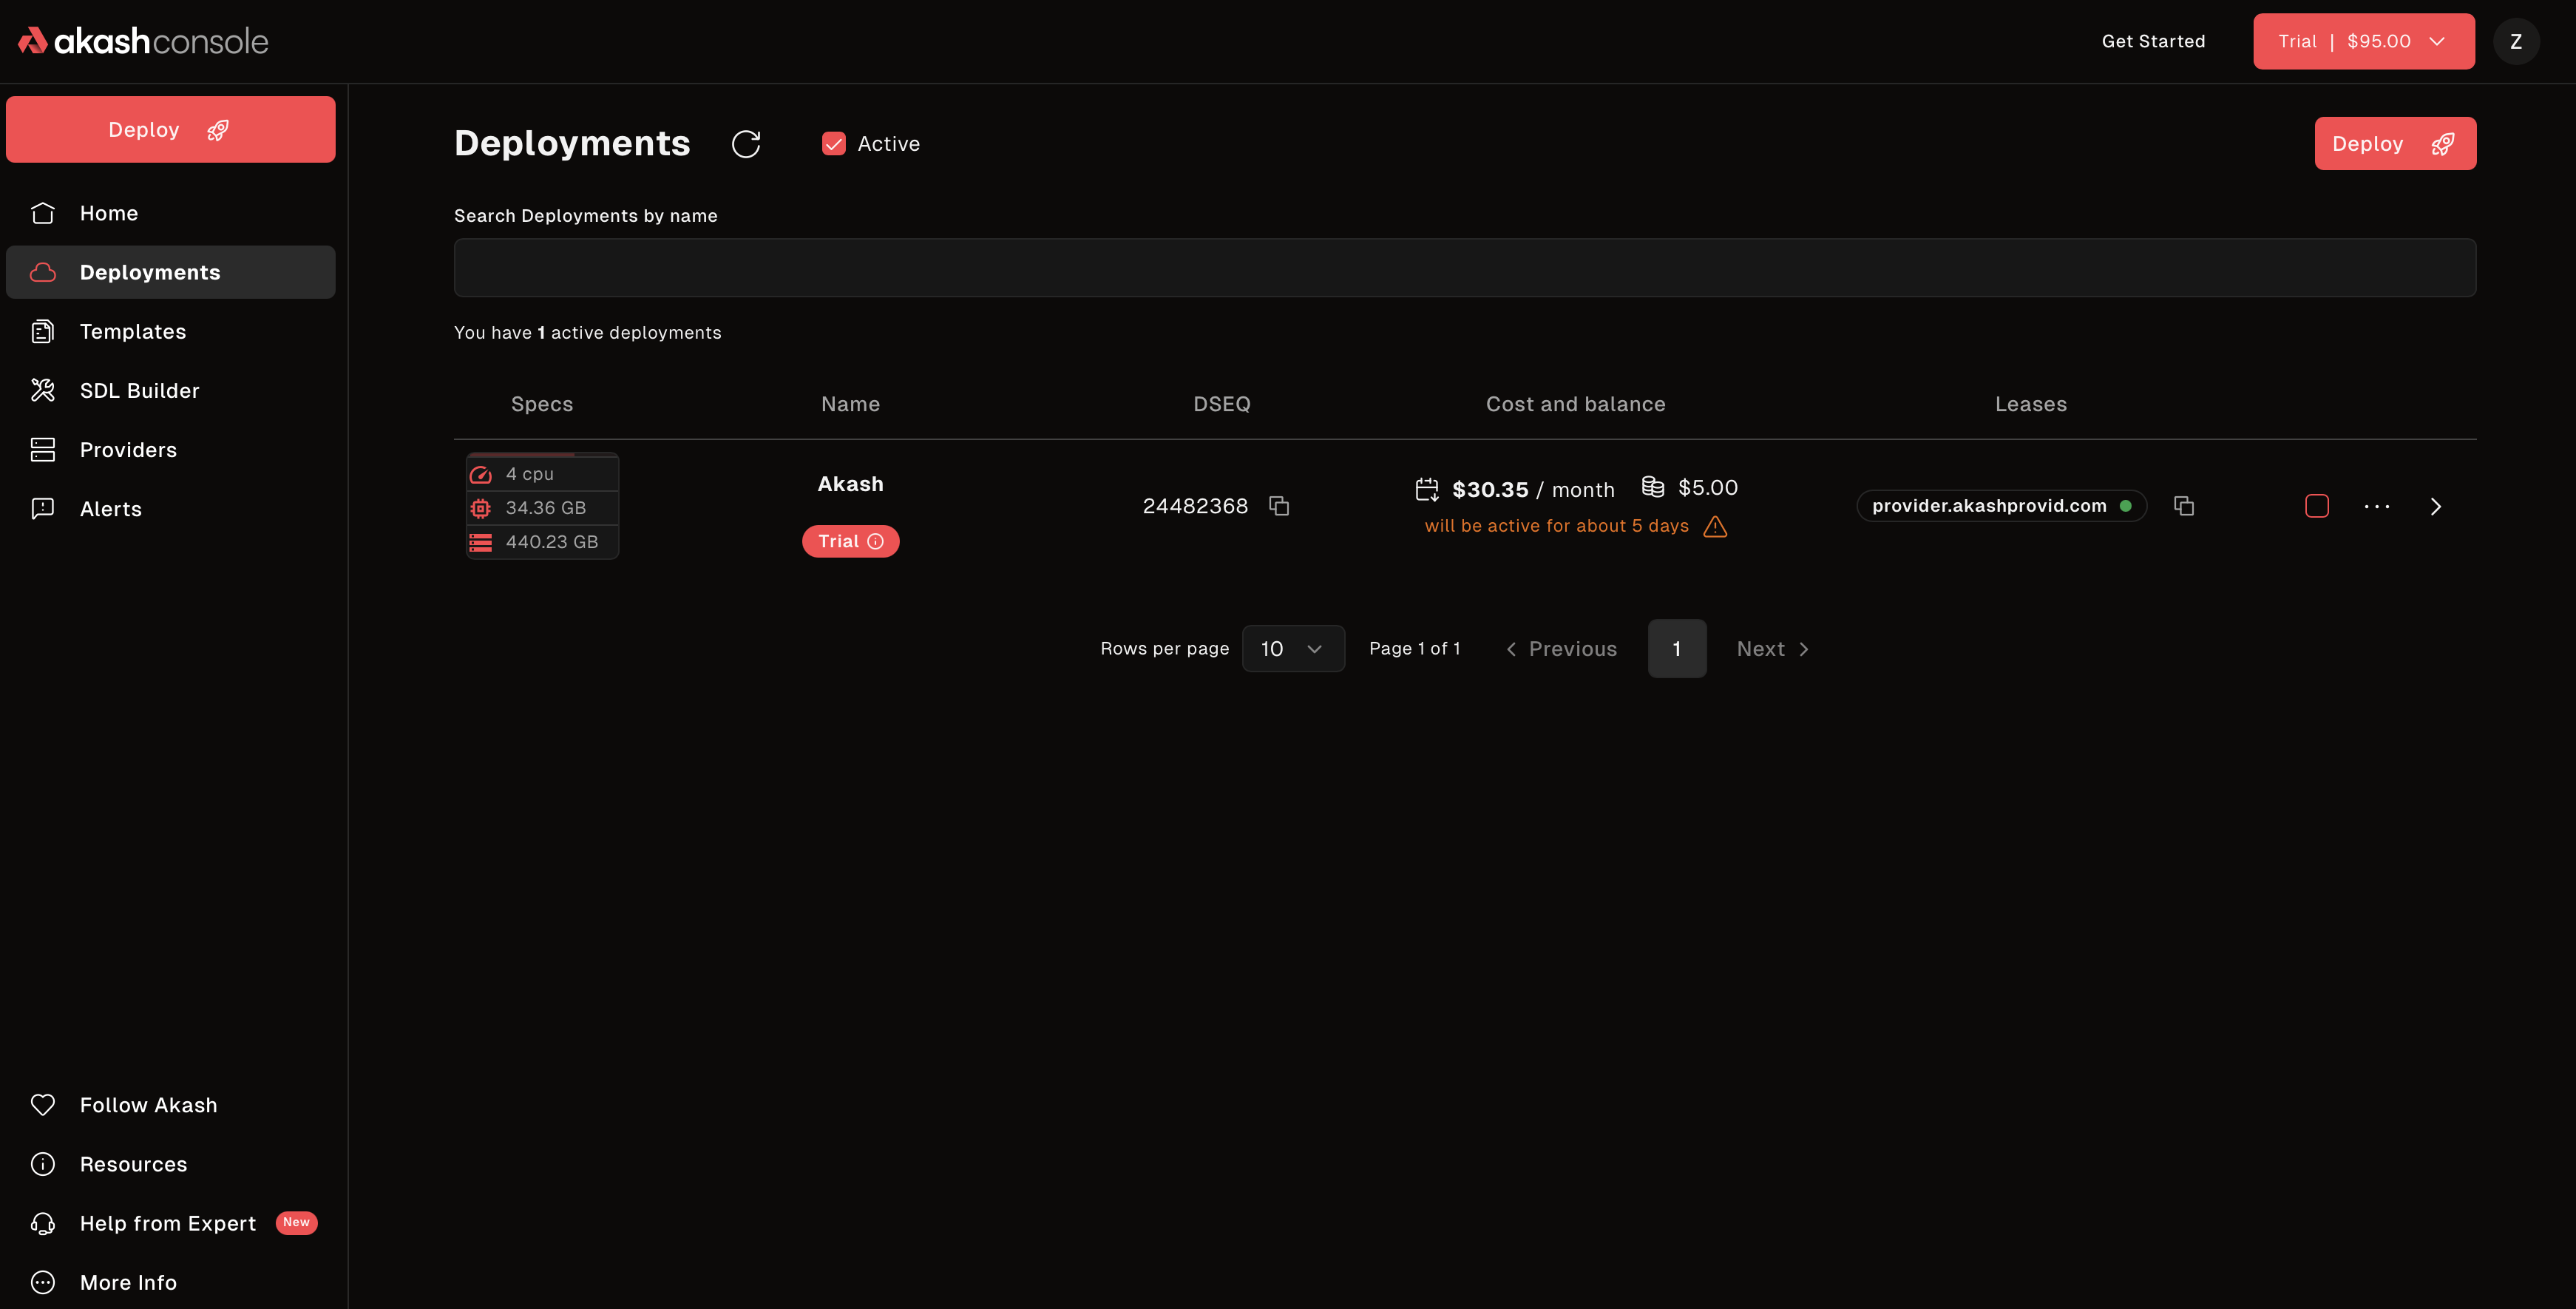
Step 8: Access Your Deployment
Once status shows “Active” or “Running”:
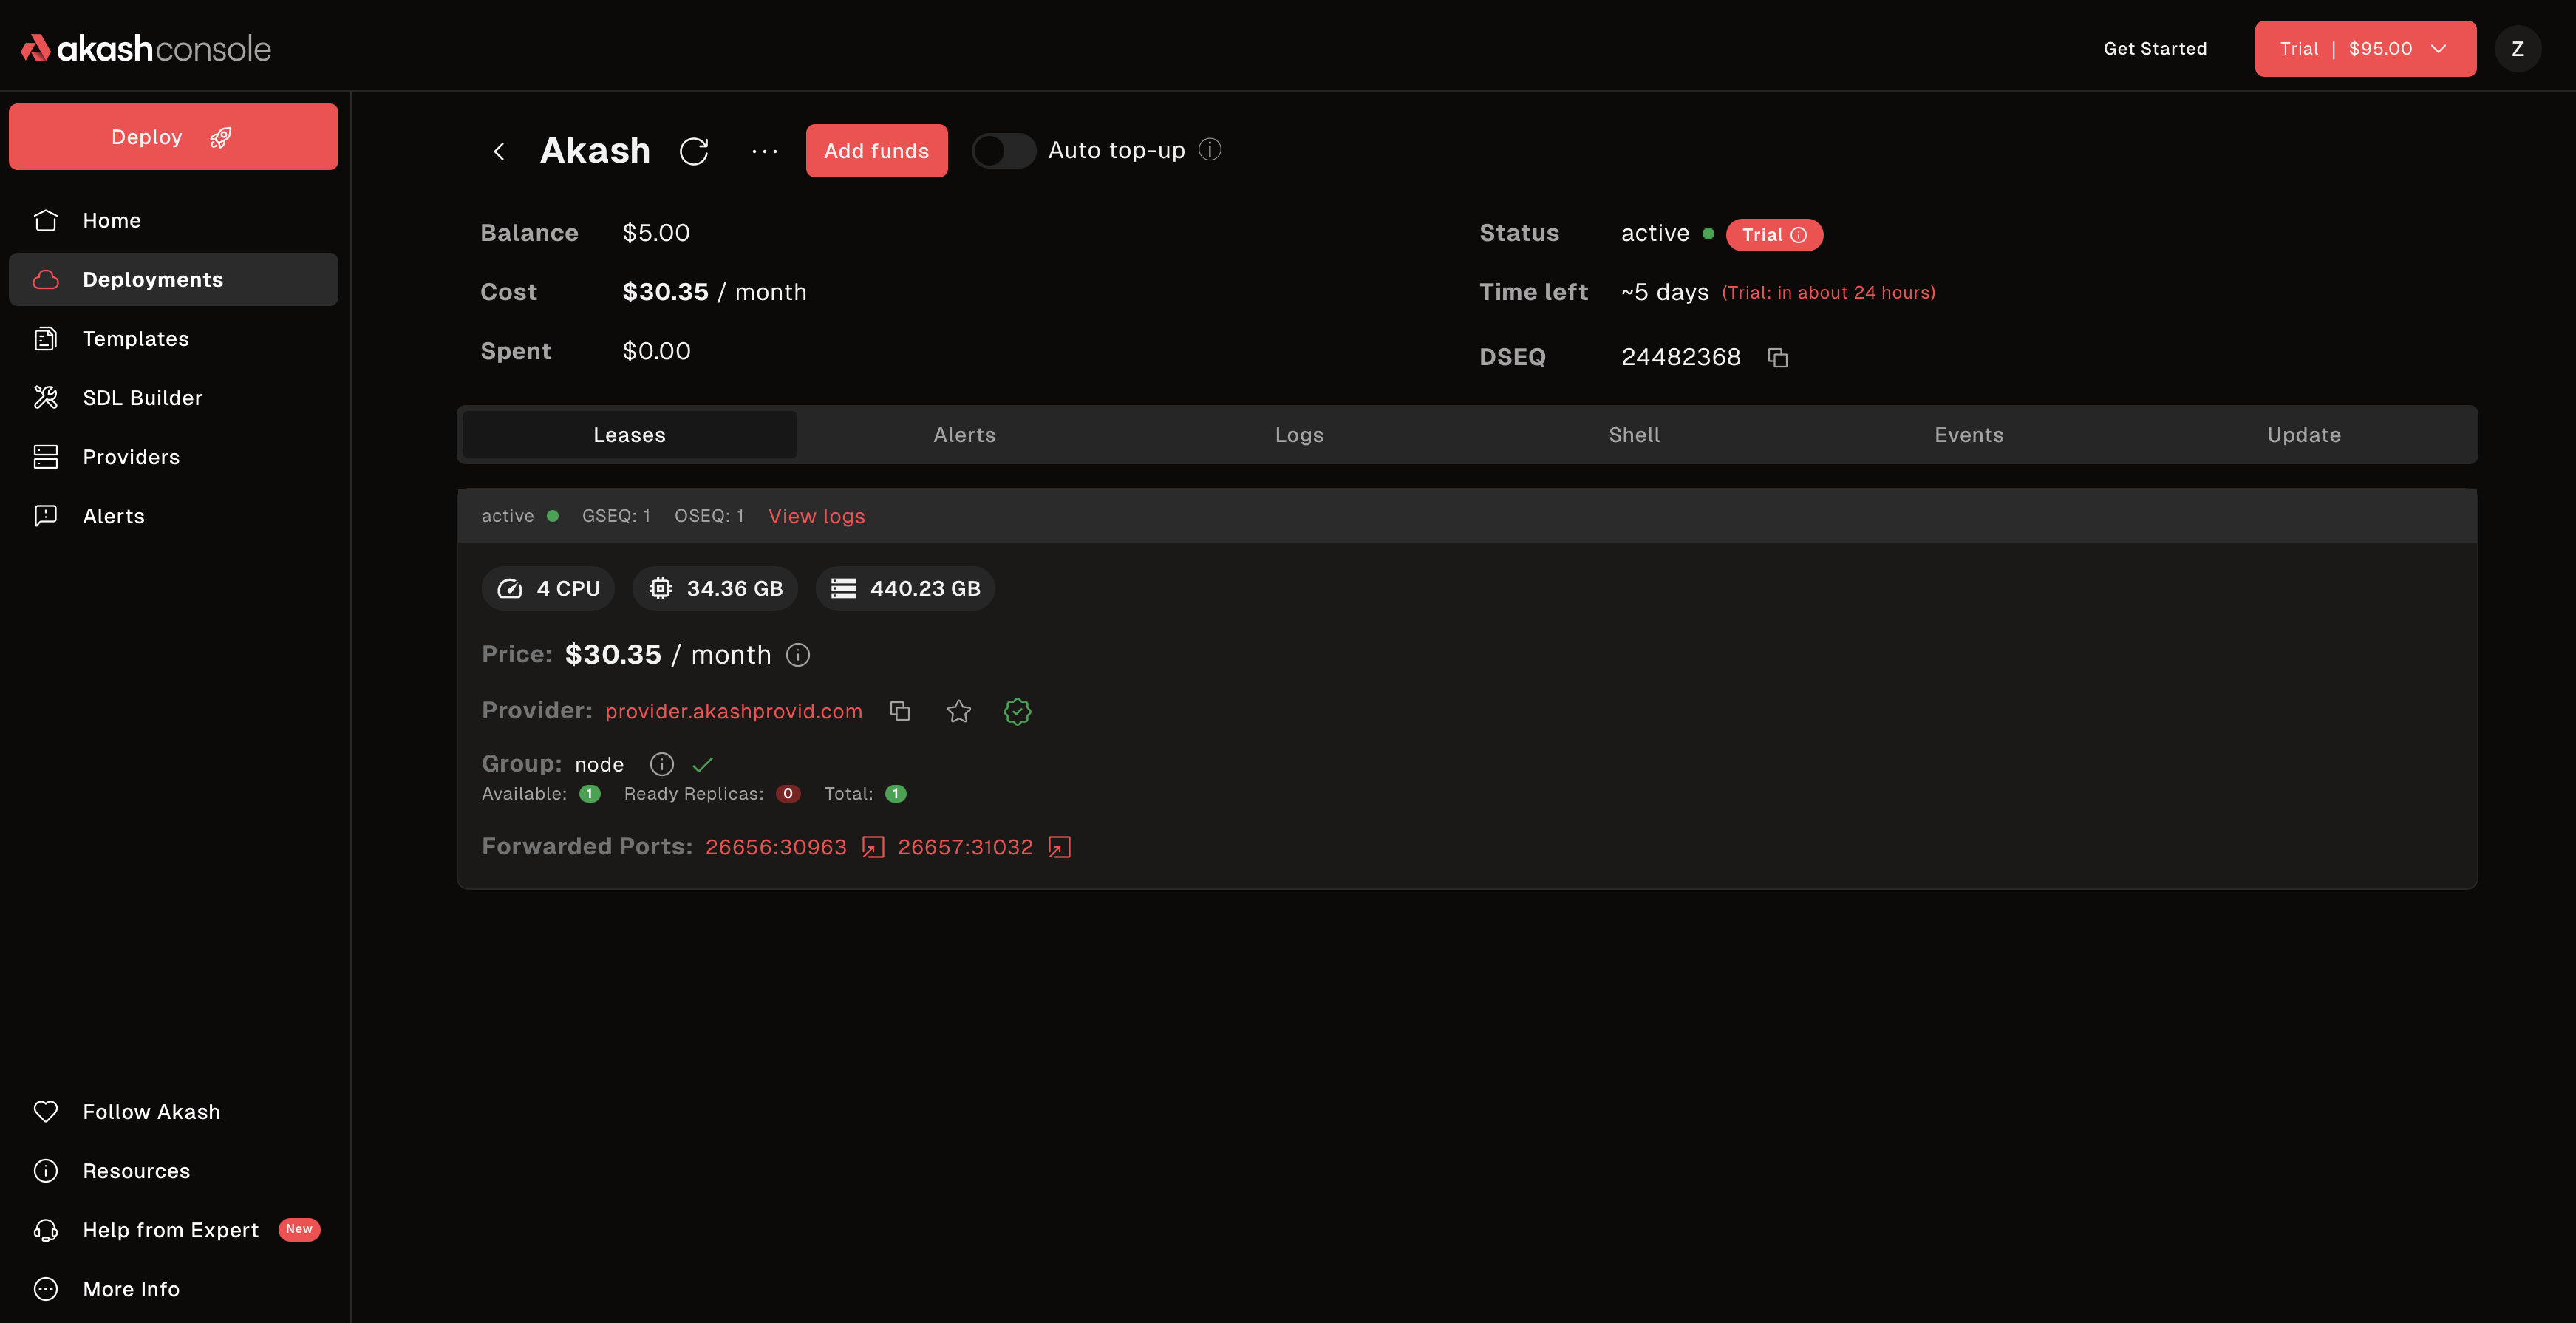 Your deployment is live with URLs and management controls
You’ll see:
- Live URLs - Access your application
- Status - Real-time deployment state
- Cost Tracking - Current spending and escrow balance
- Management Controls - Logs, update, close
** Congratulations! Your app is live on Akash!**
Managing Your Deployment
View Logs
Monitor your application’s output in real-time:
- Click on your deployment
- Select the “Logs” tab
- View real-time container logs
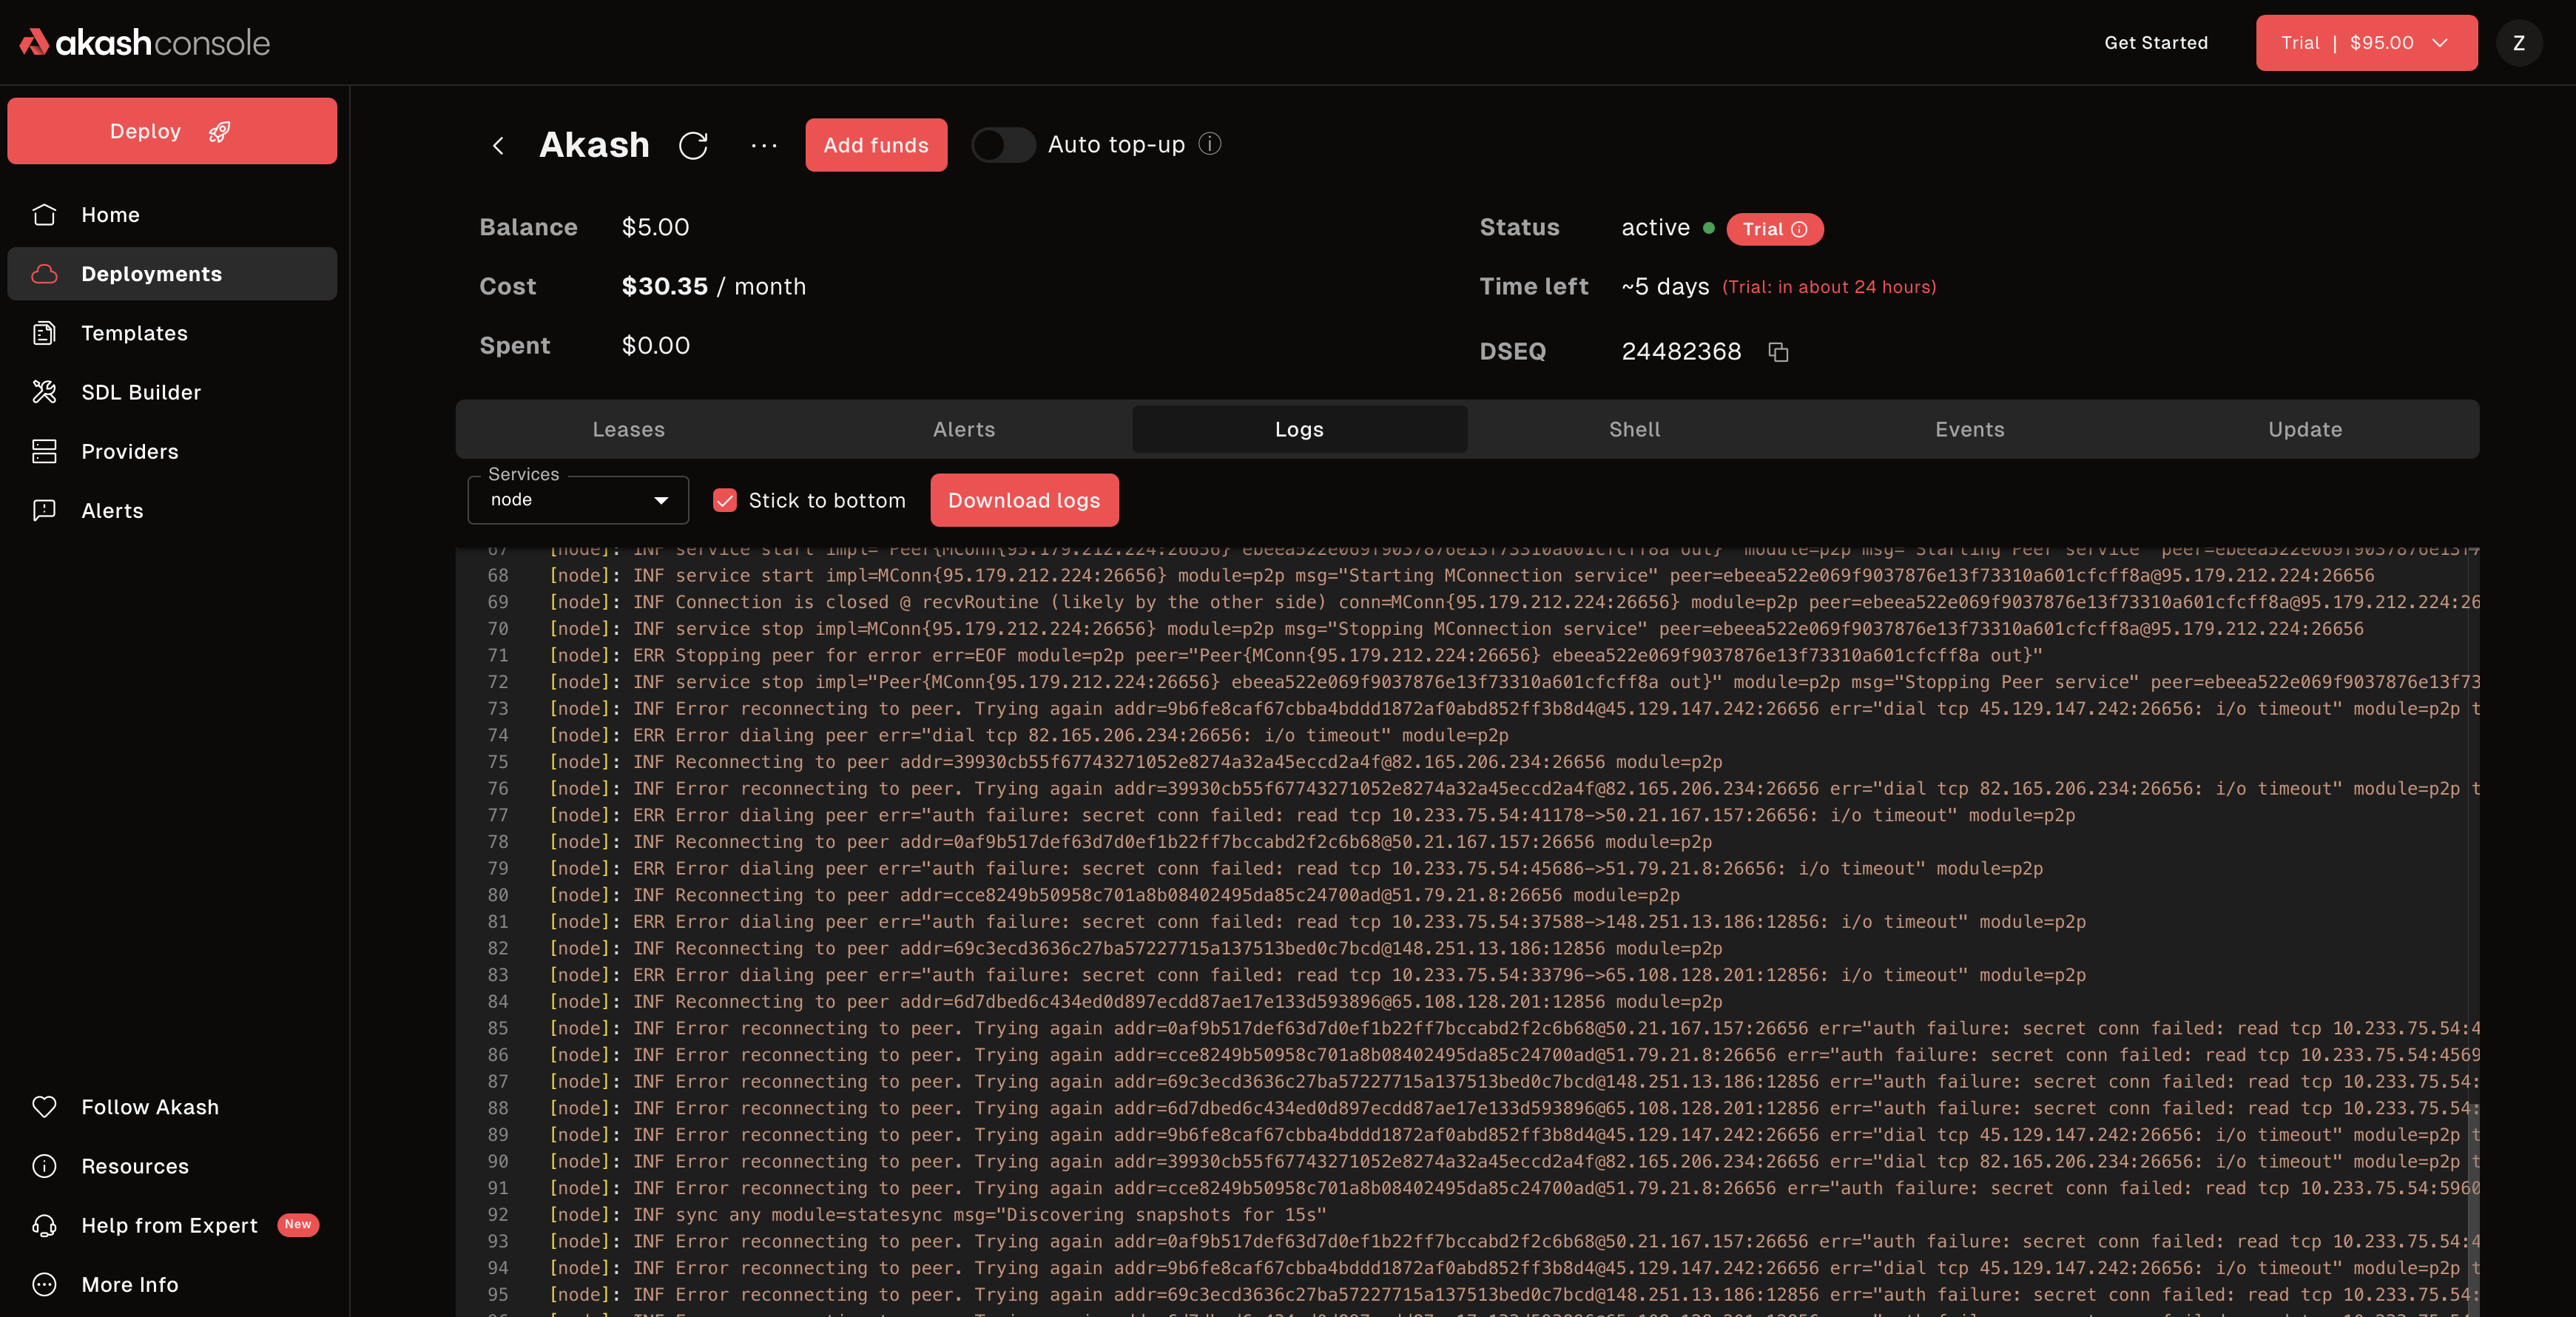 View real-time logs from your running containers
Tip: Logs are essential for debugging!
Monitor Events and Shell Access
Access deployment events and shell terminal:
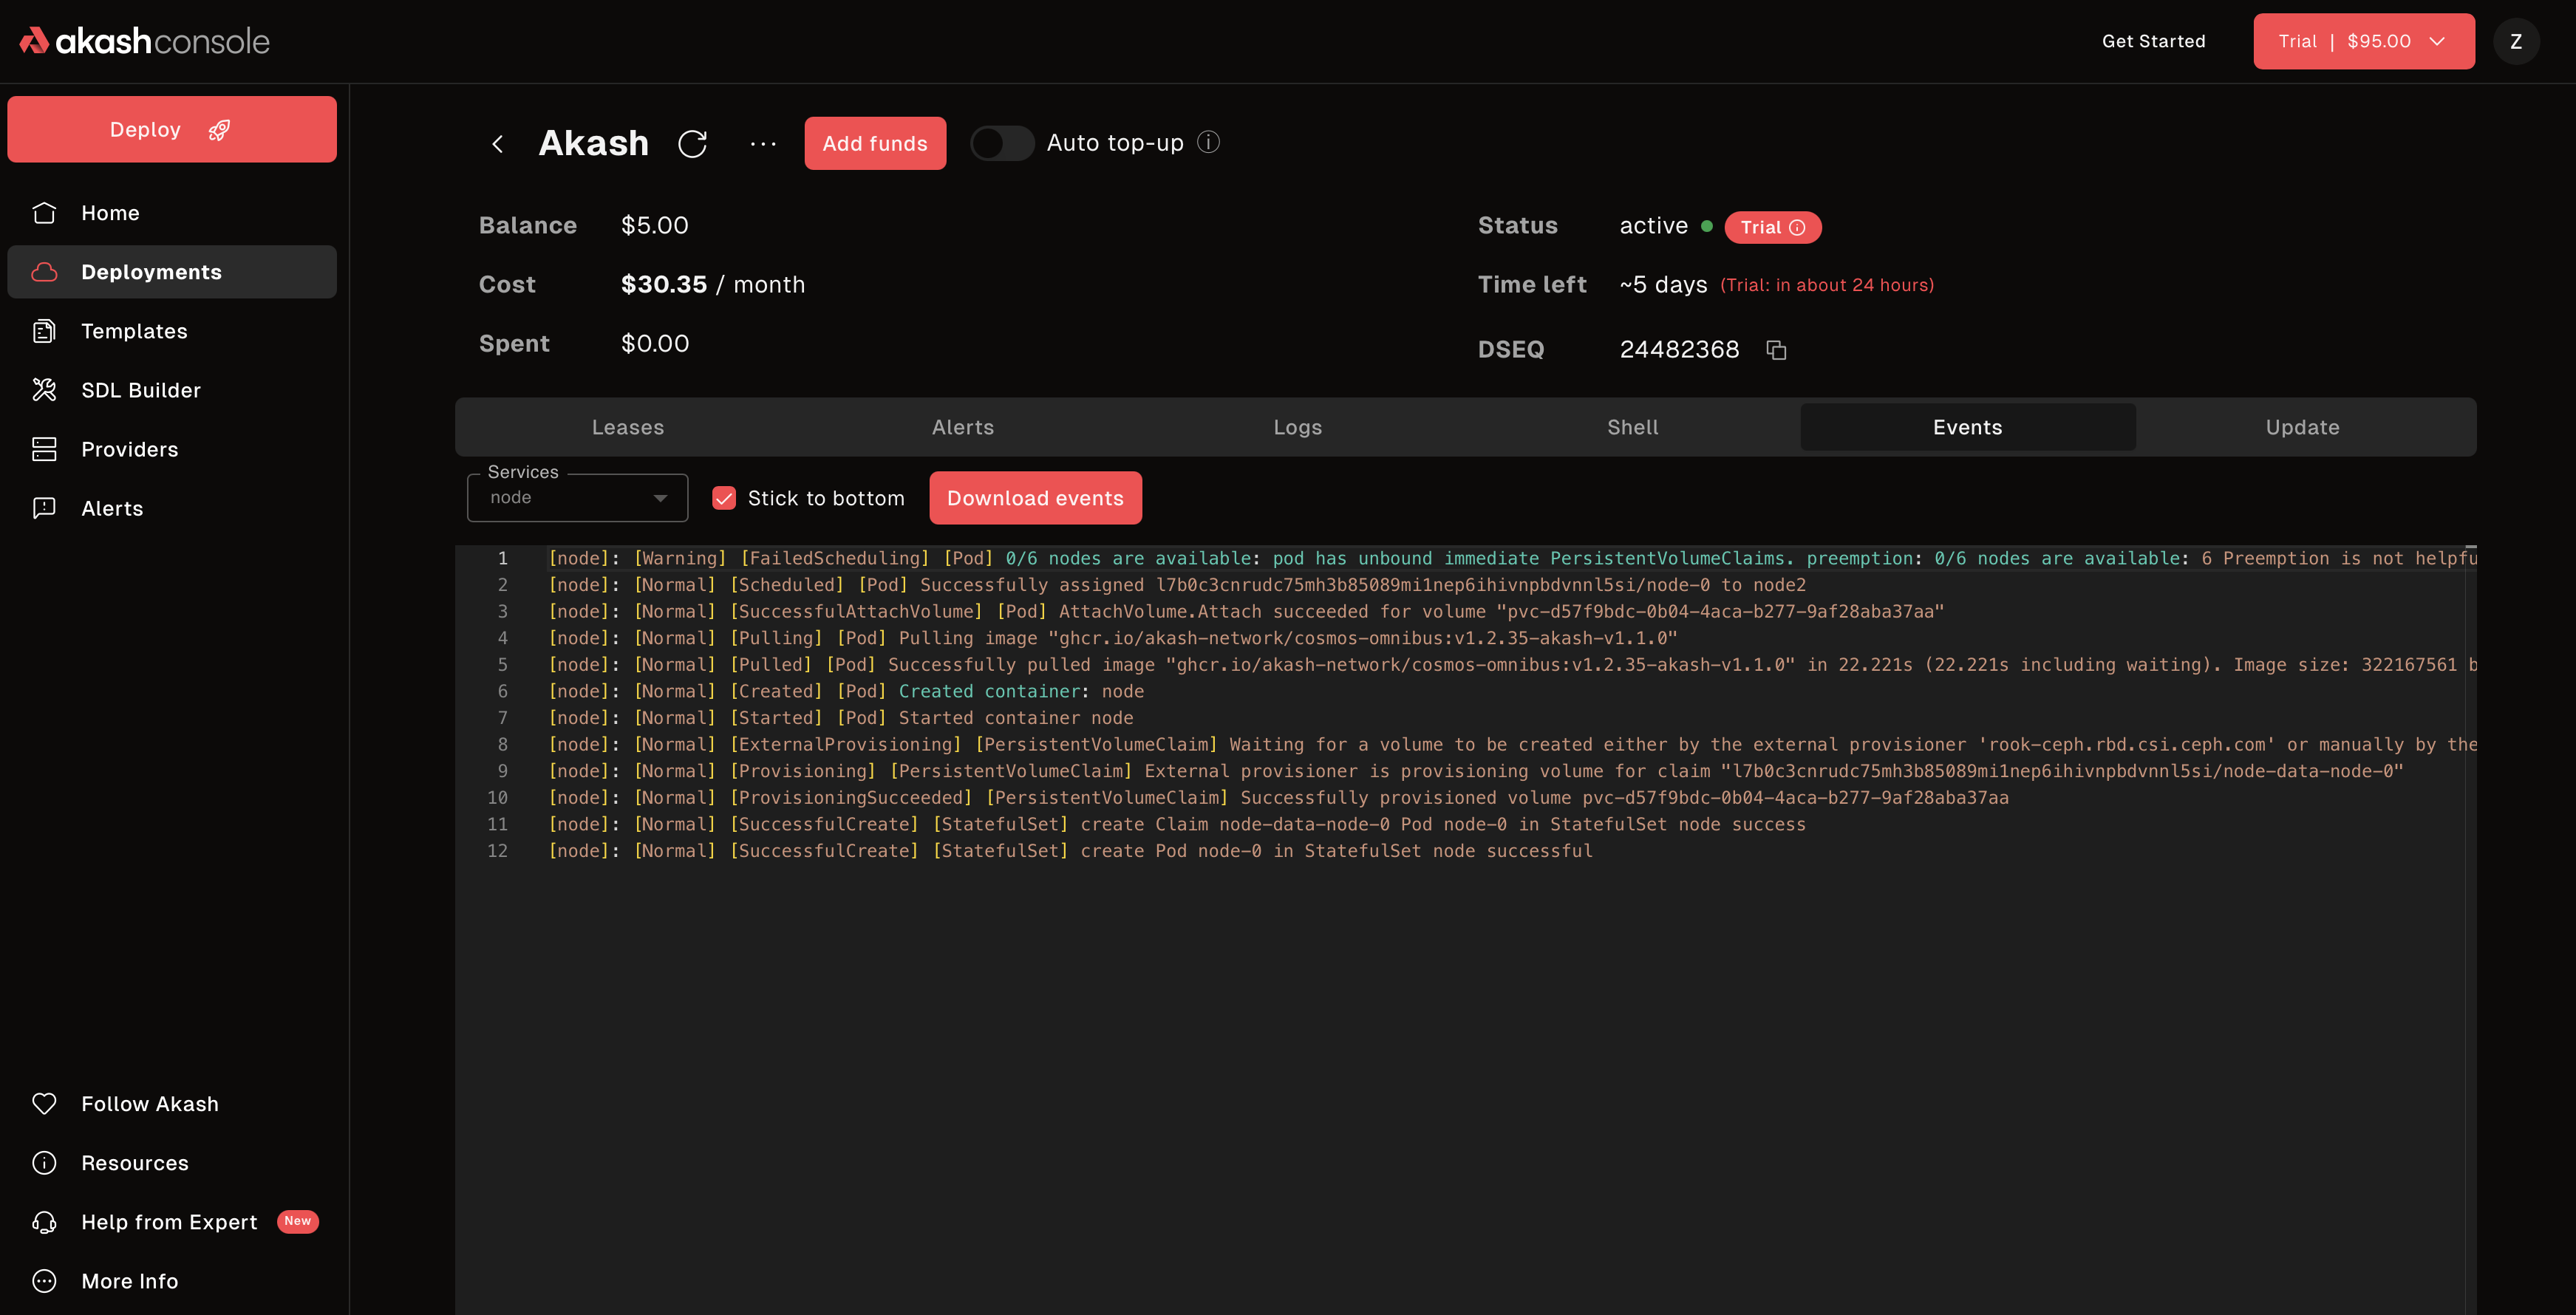 View deployment events and access shell terminal
Update Deployment
Modify your running deployment:
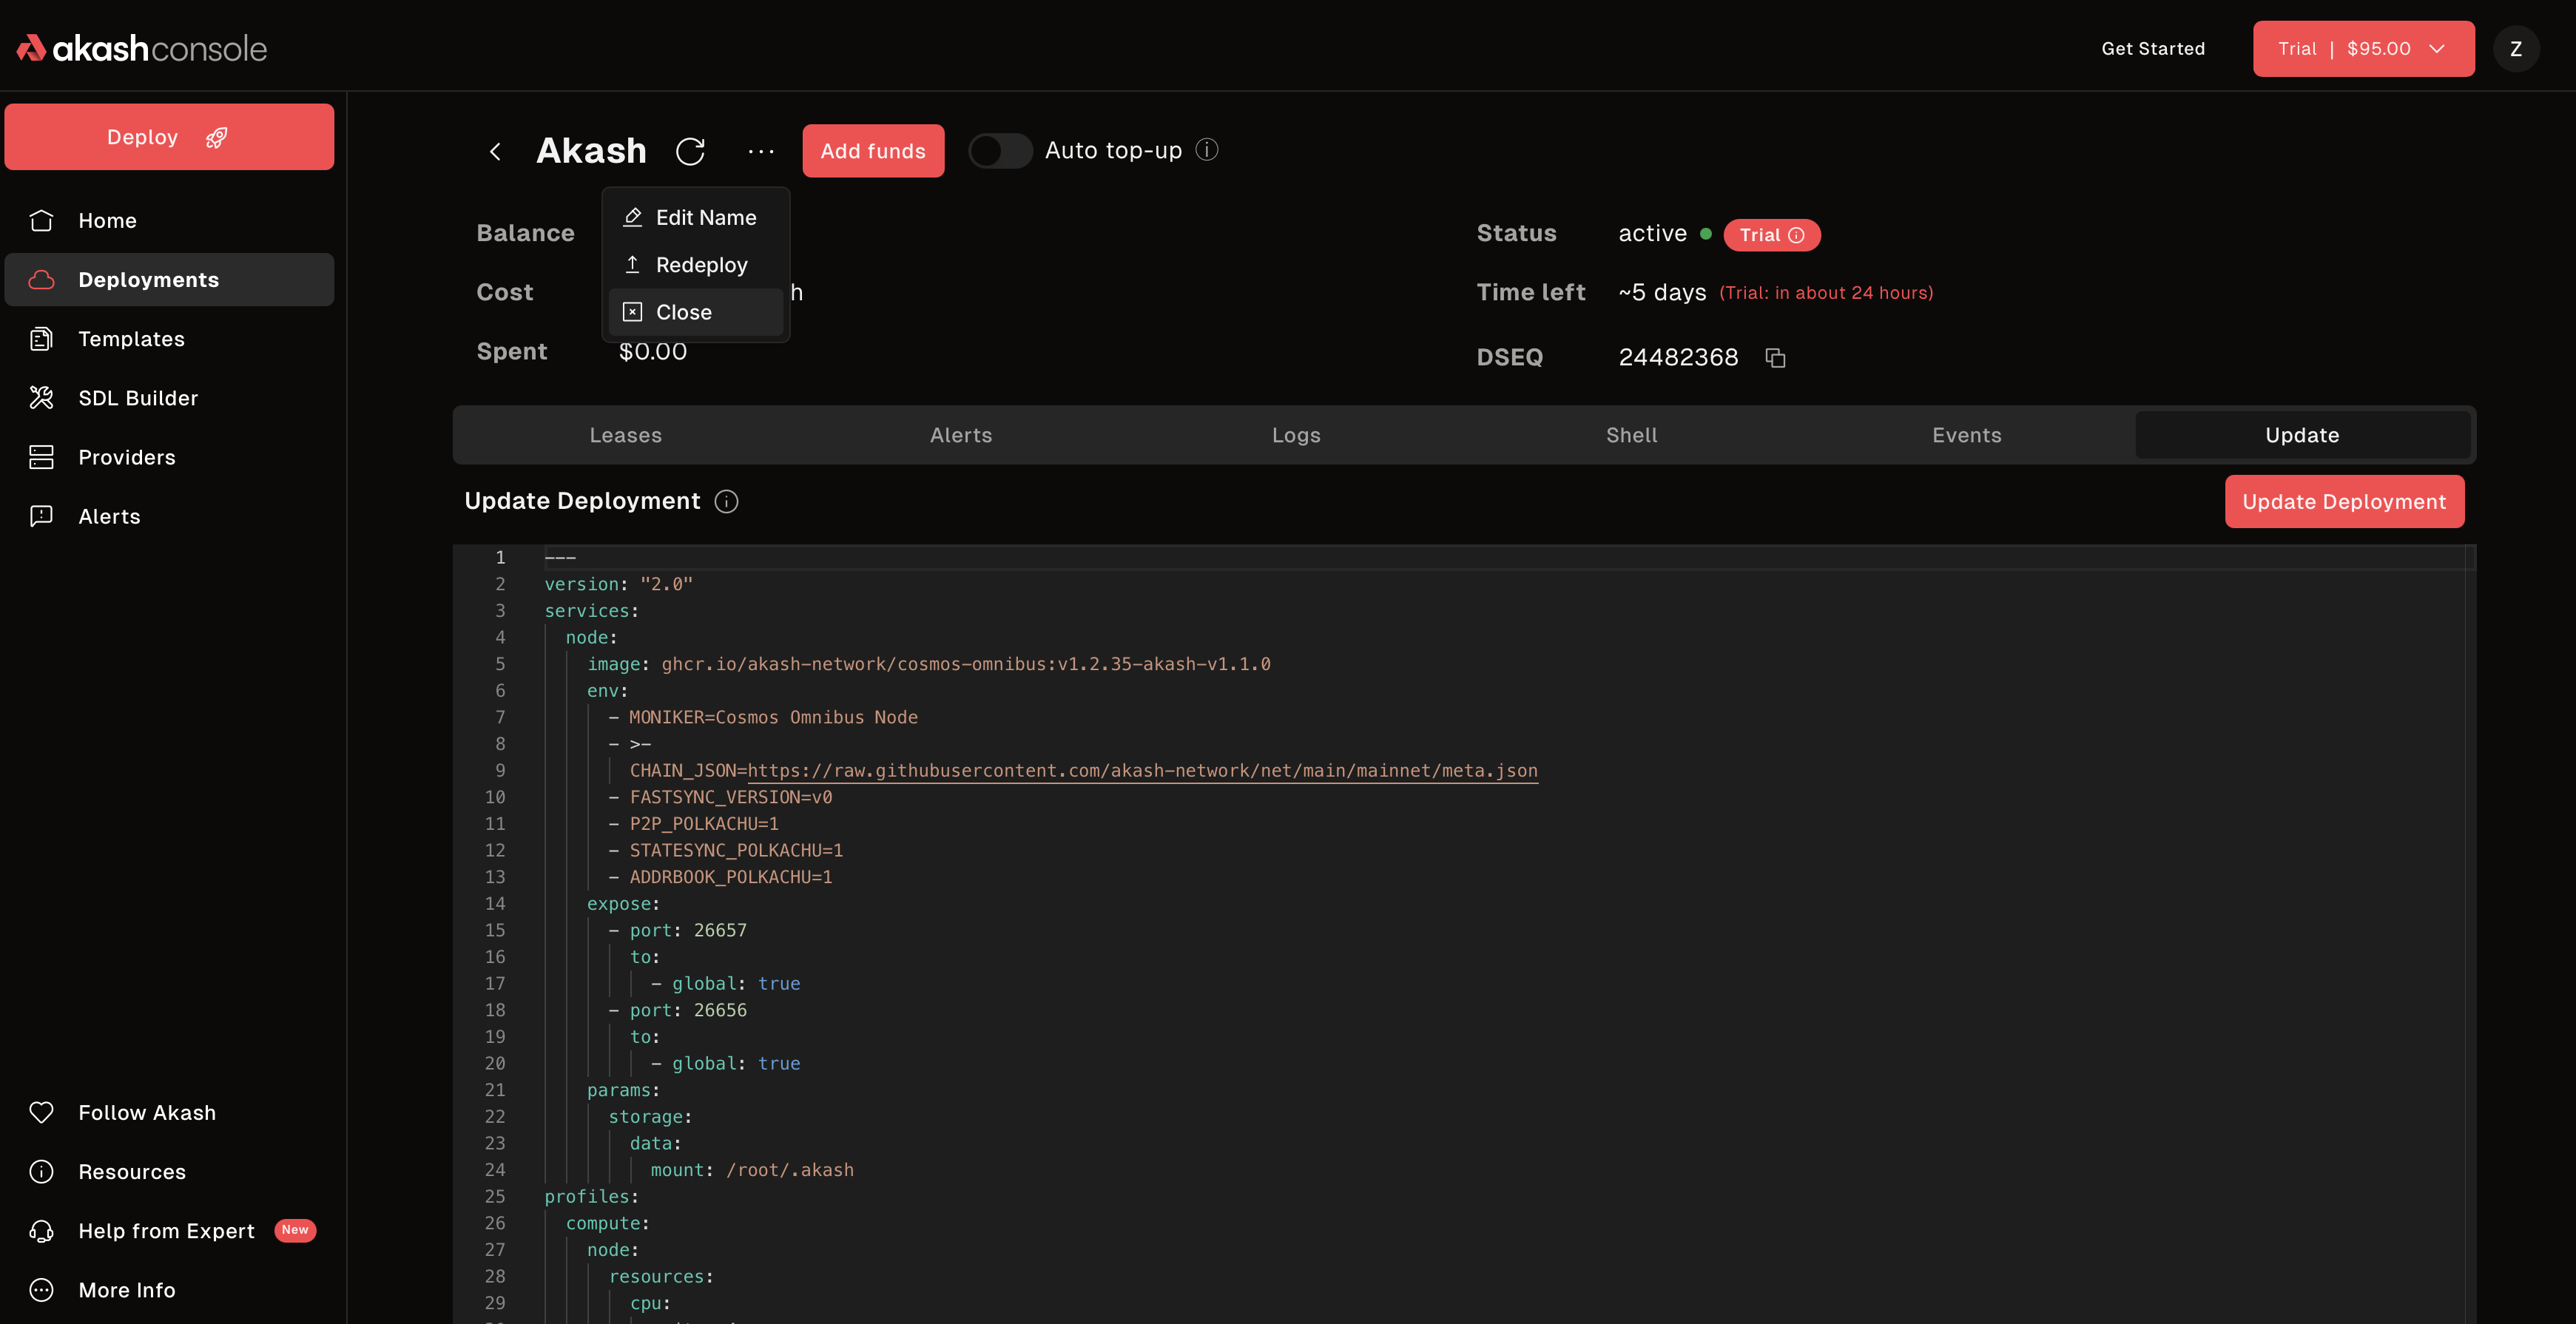
- Click on your deployment
- Click “Update Deployment”
- Edit the SDL configuration
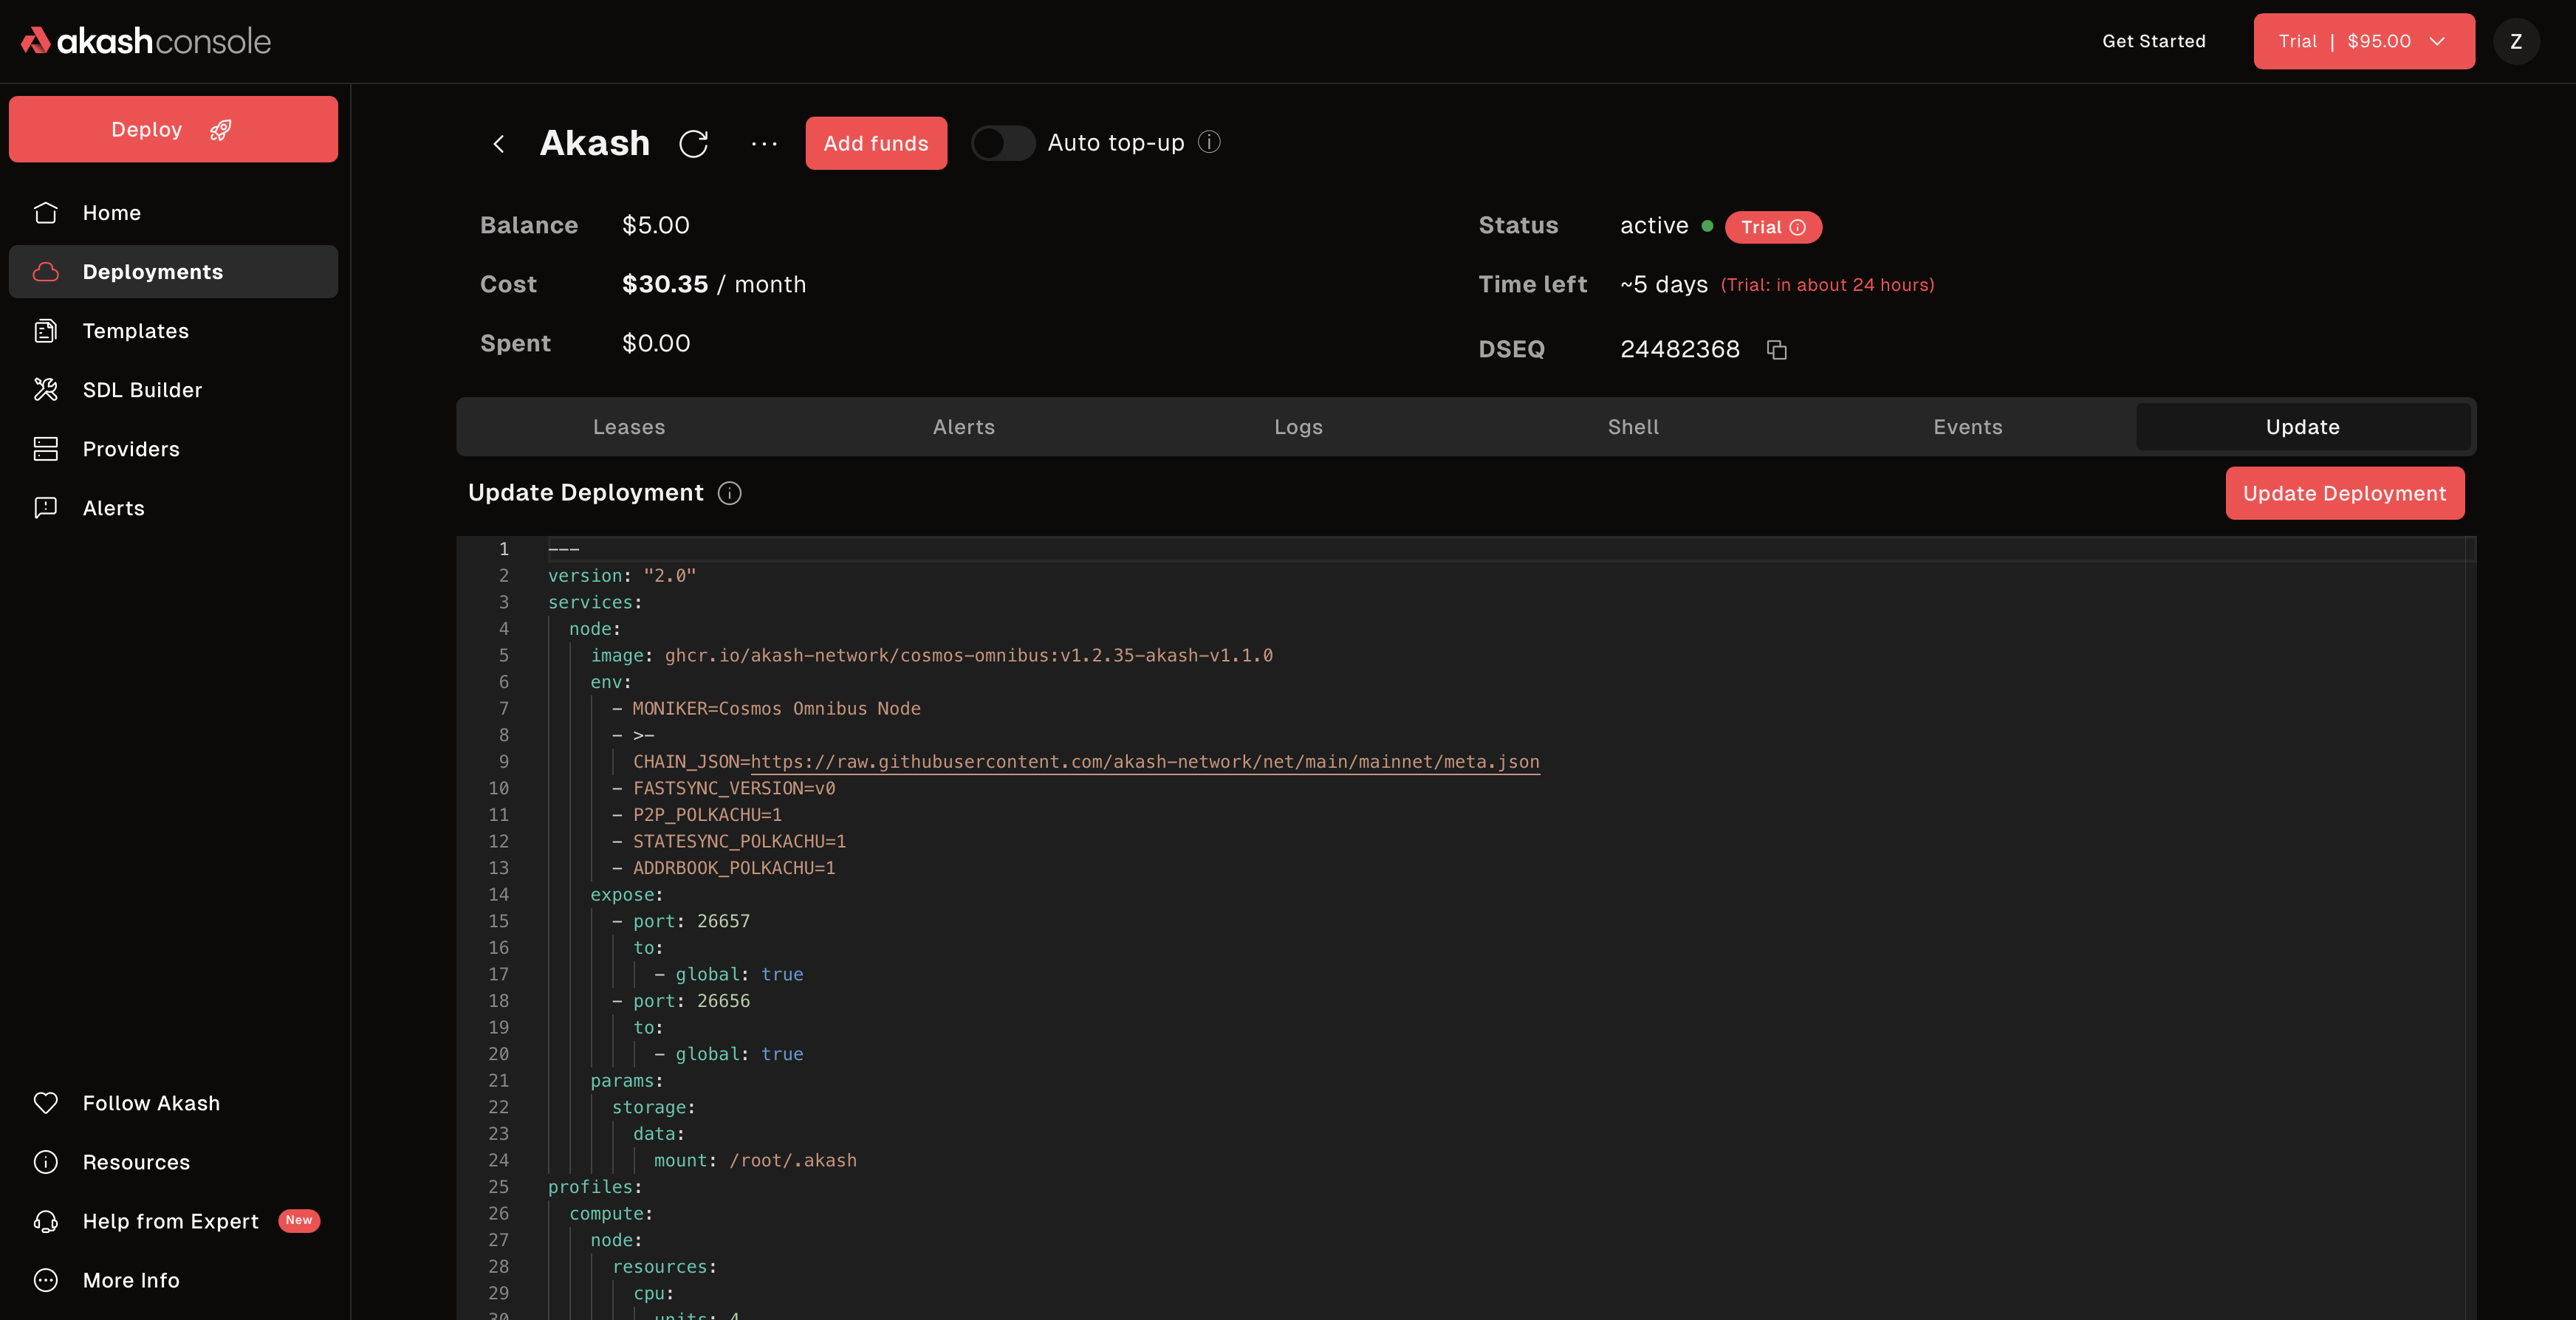 Update your deployment configuration on the fly
- Click “Update”
- Approve the update transaction in your wallet
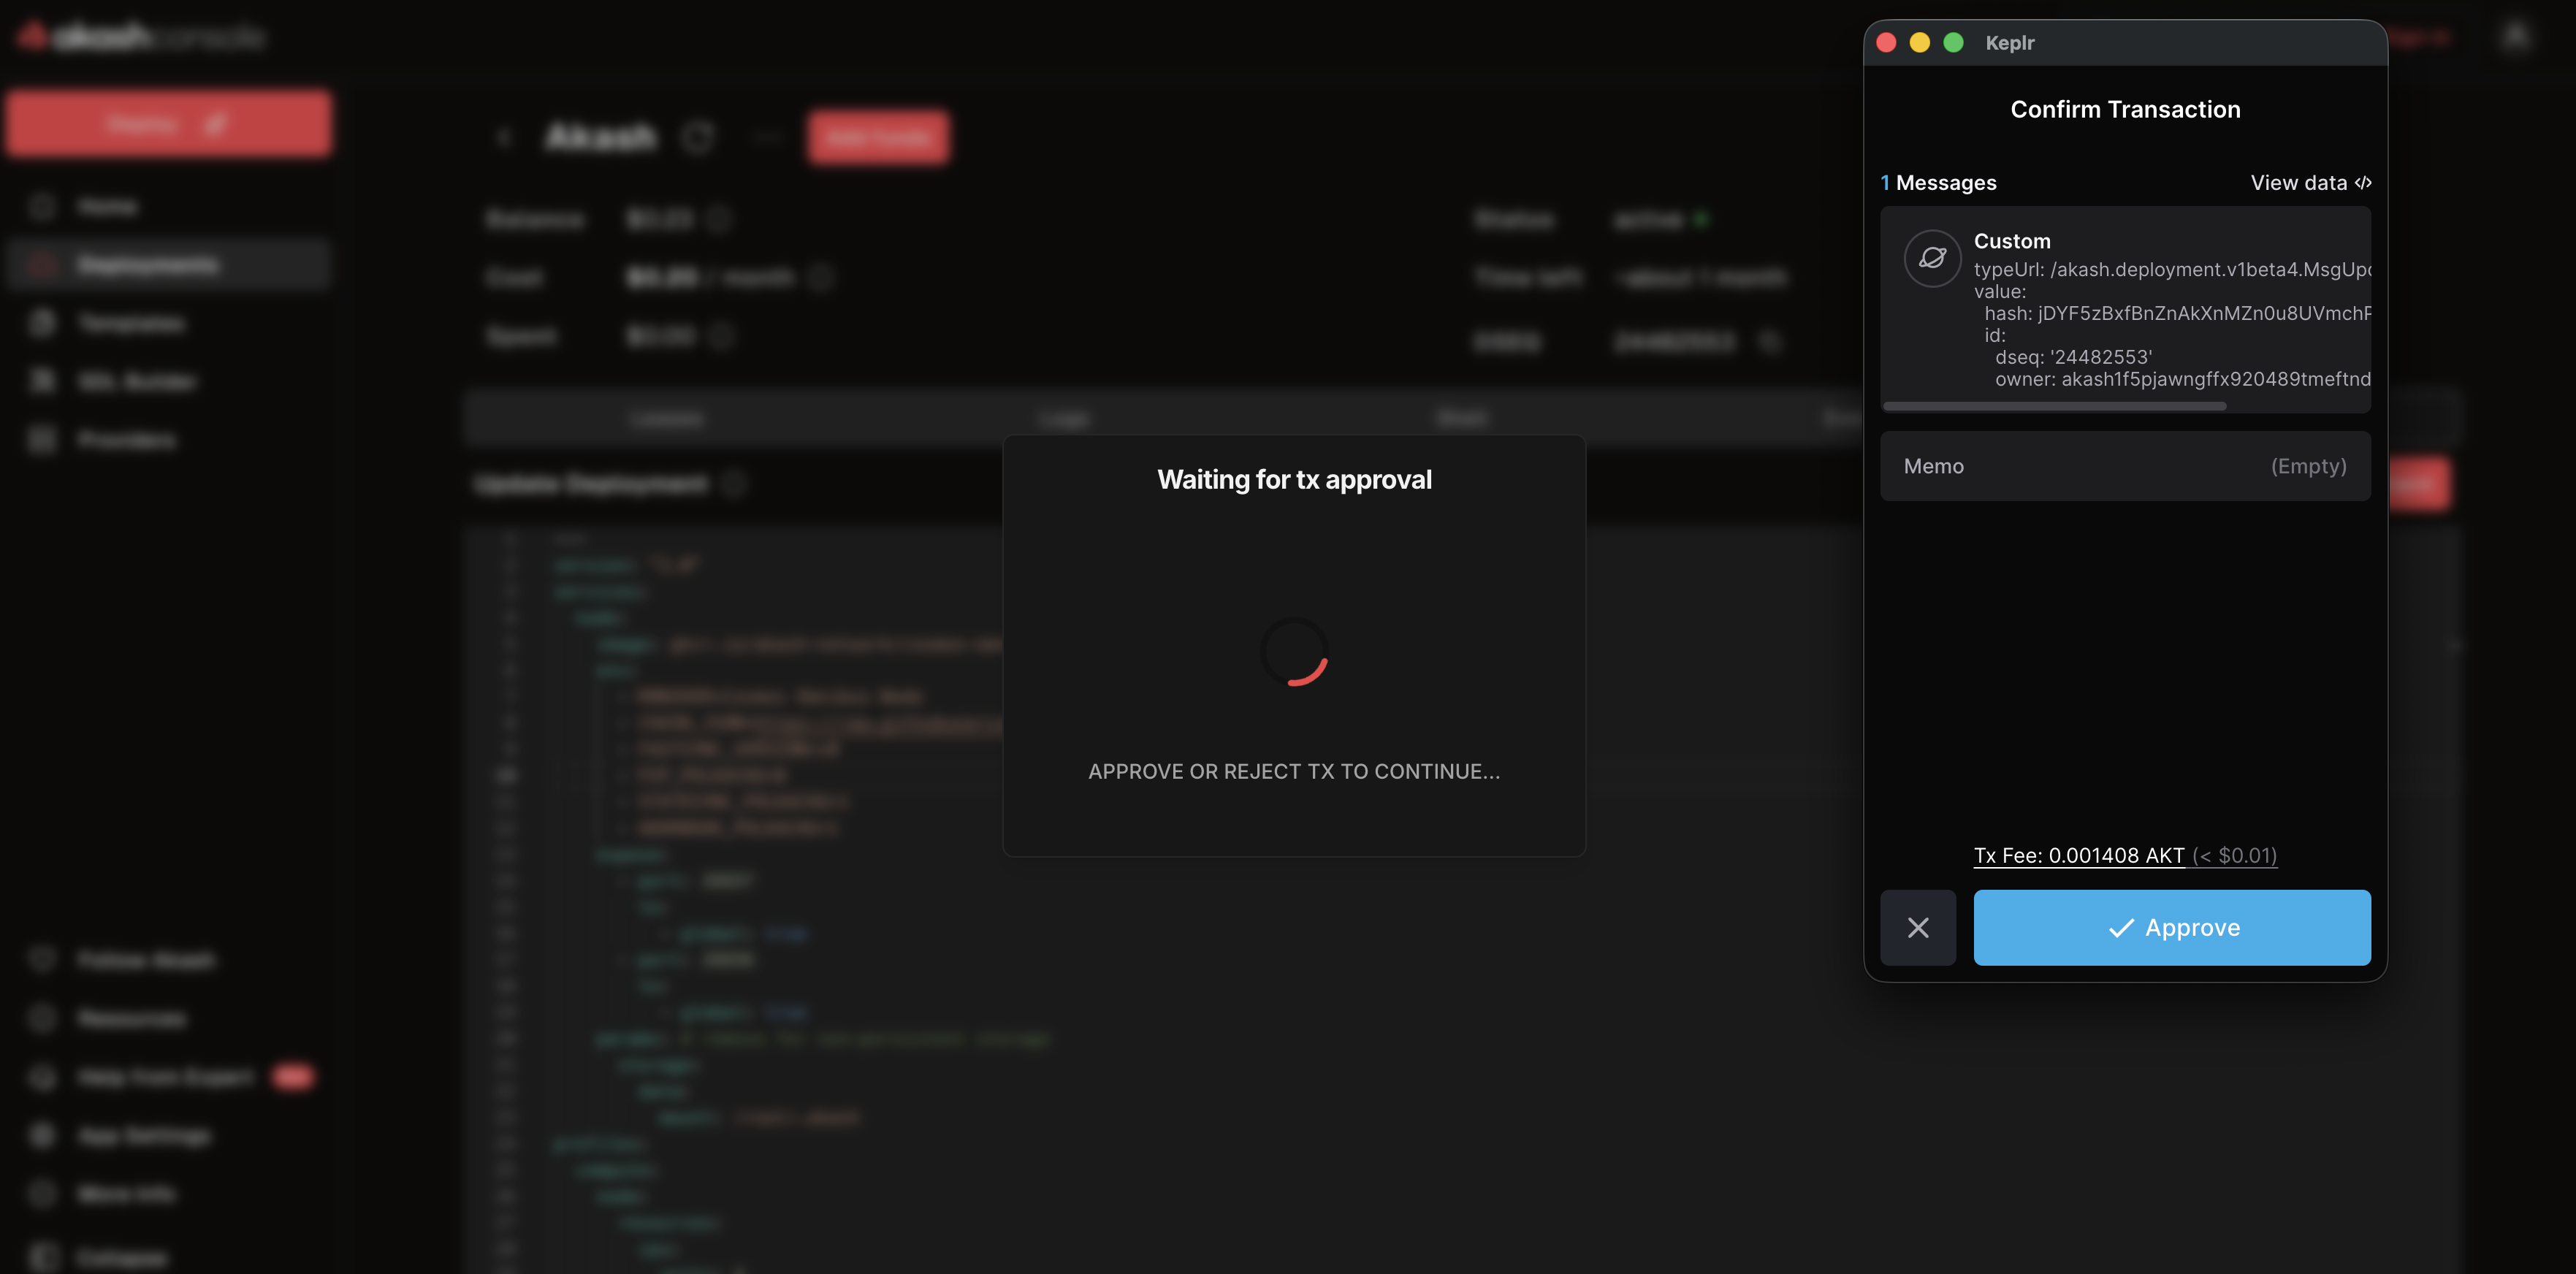 Approve the deployment update transaction in your wallet
Note: Existing containers continue running until the new version is ready.
Close Deployment
Stop your deployment and reclaim your deposit:
- Go to your deployment
- Click “Close Deployment”
 Confirm deployment closure - your deposit will be refunded
- Approve the close transaction in your wallet
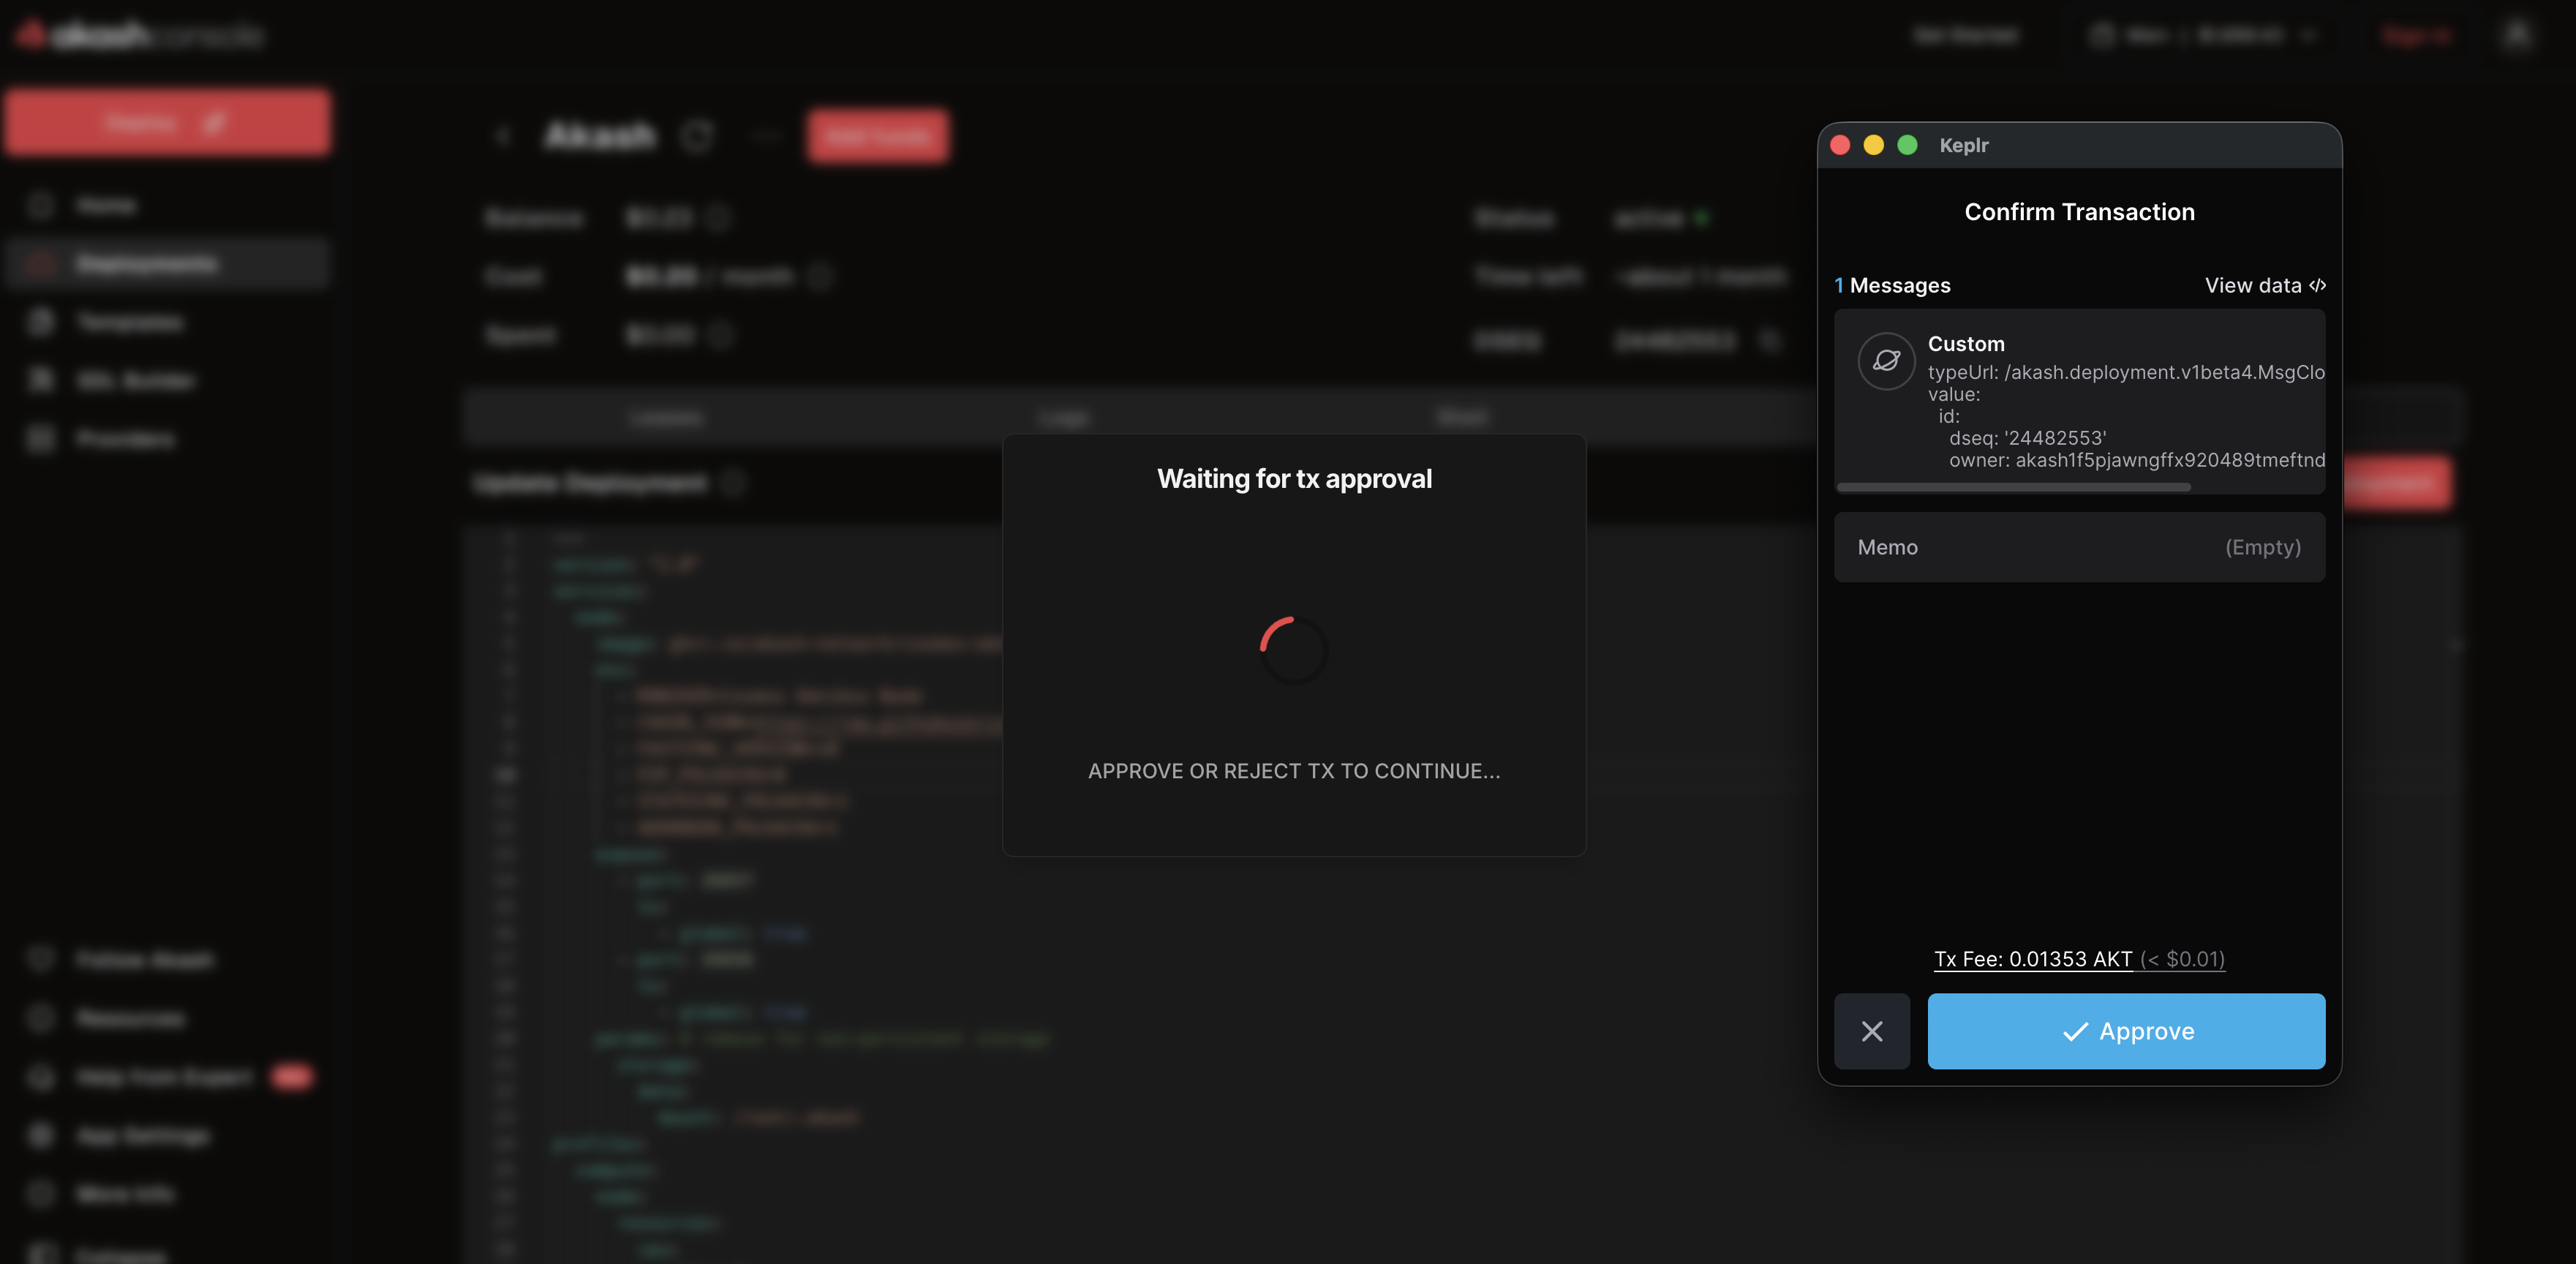 Approve the deployment close transaction in your wallet
- Your deposit will be refunded to your wallet!
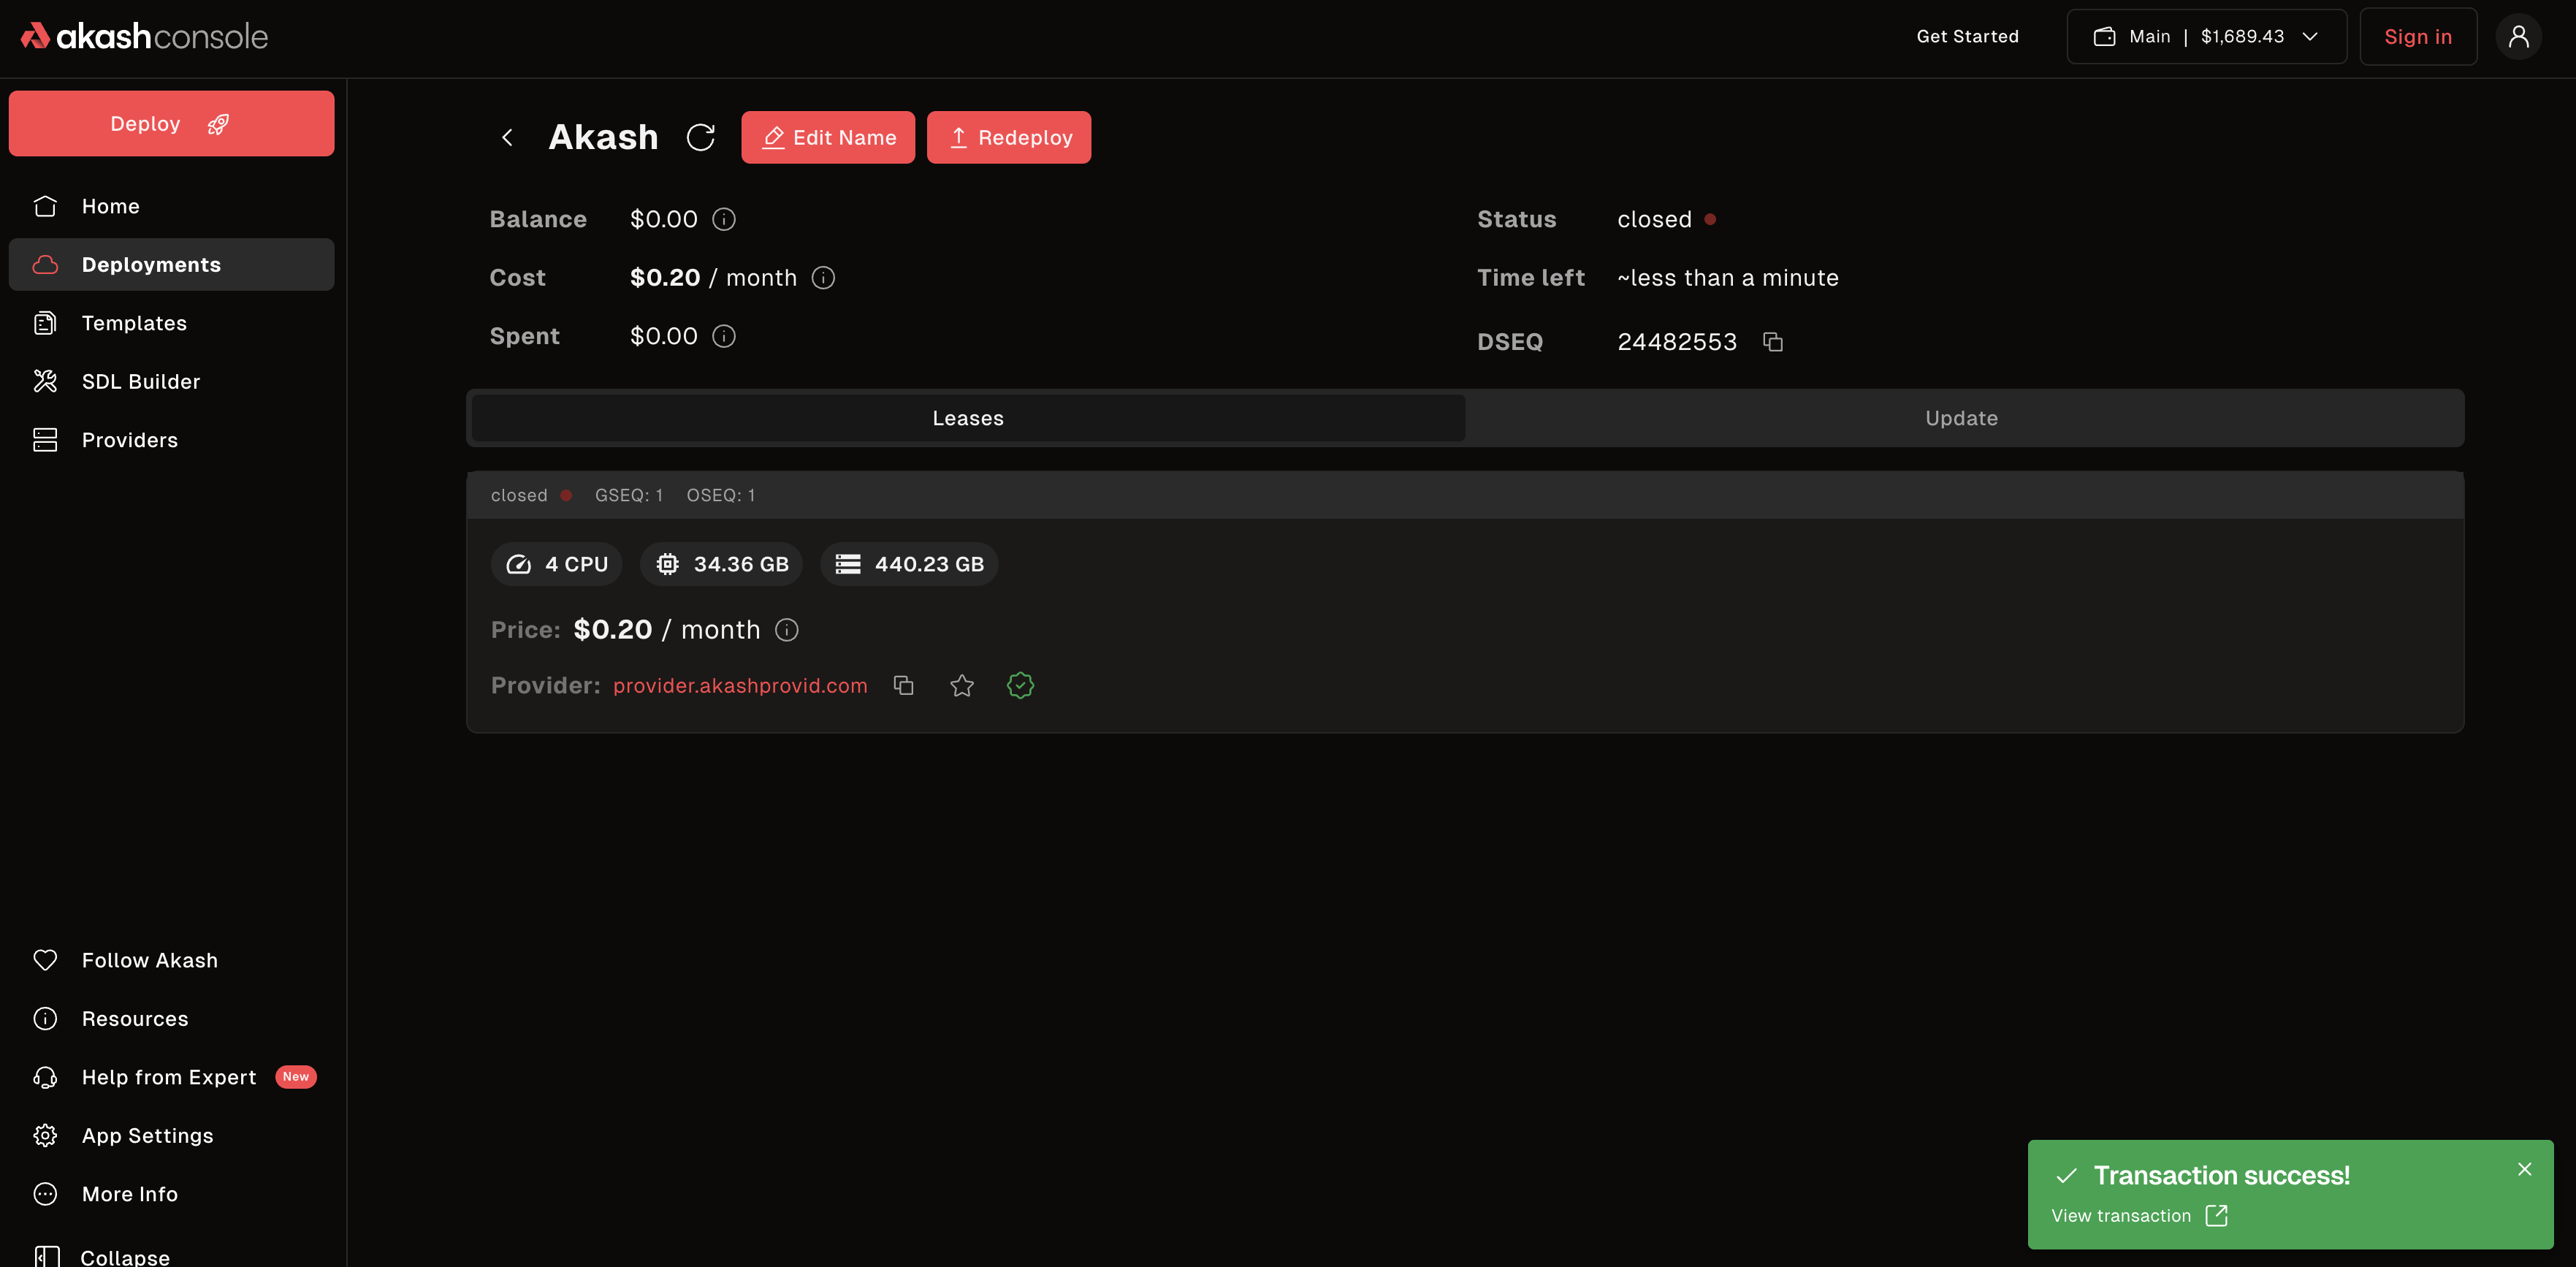 Deployment successfully closed - deposit refunded to your wallet
** Always close deployments to get your deposit back.**
Understanding Costs
What You Pay
-
Deposit (Escrow)
- Held while deployment runs
- Fully refunded when you close
- Typical: deposit in ACT (e.g. ~5 ACT); gas in AKT
-
Provider Fees
- Paid per block from your deposit
- Varies by resources (CPU, RAM, storage, GPU)
- Typical: Often less than $5/month for basic web apps
-
Gas Fees
- Blockchain transaction fees
- Very small: ~0.02-0.1 AKT per transaction
- Paid when creating/updating/closing deployments
Cost Example
Simple web app (0.5 CPU, 512MB RAM, 512MB storage):
- Deposit: in ACT (~$1-2 equivalent, refundable)
- Cost: Often less than $5/month (paid from ACT escrow)
- Gas: ~0.1 AKT total (network fees in AKT)
Your deposit (ACT) is held in escrow while hosting runs and is fully refundable when you close the deployment. Use ACT only unless the circuit breaker is in effect.
Wallet vs Trial Comparison
| Feature | Console with Wallet | Trial (Managed Wallet) |
|---|---|---|
| Setup | Need wallet + ACT (and AKT for gas) | Just email + credit card |
| Deployment Limit | None (run forever) | 24 hours max |
| Cost | Pay with ACT (mint from AKT or buy) | Pay with credit card (funds ACT) |
| Deposit | ACT (refundable) | Included in credits (ACT) |
| Control | Full blockchain access | Managed by Console |
| Best For | Crypto users | Beginners |
Common Questions
”How much do I need?”
Answer: Fund your deployment with ACT (deposit is in ACT, refundable). Keep some AKT for gas fees. You can get ACT by burning AKT or via credit card in Console.
”Can I use trial AND wallet?”
Answer:
- Trial - $100 free credits for 30 days, 24-hour deployment limit
- Credit Card - Once you add a credit card, you keep your trial credits but can’t go back to trial-only mode
- Your Wallet - Use your own Keplr/Leap wallet for production deployments with no limits
”What if I run out of ACT in escrow?”
Answer: Your deployment will close automatically. Monitor your escrow balance and add more ACT if needed (click “Add Funds” on your deployment). When the circuit breaker is in effect, you can top up with AKT to keep deployments running; otherwise use ACT only.
”My wallet isn’t connecting”
Solution:
- Make sure Keplr/Leap extension is installed
- Try refreshing the page
- Check you’re on the Akash network in your wallet
- Disable other wallet extensions temporarily
”No bids received”
Solution:
- Your pricing might be too low
- Increase the price in your SDL
- Wait 2-3 minutes (sometimes takes time)
- Try deploying during off-peak hours
- Last resort: Join Discord and ask a vanguard to review your SDL in #deployments channel
”Deployment closed unexpectedly”
Possible causes:
- Ran out of ACT (or AKT when CB) in escrow
- Provider went offline
- Deployment configuration error
Check: Logs and Events tabs for error messages
Tips for Success
- Start with templates - Use Hello World for your first deployment
- Monitor your escrow - Keep an eye on your ACT deposit balance
- Check provider stats - Choose providers with high uptime
- Use logs - Logs are your best debugging tool
- Save your SDLs - Keep copies of working configurations
- Test pricing - Try different price points to get bids from more providers
What’s Next?
Deploy Real Applications
- SDL Examples Library - 290+ deployment examples
- Web Applications - Nginx, WordPress, Ghost
- Databases - PostgreSQL, MongoDB, Redis
- AI/ML - Ollama, Stable Diffusion, ComfyUI
- GPU Workloads - LLMs, image generation, ML training
Learn More
- SDL Reference - Master deployment configurations
- Core Concepts - Understand how Akash works
Advanced Workflows
- Console API - Programmatic deployments via REST API
- Akash CLI - Command-line automation
- Akash SDK - Native blockchain integration
Need Help?
- Discord: discord.akash.network - #general or #developers
- Support: GitHub Support - Official support
Ready to deploy? Visit Console →